


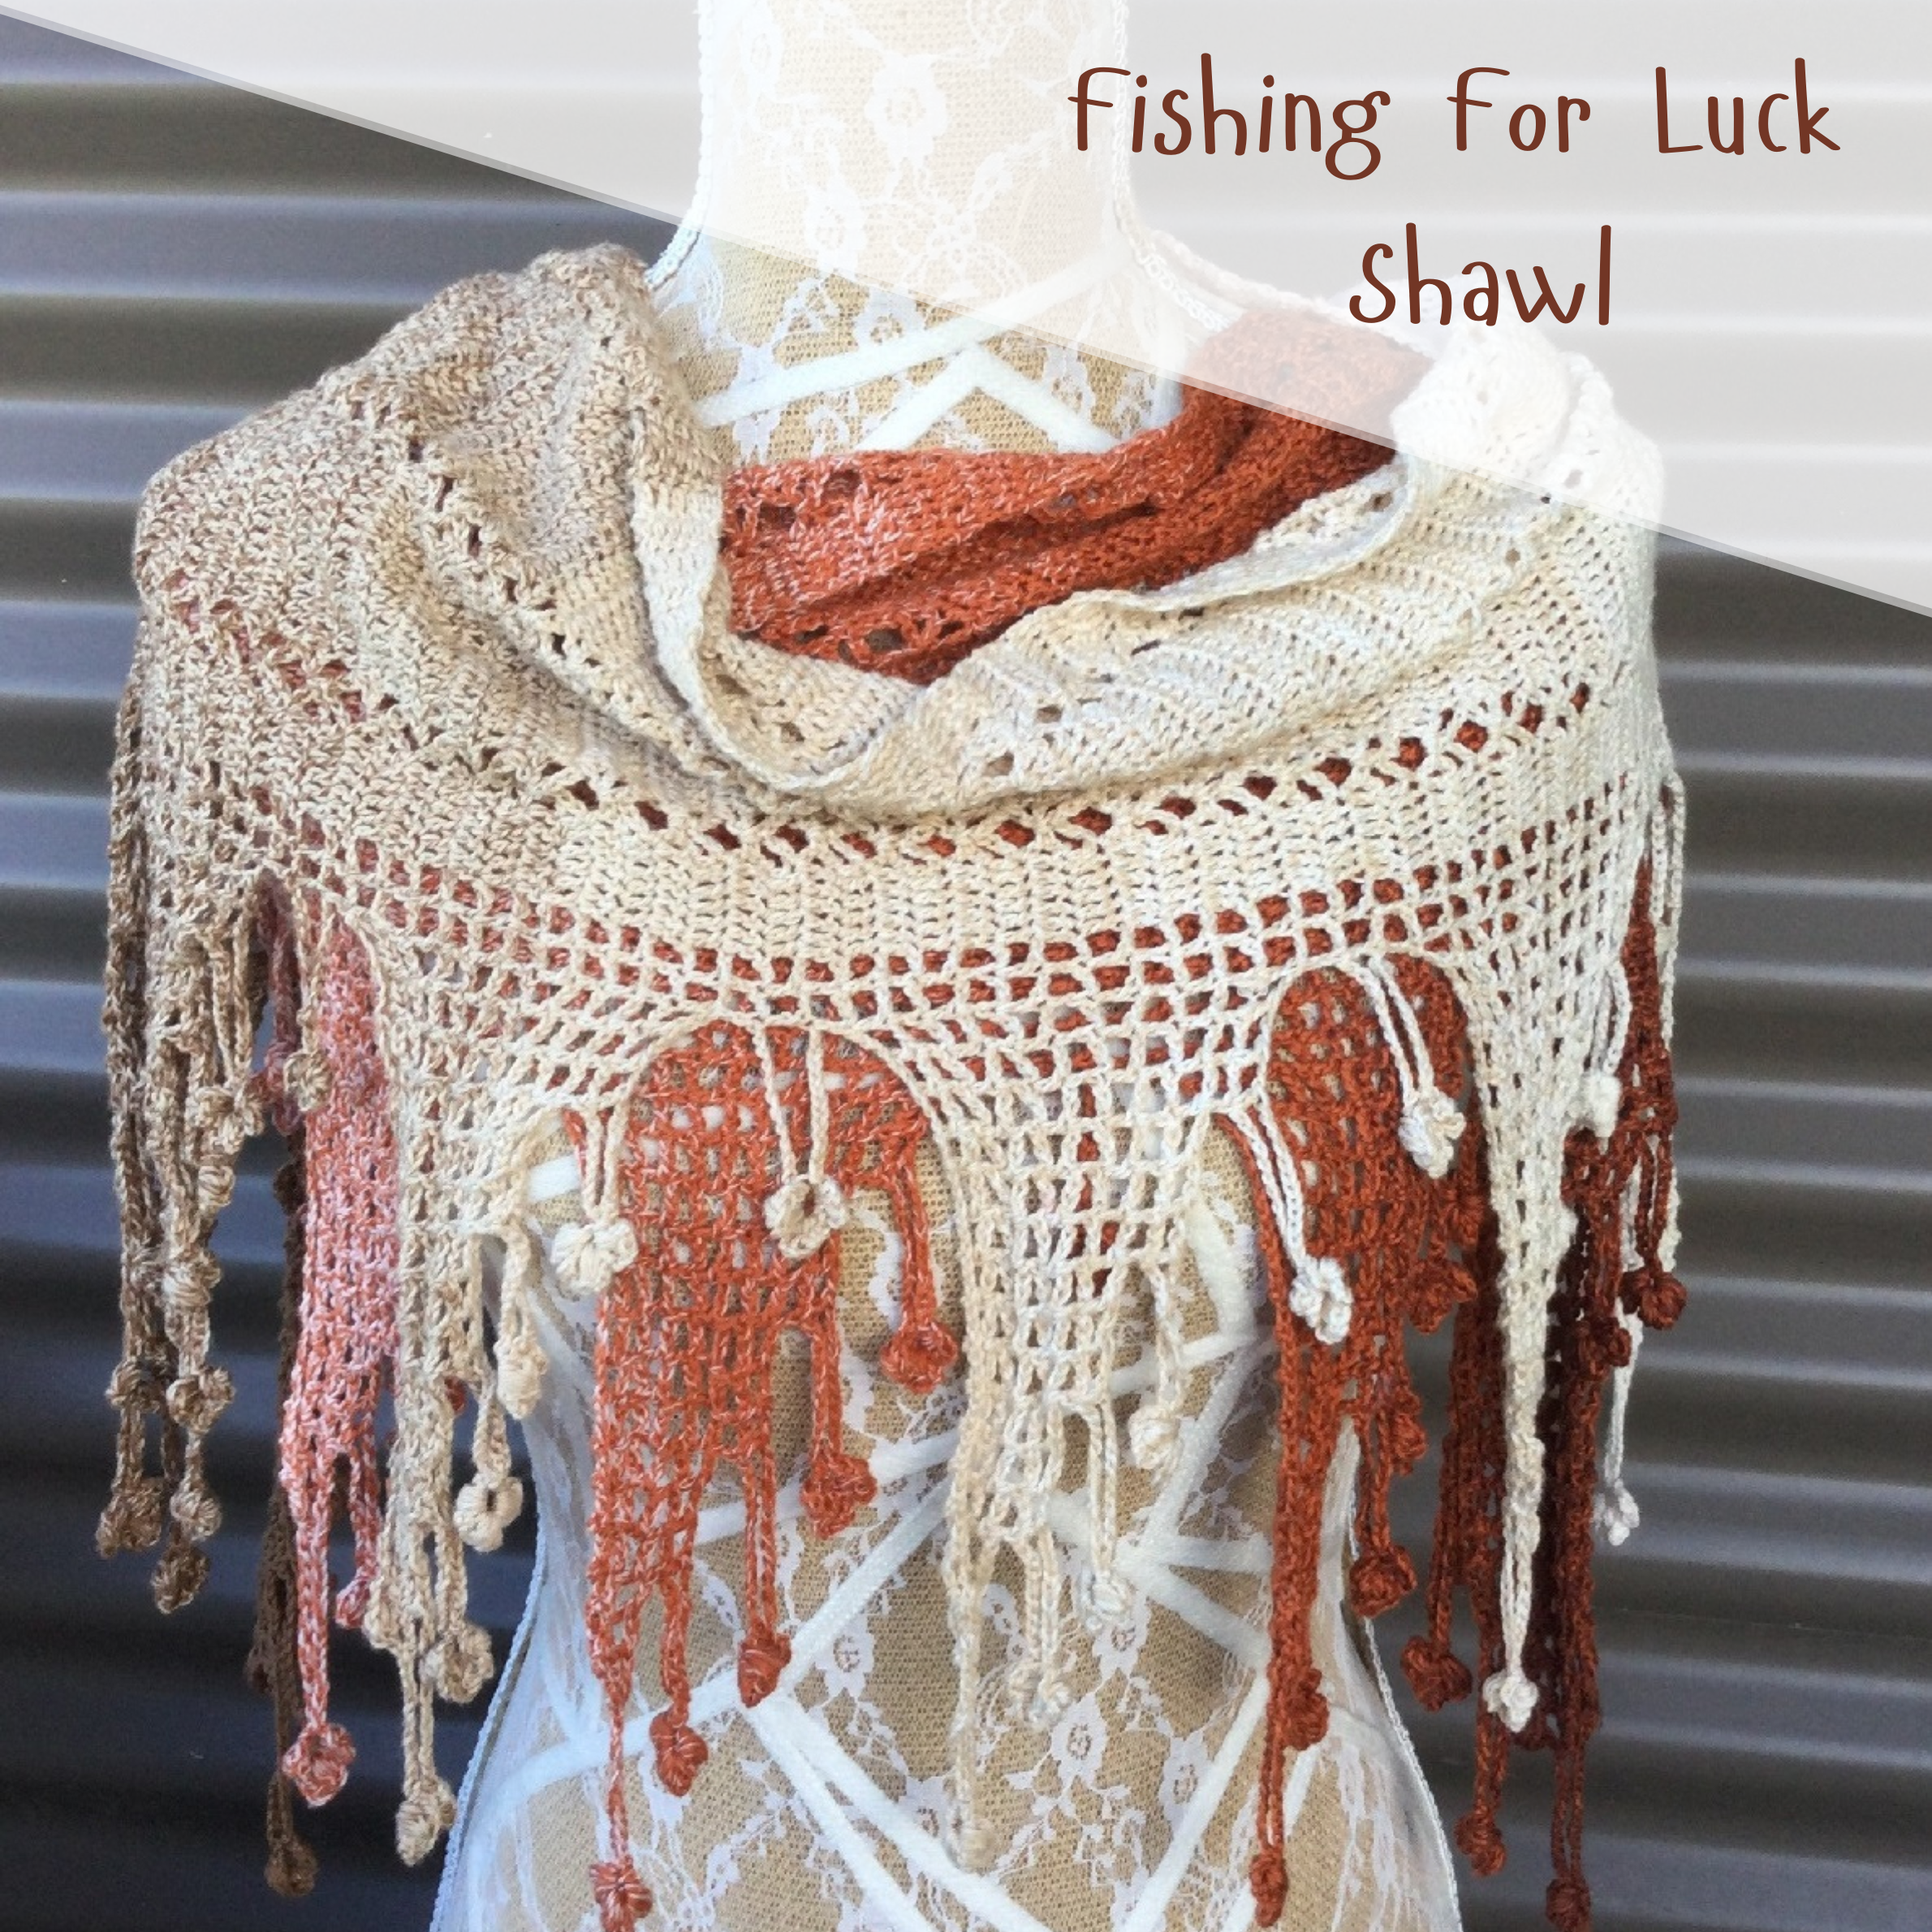

How To Make Your Own Clay Handles, At The Bottom of Page.
When life gives you lemons make lemonade! So the saying goes!Over the past 10 odd years, I have made that much lemonade that I could open a lemonade franchise, to rival any of the big companies! This week alone would be a great script for a TV Soapie, with all that has been thrown my way (I wonder who would be cast to play me?). I got so sick of making lemonade, that I dug out my crochet hook and became a hooker instead. Or rather, I now sip my lemonade, whilst tuning out to the world around, fully immersed in my crochet.And a
As far as this year is concerned, all I know is that I will be rather glad when October is gone and hopeful that November brings good luck with it.
From talking to people it would seem that many crochet to relieve the stress, from their day to day lives and all the things that keep piling up on us.
There's Martha, who has whipped up ten scarves, six pair of gloves and 40 hats in the last month. She did not strangle one person during this month! Thank goodness for the crochet! And Sally is doing well! She has made 5 blankets in the past two weeks! She may be buried neck deep in blankets but she hasn't driven off the edge of a cliff yet. Well done!
Crochet is a type of therapy! It may cost pretty much the same as if you had to pay someone to analyse you, but you do end up with a ton of wearables and gifts for those around you.
So yep! I crochet so I don't punch people! And if you want me to punch you, just try and take my crochet away! Maybe the prisons should be implementing a compulsory crochet program!
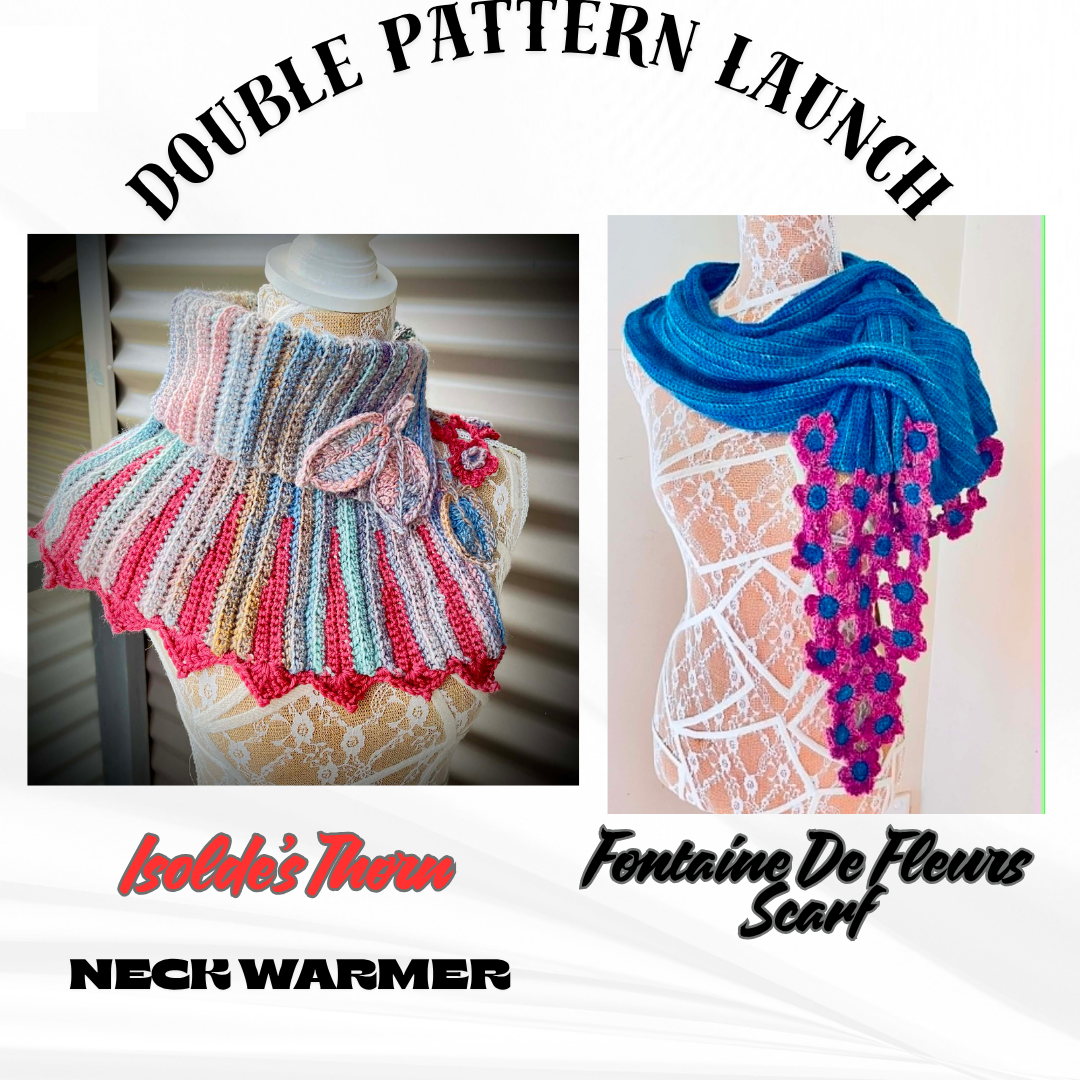
Lemonade anyone!-----------------------------------------------------------------------------------------------------------------------------
I just love my Clover Crochet Hooks! BUT, starting out on my crochet path, I ended up with a ton of cheap Aluminium Hooks.
I prefer a handle that is slightly wider, than what, these provide. With Polymer Clay and a few minutes of your time you can make those cheap hooks useful again. AND IT'S FUN!!
I have and always will be, one to improvise. I don't have a heap of clay sculpting tools. I use what I have. This includes Darning Needles to scratch in the size and another hook to make the little groove in the clay (you don't have to have a groove but I like one).

Material:
Polymer clay in various colors. I used Fimo but there are many different brands available.
Straight blade or sharp knife
Heavy rolling pin (and quite a bit of muscle)
Non stick Baking Paper
Crochet hooks to cover
Extra 1.5 to 2mm hook for making groove
Solid surface or chopping board
Darning Needle
Sculpey Bake & Bond Glue
Baking Tray
Directions:
Choose the colours you wish to work with and break or cut off approx half a block of each. (if using Fimo).
On your solid surface, spread a layer of baking paper.
Roll your blocks out, so as to make them more workable. Then mix the two together to combine the colours.
Roll the combined clay out flat and about 5mm thickness. With a knife cut a piece that will be wide enough to wrap around the hook and long enough to cover the hook, where you want the handle to be.
Add a small amount of Glue to the hook, where the clay will be.
Position the hook on the clay and gently wrap the clay around it.
With your fingers, work at the spot where the clay meets, till the join does not show any longer. Then gently roll the clay (with the hook inside) to make sure you have a smooth, uniform handle.
If necessary, trim the top edge and also cut the edge where the hook protrudes so it is even and at the right position for you.
Using your 1.5/2mm hook, gently press the side or handle of this into the spot you want a groove (I put two grooves in mine, see the picture in the heading). While holding your 1.5/2mm in position, roll your clay covered hook back and forth to get the groove around the hook.
At the top of the hook handle, use your darning needle to scratch the size into the hook (this is very necessary to know what size your hook is later).
Place the clay covered crochet hook onto a baking paper, covered oven tray. Cook in the oven at 275 degrees F for 15 minutes. Add extra time if your clay is thicker.
Take out of oven, allow to cool.
Once you have the hang of making your own, you can get adventurous. Make shaped handles and add moulded little characters to the top! The sky's the limit!