Just doesn't pay to turn your back on your crochet! I put my Scarf/Wrap down for just a minute and when I turned back Moths had attacked it. The little blighters were all over it. They had devoured huge chunks of it and were hanging from the edges!
If you feel the need to own your very own moth-eaten Scarf/Wrap then follow these links to the pattern. Ravelry (click here),Etsy (click here) and Lovecrafts (click here).
This Scarf/Wrap is made from Scheepjes Whirl in Caramel Core Blimey. It works up into a very wearable, light-weight accessory to your wardrobe.
The pattern is in written format, with photographs and a graph to help along the way. It comes in UK written terms and US written terms.
Materials:
3.5mm Hook
1x Scheepjes Whirl Caramel Core Blimey 215-225 Grams = 1000m/1093yd per ball. Approx 150m/164yd of one whirl left over.
The pattern has been tested by my dedicated team of pattern testers and some of their incredible work is below.
Test Scarf/Wrap by Stephanie Fitzgerald Hall. Made using Premier yarn in the colour Tulip. I have to say I think Stephanie only has herself to blame for Moths eating this. Keeping it in a tree has to have something to do with it!!!
Test Wrap/Scarf by Danielle Hanken Tetreault. Made using Birdies Knits hand dyed cotton in fingering weight. Colour Water Lily and Lemon Drop (see yarn substitutes for a link to this).
Test Scarf/Wrap by MJ Rose. Made using Yarn Bee Rainbow Wrapsody in Teal of Fortune.
Test Scarf/Wrap by Jane Wynne. Made using Bendigo Woollen Mills 4ply in Glacier
Now to the boring stuff!
You are welcome to sell items made from this pattern, but please credit me as the designer and add a link to purchase my pattern in your sale.You cannot manufacture and mass produce my designs for sale.
Many hours of work has gone into the designing and producing of this pattern.
You are purchasing/downloading this pattern for personal use only. Please note my patterns and my images are copyright protected, please do not use my images to sell your items. No pattern or photograph may be reproduced or distributed — mechanically, electronically, or by any other means, including photocopying, without written permission of Auburncraft Design. Please do not copy, rewrite, or redistribute this pattern as your own or otherwise. Just because you can copy does not mean you should. Please do not resell my patterns. This post may contain affiliate links.
If you have not noticed or maybe it is your first time visiting my blog, I kind of love dragonflies! I also love flowers!
Dragonflies have a habit of appearing in my work as I keep thinking up new ways to incorporate them into my designs.
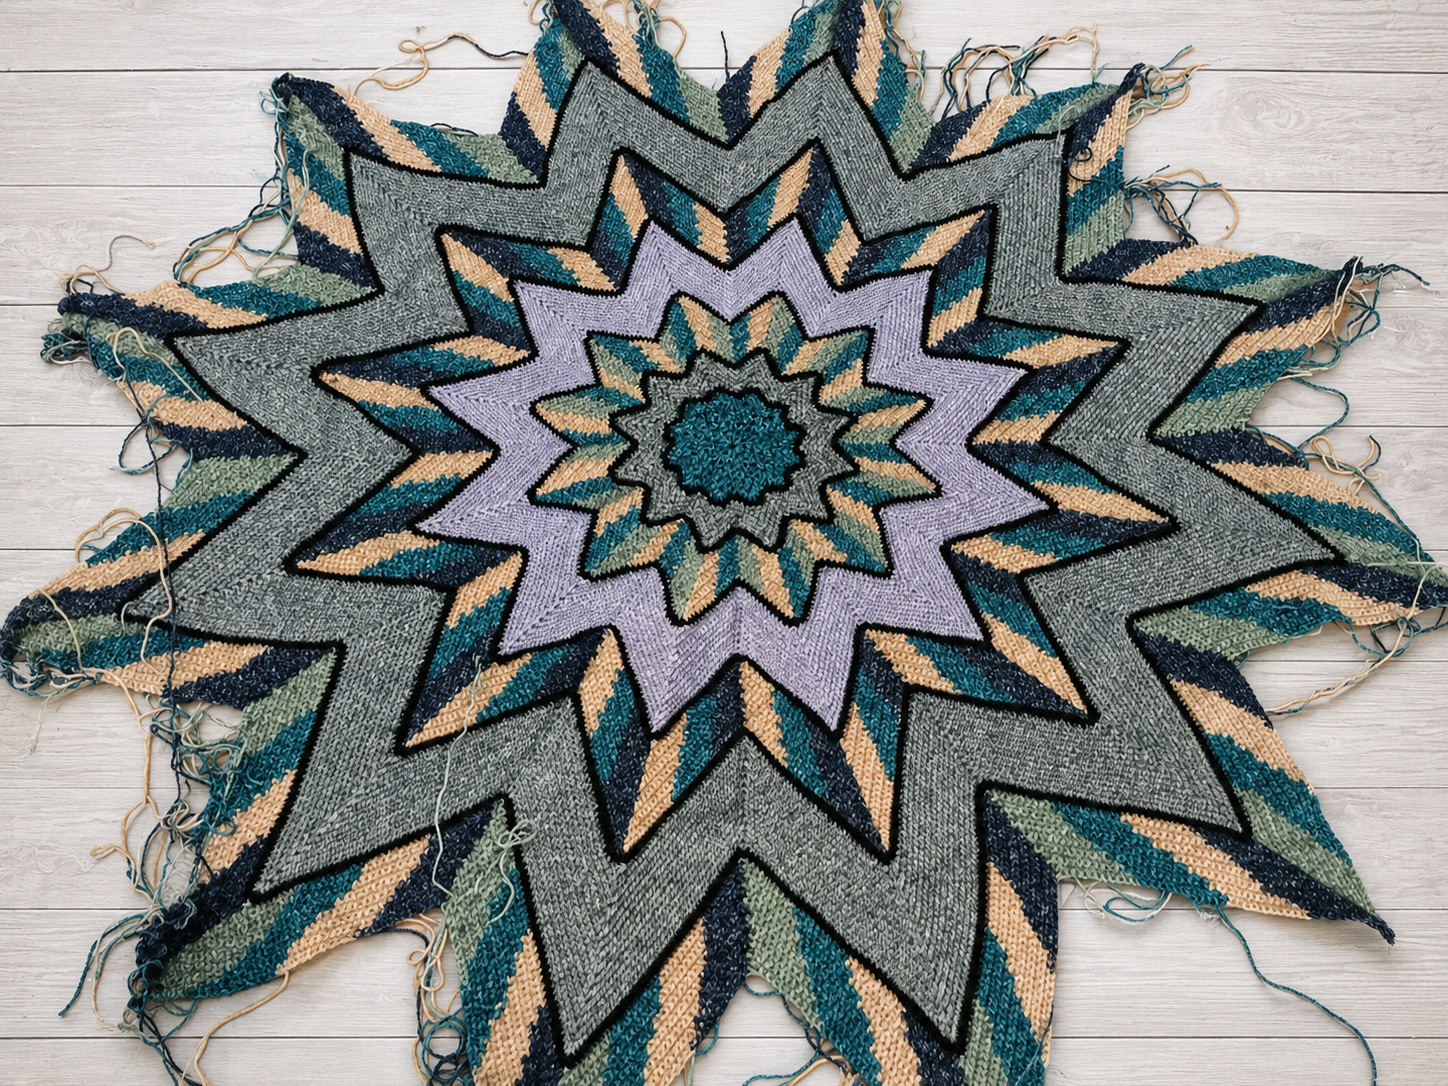
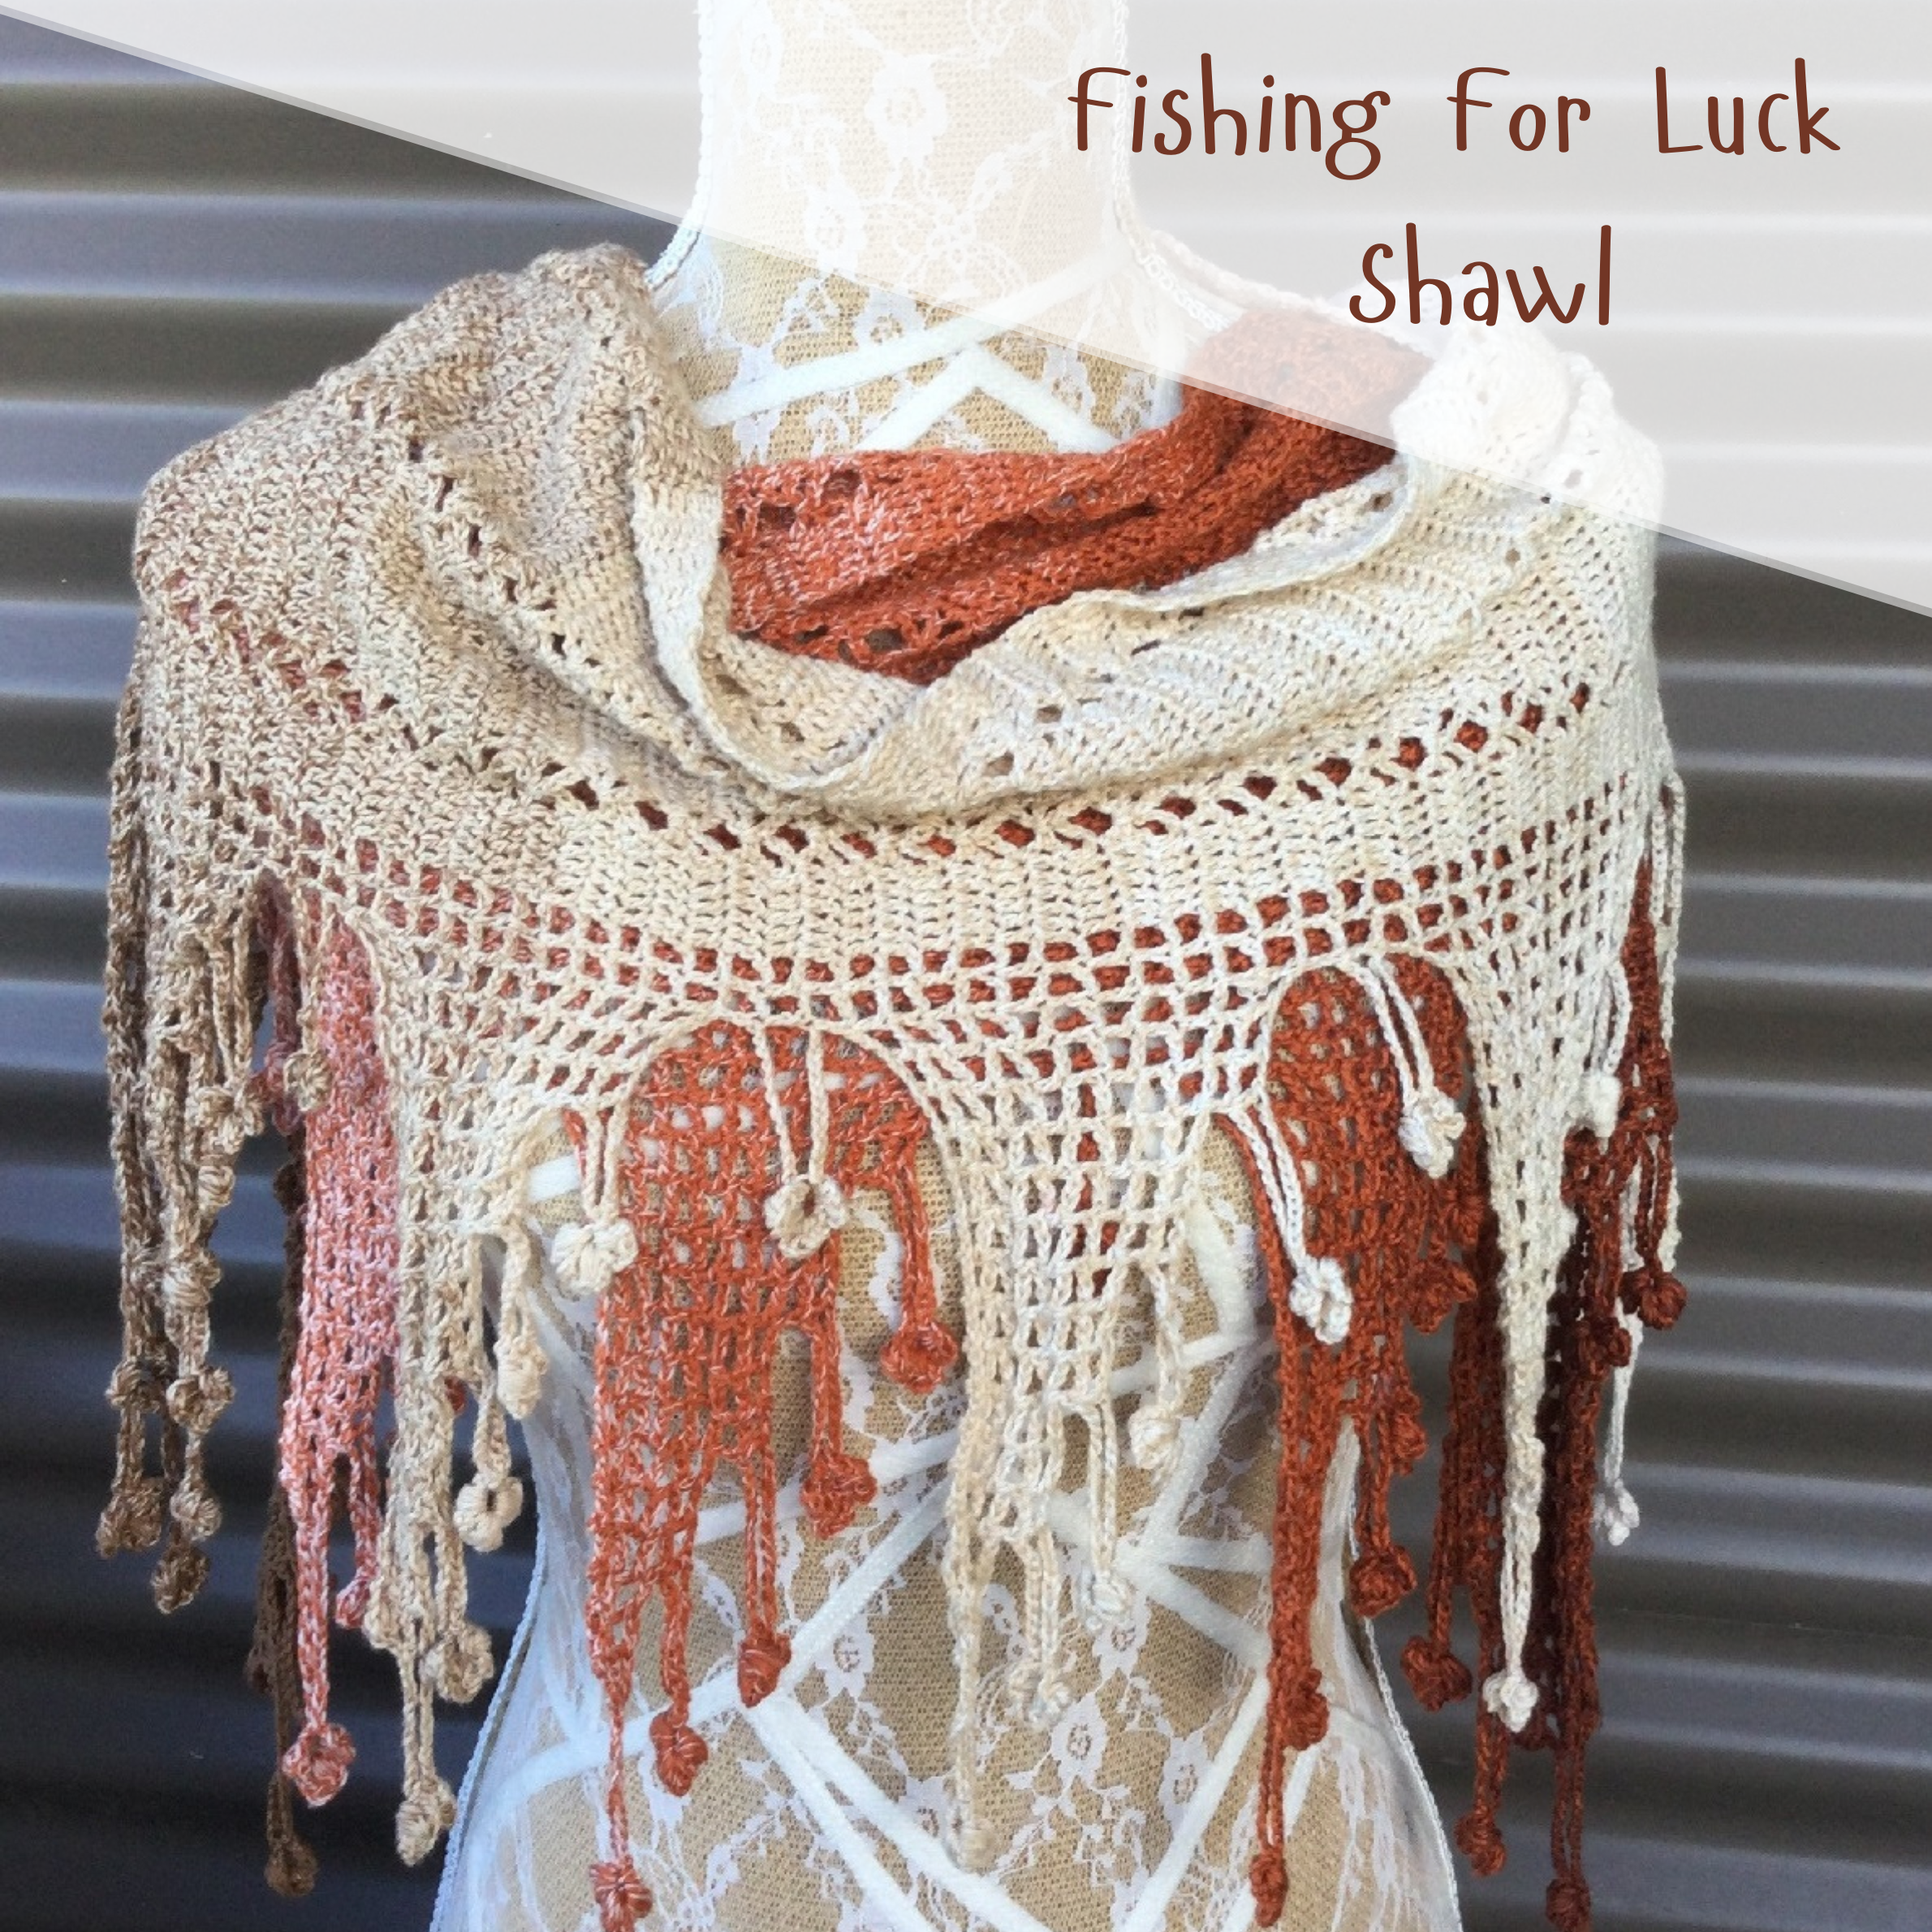
The Filet Crochet Technique is used for this project and the stitches are basic. A need for concentrating is there due to the width of the shawl. You have over 300 stitches per row.
I worked from the inside of the first ball till completion and then from the outside of the second ball to keep the colours flowing. Once the main body of the shawl was completed, I then worked from the inside of the remaining ball to make the border along the bottom edge. This kept the colours all flowing nicely.
This versatile shawl can be worn many ways.
The testing process is so important to my designs and my hard working testers deserve credit for their efforts. You will always find a page on in my patterns dedicated to showing off their efforts. Some people find having extra pages to a pattern annoying, but to me these people deserve to be credited and so I do. You can choose to omit printing this page if you like. Below is some of their incredible work.
Test Shawl by Angee Hudson. Made using Cotton Kings Twirls Deluxe in Edcora Red.
Test Shawl by Michelle Ross. Made using Nako Angora Luks col 1915.
Test Shawl by Amy Elizabeth Peterson. Made using Redheart Its a Wrap in Rainbow.
Test Shawl by Asra Konzak. Made using Cotton Kings Twirl in Rainbow.
Test Shawl by Jamie Johnson. Made using Cotton Kings Twirl in Yellow Citrine. Approx 1748yds used.
Test Shawl by Stephanie Joann Nolasco. Made using Caron Cakes.
Test Shawl by Michelle Westwood. Made using Lalables
Test Shawl by Cindy Cary. Made using Scheepjes Whirl in Peppermint Patty,
I had someone recently trying to pick my brains about the stitch composition of my Dragonflies as they are (according to the person) neater and more defined than other patterns they have seen. Of course I am not going to state outright how I achieve this as it is in the pattern, but I do have my very own way of combining stitches to achieve my particular Dragonfly.
It may seem mean not to just openly share my method, but this particular shawl has taken over 200 hours from idea, to drawing and then to construction and slowly working its way through the pattern testing process. Imagine asking a plumber, doctor, architect, cleaner or anyone else to share their work processes or work for free! Yeah I don't think this is gonna happen!
You are welcome to sell items made from this pattern, but please credit me as the designer and add a link to purchase my pattern in your sale.
Many hours of work has gone into the designing and producing of this pattern.
You are purchasing/downloading this pattern for personal use only. Please note my patterns and my images are copyright protected, please do not use my images to sell your items. No pattern or photograph may be reproduced or distributed — mechanically, electronically, or by any other means, including photocopying, without written permission of Auburncraft Design. Please do not copy, rewrite, or redistribute this pattern as your own or otherwise. Just because you can copy does not mean you should. Please do not resell my patterns. This post may contain affiliate links.
This Scarf started out life as a plain old rectangle. I drew up my design and it was too perfect. Too symmetrical! My mind kept looking at ways to make it a little more unique!
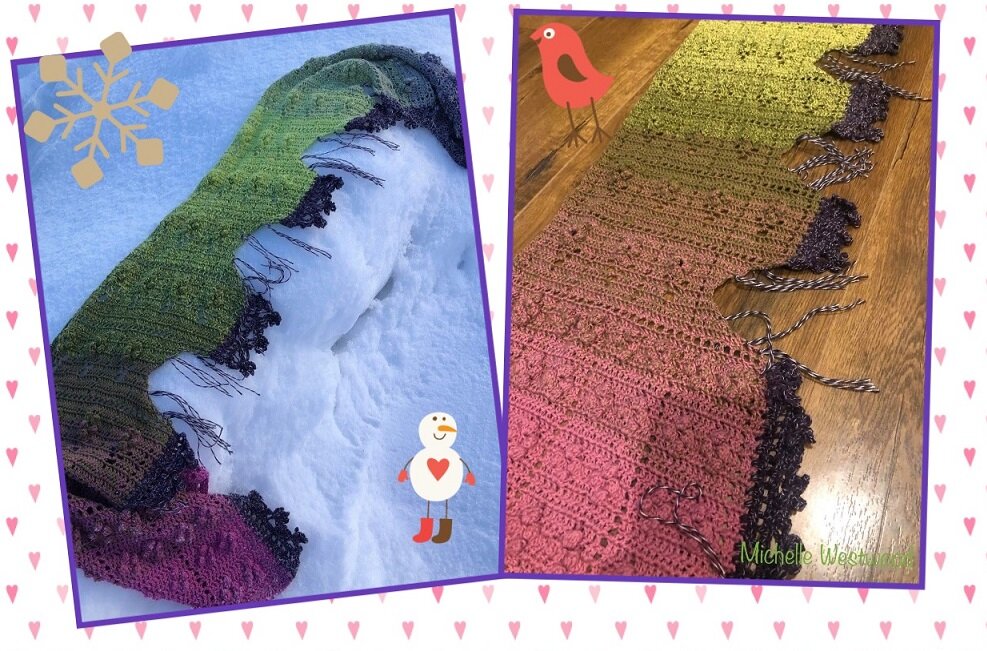
Moths Ate My Flower Scarf. Made using Scheepjes Whirl in Night Time Bubbles.
Then the idea of a scarf that had been eaten by moths popped into my head. So this is my take on a shawl attacked my moths.
The result is a rather unique scarf which drapes nicely around the shoulders due to the Moth Eaten sections.
Designed for use with one cake of Scheepjes Whirl.
1x Scheepjes Whirl Night-Time Bubbles. 215-225 Grams = 1000m/1093yd per ball. Approx 150m/164yd of one whirl left over.
Finished Measurements:
63inches/160cm long.
13 ½ inches/34.2cm wide. Measured across widest section of the shawl.
This scarf has been in the hands of my capable testers and as usual they produced some fabulous test scarves. These testers make my patterns what they are, without them, those making this Scarf really could end up with a dress or jumper instead of the intended scarf. I feel it very important to show off their efforts and I also do so in my patterns. Some of their makes are shown below. As you can see, the scarf can take on so many different looks depending upon yarn choice.
One of my incredible testers, Christy Allen, rocking her Moths Ate My Flower Scarf. Made using Lion Brand Mandala in the colour Wood Nymph!
Looking great in Scheepjes Whirl, Black Forest Zinger. By Michelle Westwood
Bethany Colhoff models her ve
rsion of 'Moths Ate My Flower Scarf'. Yarn: Redheart It's A Wrap in Rainbow. Bethany did less repeats of the pattern due to the yarn amounts she had available.
Taking on a beautiful Spring look here. Left: Jeannette Cripps used Scheepjes Whirl for her test Scarf. Right: Kelly M. Titus used Lion Brand Cupcakes.
Looking very Autumn! Test Scarf by Hannah Schmuker. Yarn: Lion Brand Cupcakes.
Now to the boring stuff! You are welcome to sell items made from this pattern, but please credit me as the designer and add a link to purchase my pattern in your sale.
Many hours of work has gone into the designing and producing of this pattern.
You are purchasing/downloading this pattern for personal use only. Please note my patterns and my images are copyright protected, please do not use my images to sell your items. No pattern or photograph may be reproduced or distributed — mechanically, electronically, or by any other means, including photocopying, without written permission of Auburncraft Design. Please do not copy, rewrite, or redistribute this pattern as your own or otherwise. Just because you can copy does not mean you should. Please do not resell my patterns.
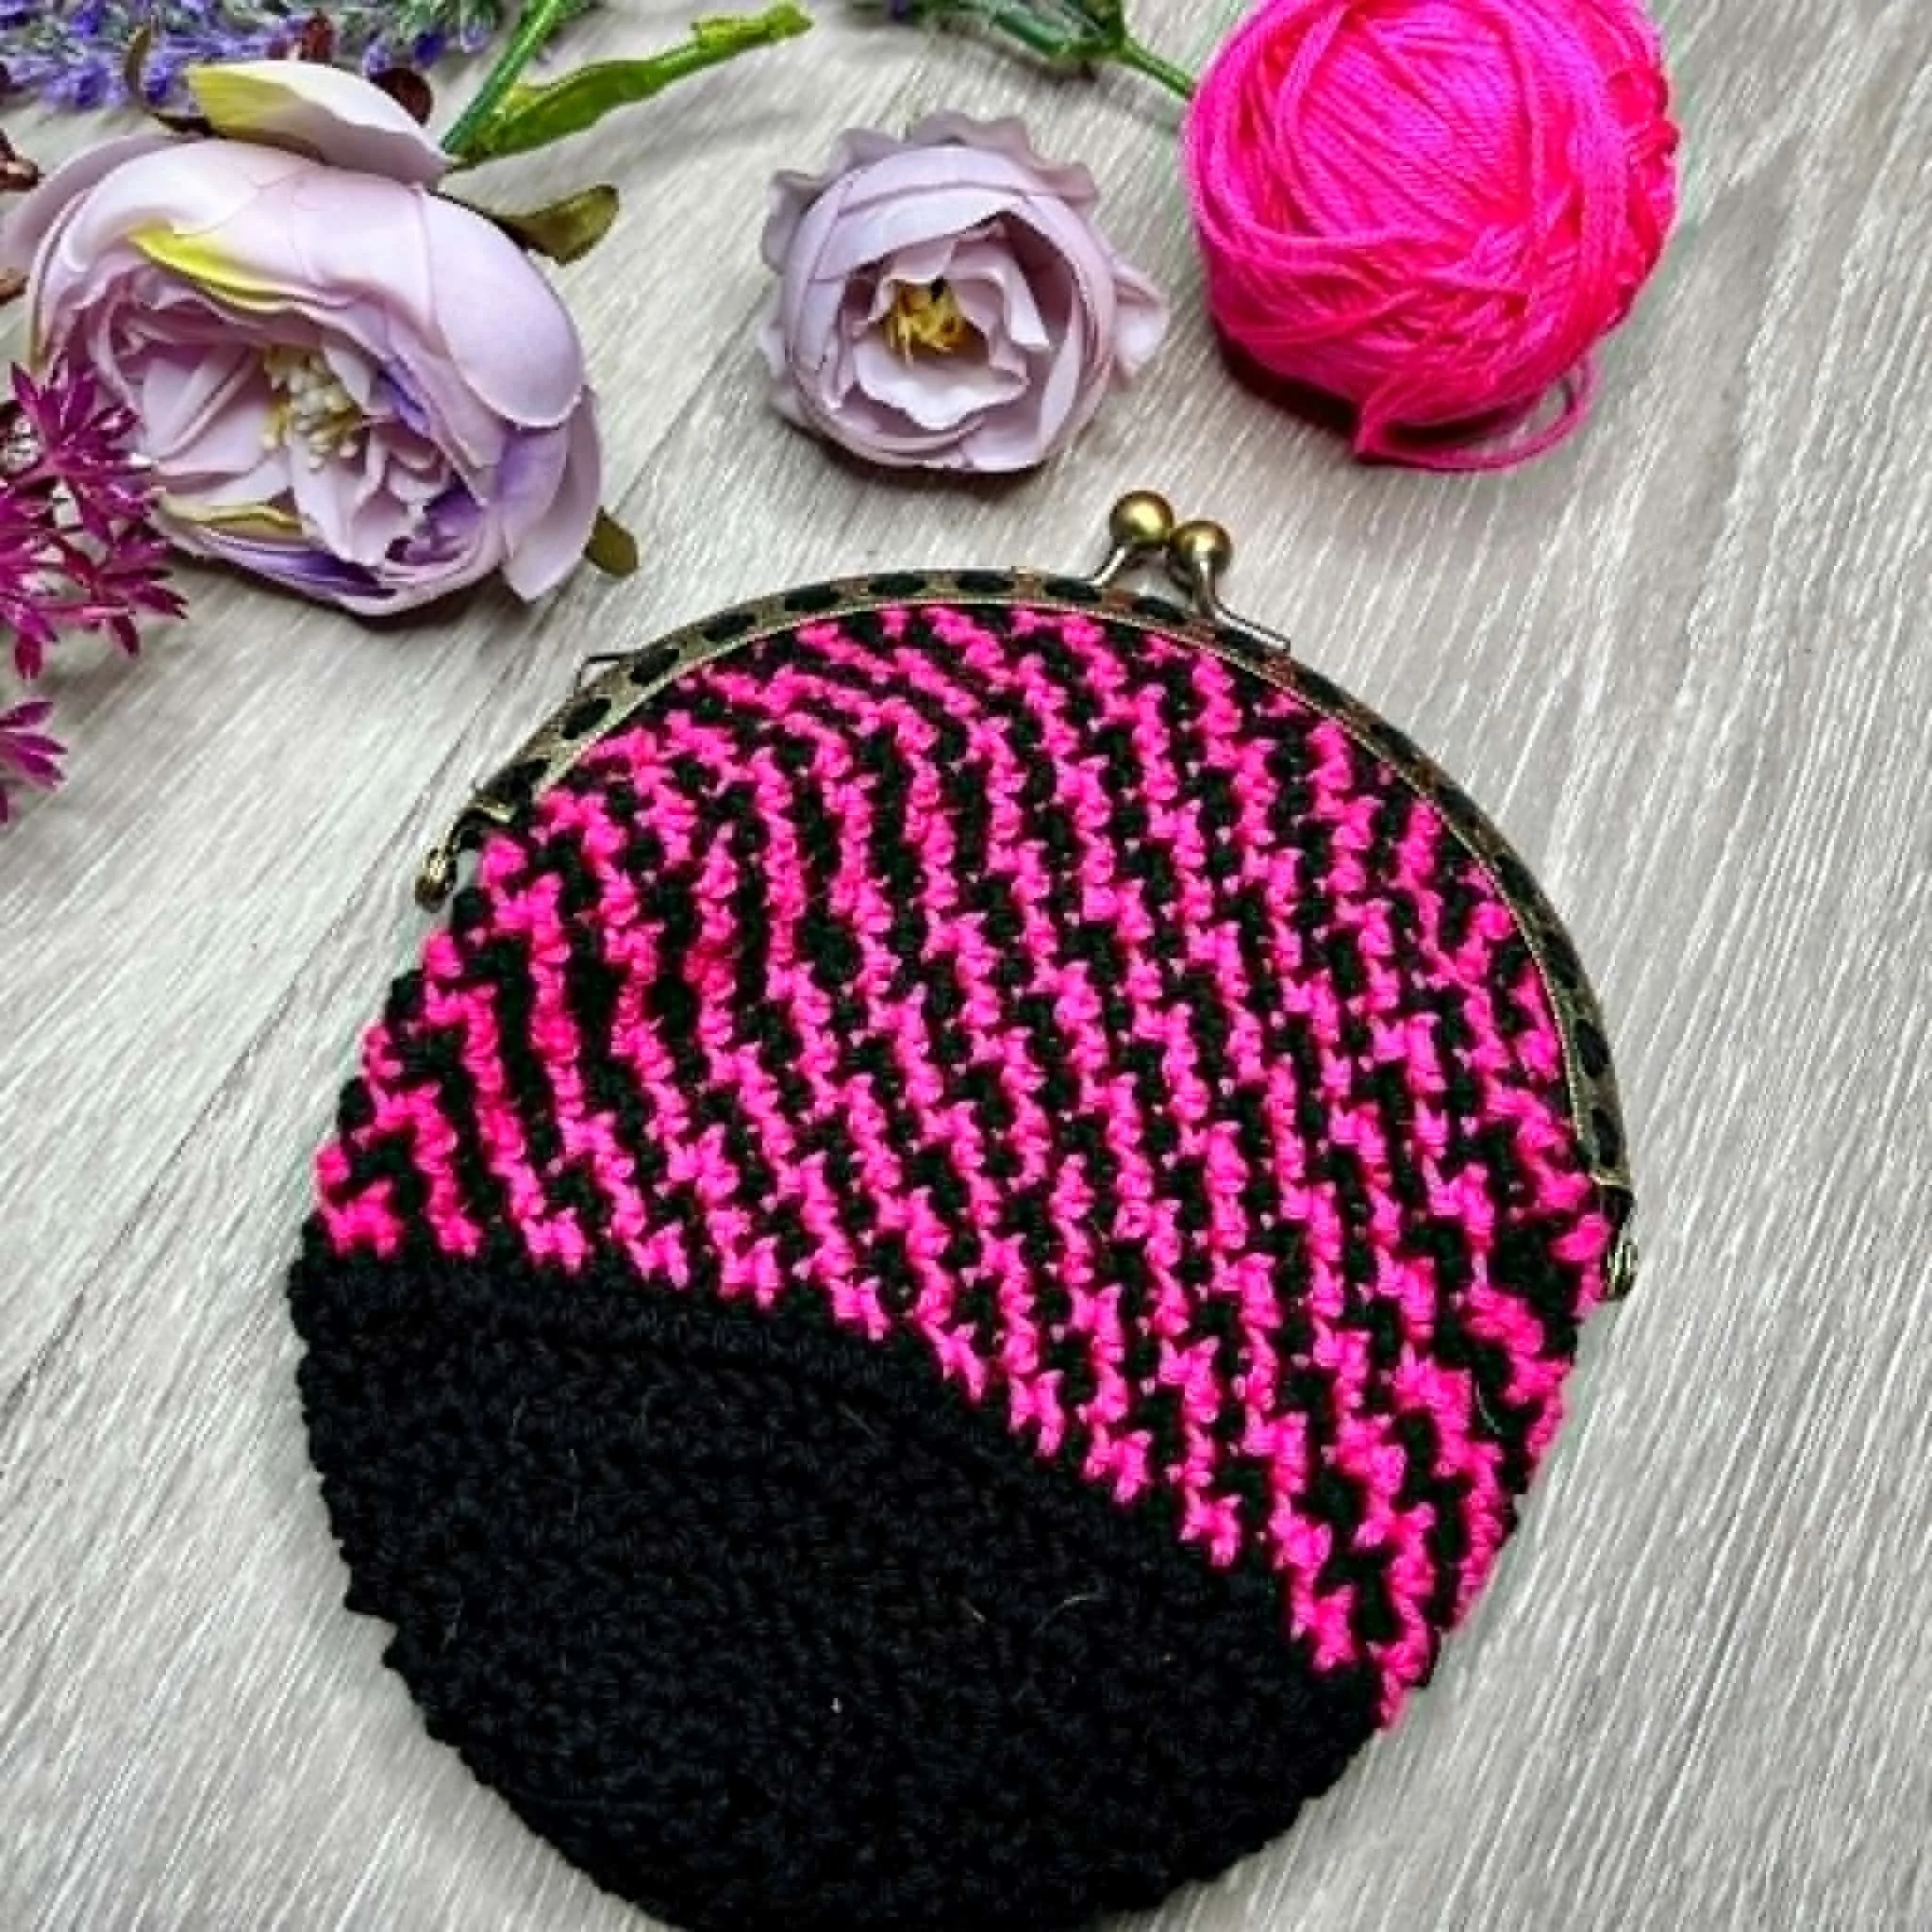
Sometimes a pattern design comes out better than you could have ever imagined. this is one of those times!
Bouquet for Bethany Blanket uses the same concept as my Flight of the Dragonflies Blanket, but has the gorgeous stemmed flowers as a feature. It is worked in the round with the pattern being in written form, with added graphs and photographs.
Bouquet for Bethany in Scheepjes Whirl, Cotton Candy and Whirlette in Grapefruit
Please give it some love and favourite or write a comment.The blanket is available in two different version (purchase which suits your needs). This version was made from Scheepjes Whirl and Whirlette as I showcase it with a slow colour change yarn. It can look just as fabulous using yarns such as Hobbii Twister or Lola, anything with that lovely graded colour change.
Bouquet for Bethany in Scheepjes Whirl, Cotton Candy and Whirlette in Grapefruit
My hard working pattern testers did a incredible job as usual. They have spent the last 5 weeks pouring over the pattern and finding what I like to call my Boo, Boo's! They produced some incredible blankets, all with their own originality due to colour and yarn choice. Some of their work is featured below:
Test Blanket by Carrie Skach. Made using Scheepjes Whirl in Watermelon Hellraiser and Scheepjes Whirlette in Licorice.
Test Blanket by Simone Howes. Made from Scheepjes Whirl in Licorice Yum Yum and Scheepjes Whirlette in Ice.
Test Blanket by Michelle Rose. Made from Nako Angora Luks Color 81909
Materials:
3.5mm hook
Colour 1-1x Scheepjes Whirl in Cotton Candy 1000m/1093yd
Colour 2-3x Scheepjes Whirlette in Grapefruit. 455m/497yd per ball. Approx 1110m/1213yd of Whirlette used
Also available is Vintage Bouquet for Bethany. This is made from quality Bendigo Woollen Mill Cotton and has an embroidery feature in the border. Follow this link (click here) to read about the Vintage Version.
Now to the boring stuff! You are welcome to sell items made from this pattern, but please credit me as the designer and add a link to purchase my pattern in your sale.
Many hours of work has gone into the designing and producing of this pattern.
You are purchasing/downloading this pattern for personal use only. Please note my patterns and my images are copyright protected, please do not use my images to sell your items. No pattern or photograph may be reproduced or distributed — mechanically, electronically, or by any other means, including photocopying, without written permission of Auburncraft Design. Please do not copy, rewrite, or redistribute this pattern as your own or otherwise. Just because you can copy does not mean you should. Please do not resell my patterns.
This pattern is available for free on Ravelry only (link below).
Easter is just around the corner and no doubt some are looking for that perfect gift!
Yes, of course you can always give someone a Choccie Egg, but we all know that you get more chocolate in a box of chocolates!
Maybe you like to keep your chocolate to yourself! This cover is also great for hiding your box of chocolates in. 'Nope no chocolates inside that', if anyone asks!
Bunny Rabbit Chocolate Box Cover
This works up quickly so you can make them for all your loved ones!
The pattern is available on Ravelry (Click here), Etsy (Click here) and Lovecrafts (Click here).
This bunny chocolate box cover is designed to fit a Lindt Chocolate box 150g/5.2oz (or one equivalent size). Box measurements 6 ½ inch/16.5cm x 7 ¼/18.4cm x 1 ¼ inch/3.1cm. It can be adjusted to suit other size boxes. One of my pattern testers made cover for a larger box of chocolates.
C2= 1 Robin Dynasty12Ply Mohair. Or equivalent yarn for the Ears, Whiskers and Toes.
C3= Smallamount Black Dk weight yarn for Eyes and Mouth.
C4= Smallamount White Dk weight yarn for Eyes.
C5= Smallamount of Pink Dk weight yarn for the Nose.
1 x small white Pompom. Or make your own. Instructions are not given for the making of this. ( I used Mohair yarn and a Clover Pompom maker (Click here).)
Press Studclosure.
2 x smalltriangle shaped white buttons for the teeth.
Needle and Cotton Thread.
My pattern testers did a fabulous job as usual and I cannot thank them enough!
Test make by Sandy Stolpa Hippensteel. Made from Bernat Velvet. Baby Bee Lou Lou for the face, Pipsque inner ear. Cotton eyes.
Now to the boring stuff! You are welcome to sell items made from my patterns, but please credit me as the designer and add a link to purchase my pattern in your sale.
Many hours of work goes into the designing and producing of my patterns.
If you purchase/download my patterns, they are for personal use only. Please note my patterns and my images are copyright protected, please do not use my images to sell your items. No pattern or photograph may be reproduced or distributed — mechanically, electronically, or by any other means, including photocopying, without written permission of Auburncraft Design. Please do not copy, rewrite, or redistribute this pattern as your own or otherwise. Just because you can copy does not mean you should. Please do not resell my patterns.
What could be better than a patch of dragonflies? I love dragonflies and am always looking at new ways to incorporate them into my designs.
I really have a thing for Dragonflies! I love days where you see them! A buzz of wings and they are gone on their way, about their day! You can try to chase them but they are not going to be caught!
I have to say I am pretty pleased with the end result of this design. The motif squares measure roughtly 25.4cm/10 inches (depending upon hook, yarn choice and tension).
The sky is the limit for how large you want this beauty to be, as it can easily be made larger with more motif squares added.
I used Bendigo Woollen Mill 8ply Cotton for this. The BWM cotton is a super soft yarn which is lovely to work with. Many different yarns could be used as a substitute.
Materials 3.5mm hook C1=1 x Bendigo Woollen Mill 8ply/Dk Cotton in Daffodil 485m/530yd per ball. Approx 400m/437yd used. C2=1 x Bendigo Woollen Mill 8ply/Dk Cotton in Honeydew 485m/530yd per ball. Approx 400m/437yd used. C3=1 x Bendigo Woollen Mill 8ply/Dk Cotton in Kiwi 485m/530yd per ball. Approx 400m/437yd used. C4=2 x Bendigo Woollen Mill 8ply/Dk Cotton in Parchment 485m/530yd per ball. Approx -650m/710yd used. Scissors Tapestry Needle
The pattern comes with separate copies for Uk terms and USA terms. It has many photos to help along the way.
Pattern testing is a huge part of getting a design ready to publish. I am lucky enough to have some really incredible people who test for me. They have amazing patience and tolerance to my errors, or what I like to refer to as my boo, boos. Below is a few examples of their work.
Test Blanket: Made by Cindy Cary using Bendigo Woollen Mills 8ply Cotton in Daffodil, Pink Rose, Artic and Teal.
Test Blanket by Debbie Schell Kirkland, made using Bernat Baby Sport in Lavender and Cream.
left: Test Blanket by Kathy Mant. Made using Bendigo Woollen Mill 8 ply cotton in Artic, Daffodil, Cream and Pine Lime. Centre: Test Blanket by Lindsay Broussard Silvestrini. Made using Caron Simply Soft.
Right: Test Blanket by Elika Rivera. Made using Red Heart with Love in Grape Jam, Boysenberry, Lilac and White.
Test Blanket by Michelle Westwood. Made using Paintbox Simply Dk and a 4mm hook
Now to the boring stuff! You are welcome to sell items made from this pattern, but please credit me as the designer and add a link to purchase my pattern in your sale.
Many hours of work has gone into the designing and producing of this pattern.
You are purchasing/downloading this pattern for personal use only. Please note my patterns and my images are copyright protected, please do not use my images to sell your items. No pattern or photograph may be reproduced or distributed — mechanically, electronically, or by any other means, including photocopying, without written permission of Auburncraft Design. Please do not copy, rewrite, or redistribute this pattern as your own or otherwise. Just because you can copy does not mean you should. Please do not resell my patterns.
Firstly, you may be wondering why I named this ‘The Paper Bag Hat’. I did so due to the way I have chosen to close the top of the hat. It reminded me of the old-fashioned brown paper bags from my days working in a local Supermarket.
I started as a Checkout Chick in my teens and the registers were all push button (but not in the digital sense). I would have to ask each customer if they would like a box, or a bag for their purchases. If they wanted a bag I would grab one from the pile of neatly stacked brown paper bags and open it up. The bags had a square bottom, and the sides had a concertina fold. So totally different from the tons of plastic bags that are in supermarket now. Know doubt many people over the years would also love me to put a paper bag over my head so now I can!
Materials: (click on any of the yarn names to source them)
Once you have your chains to start done, you can place themaround the head you are making the hat for and adjust if you think it will notbe the right size. The starting chains must be dividable by 3 sothe pattern will work.
It is a good idea to sew the ends in as you go and to eitheruse a stitch marker or count your stitches so you don’t lose one of them asthey are slippery little suckers and tend to hide.
Ch1 stitch to begin rounds does not count as a stitch.
If you find it too confusing on the rows that you work inthe round, you can just slip stitch each round closed. Doing the rows in the round as stated in thepattern will give a better look visually to the larger sections of sc.
Treble stitches on Round 31 which you place into the frontloops you made on Round 28 count as ast. Don’t make Treble stitches tootight.
Finished Circumference: Adult Small 20 ½’ 52cm, Medium 22’ 56cm, Large 24’ 61cm
Gauge: 24 rows to 10cm . 17 stitches to 10cm
Difficulty Level Intermediate
Abbreviations.
Ch. Chain
Sl St. Slip Stitch.
St. Stitch
Sts. Stitches
Bl- Back Loop
Scbl. Single Crochet Back Loop Only.
Notes: DO YOURSELF A FAVOUR AND READTHE NOTES
Once you have your chains to start done, you can place themaround the head you are making the hat for and adjust if you think it will notbe the right size. The starting chains must be dividable by 3 sothe pattern will work.
It is a good idea to sew the ends in as you go and to eitheruse a stitch marker or count your stitches so you don’t lose one of them asthey are slippery little suckers and tend to hide.
Ch1 stitch to begin rounds does not count as a stitch.
If you find it too confusing on the rows that you work inthe round, you can just slip stitch each round closed. Doing the rows in the round as stated in thepattern will give a better look visually to the larger sections of sc.
Treble stitches on Round 31 which you place into the frontloops you made on Round 28 count as ast. Don’t make Treble stitches tootight.
Hat
With C1. Ch 75 (81,87) Do not twist Chain. Slst to first chto form a ring.
Rnd 1: (Right Side): Ch1. Sc in same Ch asjoining and in each Ch around. Slst into back loop of first sc. Turn. – 75(81,87) sts.
Rnd 2: Ch1. Bl only, Sc in each st around.Slst to join. Turn. Fasten off and cutyarn.
Rnd 3: Attach C4 in same st as join. Ch1. Blonly, Sc in each st around. Slst to join. Turn.
Rnd 4:Bl only. Sc in each st around. Slst to join. Turn. Fasten off and cut yarn.
Back or hat.
Rnds 5-6: With C3, repeat Rnds 3-4.
Rnds7-8: With C4, repeat Rnds 3-4.
Rnds 9-10:With C2, repeat Rnds 3-4,
Rnds 11-12 With C4, repeat Rnds 3-4
Rnds 13-14 With C3, repeat Rnds 3-4
Rnds 15-16 With C4, repeat Rnds 3-4
Rnds 17-18 With C1. Repeat Rnds 3-4
Rnd 19: With C4. Sc Bl only into each Sc around. Do not cut or turn.
Rnd 20: Continue working in the round and usea marker to show where each row starts. Shift the marker after each round to the next row. Sc into both loops.
Rnds 21-22-23-24-25-26-. Repeat Rnd 20
Rnd 27: Sc into each St around. Close round with Slst.
Rnd 28: Ch1. * Scbl1, sc2* Repeat from *to * around. Close round with a Slst. Insert stitch marker 75(81, 87) sts.
Rnd 29: Ch1. Sc around. Close round with a Slst.
Rnd 30. Repeat round 29. Do not cut yarn
Rnd 31. Change to C3. Ch1, Sc1 into same st.Tr2tg the first part of this will go into the loop in Rnd 28 that has thestitch marker in it. The second partinto the next free loop. This counts asone st on row 31 (or the row you are working on). Sc2. *Tr2tg first part into same st as before and second part into the nextfree loop, sc2* Repeat from * to * around. Sc1. Close round with a Slst. Cutyarn. 25 (27,29) v’s
Rnd 32, 33, 34: Continue with C4. Ch 1. Sc in all stitches around. Do not close round, continue onto the next round with sc. (this round will work in a spiral. 75(81, 87) sts. Keep using a st marker to mark the start of each round.
Rnd 35: Sc around. Close this round with a Slst atStitch marker point.
Rnd 36: Repeat row 28
Rnds 37-38: Repeat row 29
Rnd 39: Using C2. Repeat row 31
Rnds 40-41-42: Continue with C4. Ch 1. Sc in all stitches around. Do not close round, (this round will beworked in a spiral). Continue onto the next round with Sc .75(81, 87) sts.Place a St marker at the end of the round.
Rnd 43: Continue with Sc around. Close this round with Slst at St marker.
Rnd 44: Repeat row 28
Rnds 45-46 :Repeat row 29
Rnd 47: Using C1 Repeat row 31
Rnd 48-49-50-51. Continue with C4. Ch1. Sc in all stitches around. Do not close round, continue onto the nextround with Sc. 75(81, 87) sts. Place aSt marker to show the end of each round. Fasten off and cut yarn.
Rnd 52-53-54: Attach C1. Sc in all stitches around. Do not close round, continue onto the next round with sc. Place a St marker to show the end of each round. Fasten off and cut yarn. 75(81, 87) sts.
Closing the top of the Hat:
Step One:Lay the hatflat and neatly folded into half. Measure in 3.5 “(3.”, 3.9’”inches) 9 (10, 10)cm.
Step one.
Step Two:
Tuck the measured section in on itself or folded in onitself.
Step two.
Step Three:
With your darning needle and C1. Use tacking stitches to hold the fold inplace for when you crochet around it.
Step three.
Step Four:
Repeat the last three steps on the other side.
Step Five:
Starting at a fold edge, attach yarn and slip stitch the twolayers of the fold together. Slst acrossthe middle top of the hat and onto the left-hand fold edge. Fasten off and cut.
Step five.
Step Six:
Done!!!
You will now have two folded edges remaining to do. Attach the yarn at one of them and Slstacross to close. Fasten off andcut. Attach yarn at other fold edge, slst across to close.
Sew in any ends.
A free Pdf version of this pattern is available on Ravelry (Click here). Please give some of my pattern some love if you visit and pop a few in your favourites.
Now for the Boring Stuff!!!
Many hours of work has gone into the designing and producing of this pattern, You are purchasing/downloading this pattern for personal use only. Please do not copy, rewrite, or redistribute this pattern as your own or otherwise. Please do not resell my patterns.
You are welcome to sell items made from this pattern, but please credit me as the designer and add a link to purchase my pattern in your sale.
Please note my patterns and my images are copyright protected, please do not use my images to sell your items.
This pattern has been tested by a large group of pattern testers, with varying abilities in crochet.
If you are on Ravelry, please add your finished photos as projects as I love to see your finished work.
Mosaic Filet Lap Blanket. Made from Bendigo Woollen Mill 8 ply Dk Cotton In Parchment.
I have been staring at patterns created by Tessellated Tiles for ages. My mind has been busy working up a pattern, using the shapes that mimic these tiles. I have to say I am pretty darn excited by the results.
I love Filet Crochet! It is simple and gives a very effective finished product, which is easily achievable for most levels of crochet ability.
Below: (Pictured) are a few of my testers blankets. They look super fantastic!!! As usual a huge thank you to all those who tested for me.
Left: Amanda Corniello test blanket. Made from Premier Dk Everyday Baby yarn in Fog Grey. 3.5mm hook. Approx 1300m of yarn used. Right: Simone Howes test blanket. Made from Bendigo Woollen Mills 4 ply/ Fingering Cotton in Wisp Grey. 3mm hook used. Approx 1250m of yarn used.
Left: Sharon C Coys Elderton test blanket. Made from Stylecraft Special Dk in white. Right; Michelle Rose test blanket. Made from Caron one pound, worsted weight in Limeade.
Now for the Boring Stuff!!!
Many hours of work has gone into the designing and producing of this pattern, You are purchasing/downloading this pattern for personal use only. Please do not copy, rewrite, or redistribute this pattern as your own or otherwise. Please do not resell my patterns.
You are welcome to sell items made from this pattern, but please credit me as the designer and add a link to purchase my pattern in your sale.
Please note my patterns and my images are copyright protected, please do not use my images to sell your items. No pattern or photograph may be reproduced or distributed — mechanically, electronically, or by any other means, including photocopying, without written permission of Auburncraft Design.
This pattern has been tested by a large group of pattern testers, with varying abilities in crochet.
If you are on Ravelry, please add your finished photos as projects as I love to see your finished work.
Following on from my two triangle shawls, Clematis Shawl and Vintage Clematis Shawl (shawl pictures and links at bottom of page), and at the suggestion of one of my testers, I designed this really cute Christening blanket. The pattern is available on Ravelry (click here) and Love Crochet (click here).
The blanket is named after the tester, who decided I should turn this design into a blanket. And so it became the 'Amanda Christening Blanket'.
I wanted something that was special, and had a special border that stood out. I think I have achieved that goal with this blanket.
It has spent the past month with my testers, who have helped to make the pattern what it is. They impressed me not only with finding my errors (or what I like to call my Boo, Boos), but they also used varied yarns and the results were really amazing.
Amanda Christening Blanket
4mm/G hook
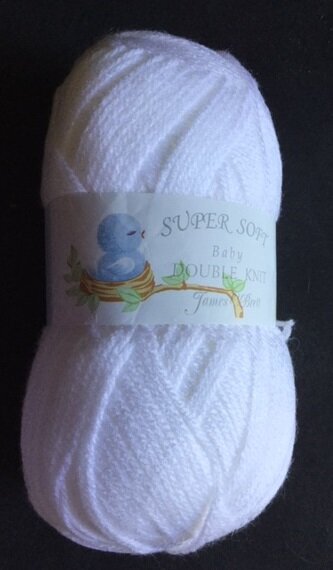
· 4 x James C Brett Supersoft Shade BB4 290m/317yd per ball. Total yarn used approx. 1100m/1202yd.
James C Brett Supersoft available on Love Crochet
The choice of yarn can define a pattern and how it looks. I used James C Brett Dk (click here). Below are a few example of my testers work and what they produced. I love them all!!!
Top Left: Blanket by Hannah Schmaker, made from scrap yarn and achieving a boho look.
Bottom Left: Blanket by Sharon C Coys Elderton, very pretty in Robin Paintbox.
Centre: Blanket by Leslie Hanson, gorgeous in blue.
Right: Blanket by Kathy Mant, in soft grey using Patons Big Baby 4 Ply and 3.5mm hook. Pram size
L
eft: Blanket by Jane Wynne made from Kartopu Love Cotton Prints. Right: Blanket by Amy Elizabeth Peterson made from Bernat Baby Softee. Both came out looking fabulous!
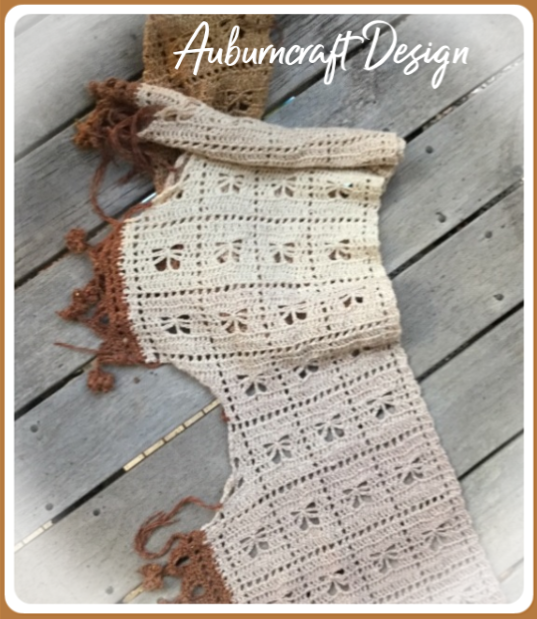
This uses simple stitches and surface slip stitch to create an interesting textured look. Stylecraft Batik is used for best results. This is available on Love Crochet.
For me the design process is a journey!
Yes, I know. You are now thinking 'Oh she used the journey word, I'm out of here'. Can't say I like sentences that begin that way myself!
I mean it in almost a literal kind of way. I start with one idea in my head and end up taking a few turns along the way. I headed down the motorway of crochet, decided to take one of the exits and ended up in the side streets in a very cute little boho town.
My mind just kicks into overdrive and what I began to make, morphs into something else.
This was the case with this beauty! I find myself looking at it and making mmmmmmmmm noises.
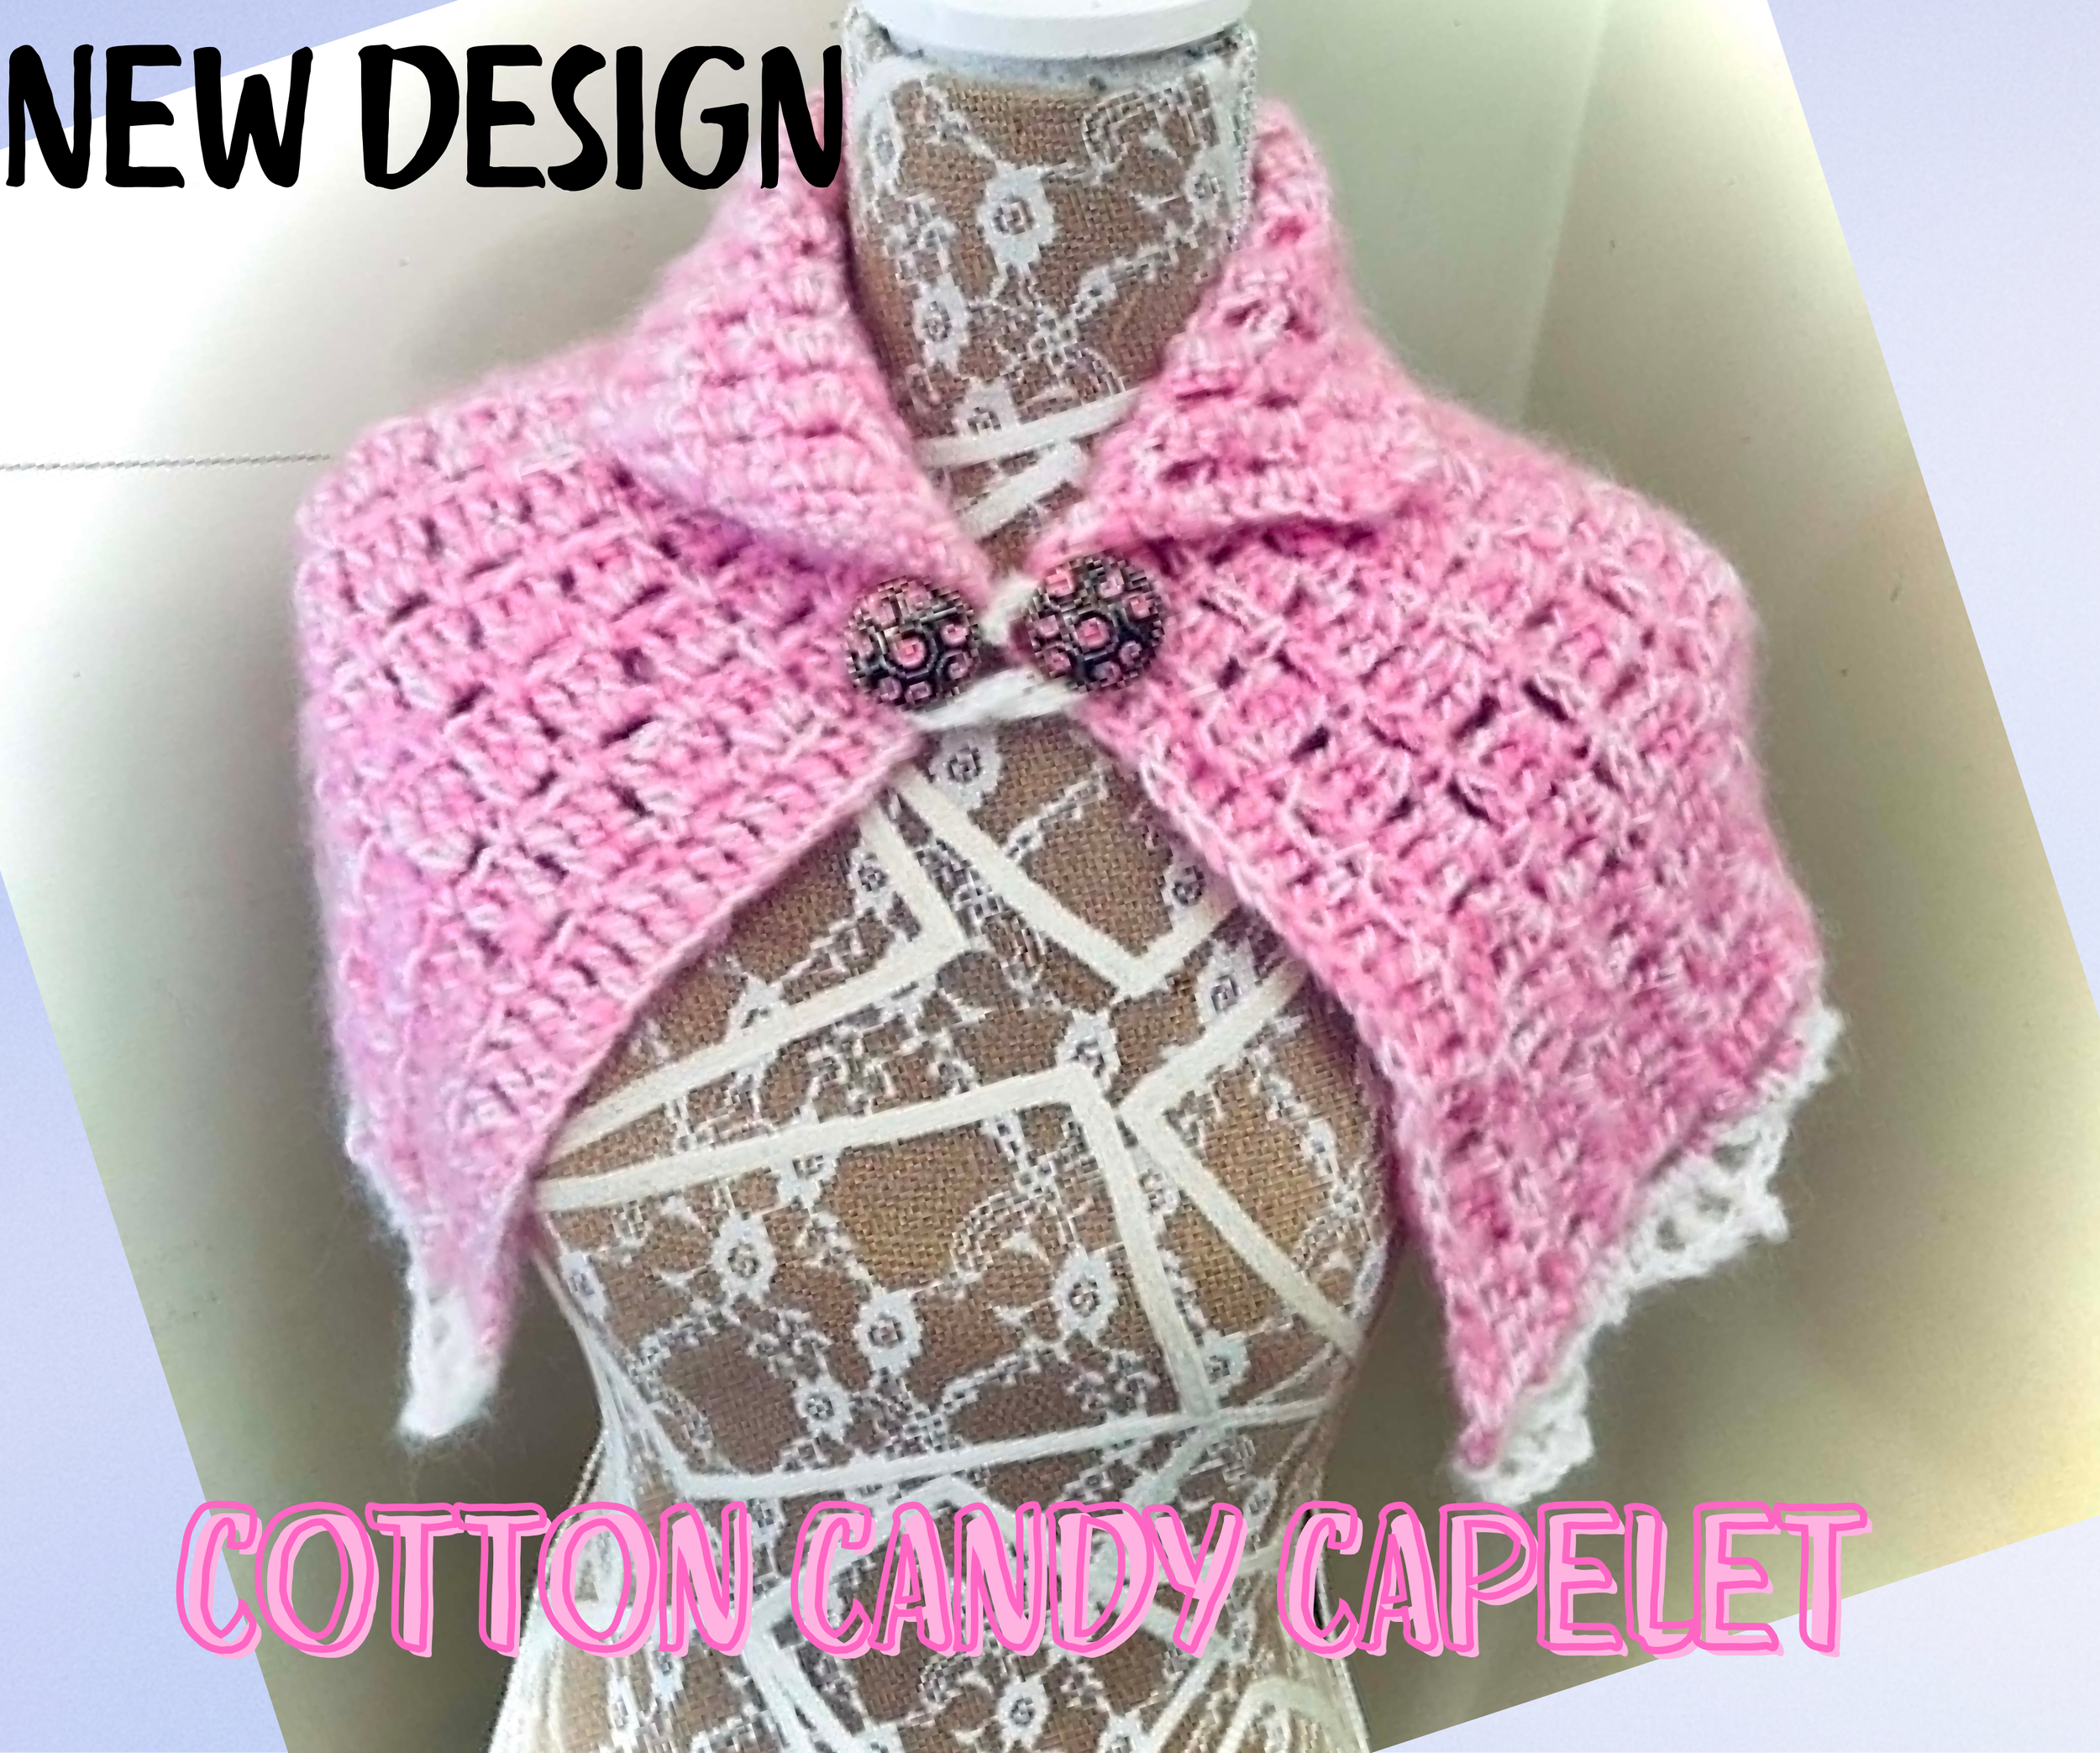
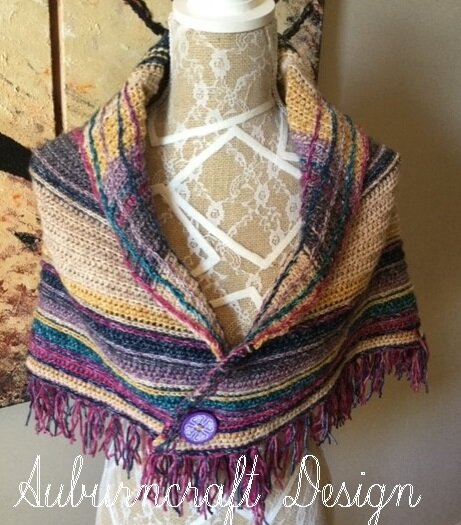
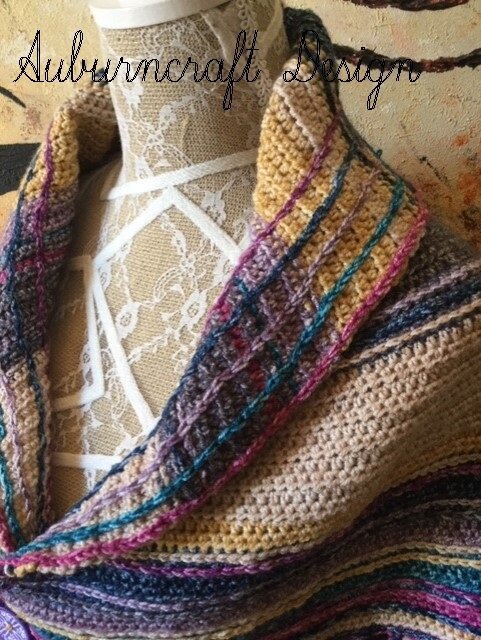
Just a Little Bit Batik began its life thinking it was going to be a basic shawl. Somewhere along the way, the gremlins that keep the cogs in my brain moving, decided to go rogue and it ended up something a little bit more and I would like to think, a little bit more special.
It is now a Shawl/Shrug/Capelet/Wrap (to be honest I have no idea how to classify it) and rather puffed up with itself for being special. It is designed to be worn with the top edge rolled back to form a collar and a button closure to hold it in place.
It's a really unique fashion accessory that I would wear! And while I do tend to have a bit of an 'out there' style of dress sense (or so I have been told), I hope that this pattern will be loved by many.
It is colourful! And I love colour! It is also an easy crochet project and beginner friendly!
When I design something, I don't really think about it in the sense of what may, or may not be a popular item for people to want to purchase. I think about what I like and what appeals to my ideas of what colour, and shape should be. I like original things and will always be the crazy person wearing the tie dye leggings, or the over the top sunglasses. I don't care if they are in fashion. I wear what makes me happy! I design what makes me happy! And if it makes others happy too, all the better!
I can see a blanket in this same style in the near future!!!
This post may contain affiliate links. These help to keep my blog open.
Put your hand up if you think Solomons/Lovers knot looks scary!
Yeah, I bet you considered putting your hand up. Most people do look at the stitch and think that it must be really difficult. It isn't!
I thoroughly enjoyed designing this little shawl. It is comprised of a simple two row repeat. Testers with all levels of ability have made this, with success.
I used Alize Angora Gold for mine, but my testers used various yarns. Light fingering works best and Lion Brand Shawl in a ball works up beautifully.
The shawl is worked on a 5mm/H hook and is a simple rectangle shape. It works up quickly, and would be beautiful addition to wear for any special occasion, lightly draped across your shoulders.
The pattern is available in my Auburncraft store on Ravelry.
Please give the pattern some love on Ravelry and pop it in your favourites.
Also please remember that my patterns are copyrighted.
This is a little square I designed a while ago. I have had visions of doing something more with it and a modified version of it is in the works (don't hold your breath though as I have a million WIPS on the go).
Dc4togcluster- Double Crochet 4 together to form Cluster
Tr4togcluster – Treble Crochet 4 together to form Cluster.
Tog-Together
RS- Rightside
PS- popcornstitch
Notes:
Chains countas a stitch unless otherwise stated.
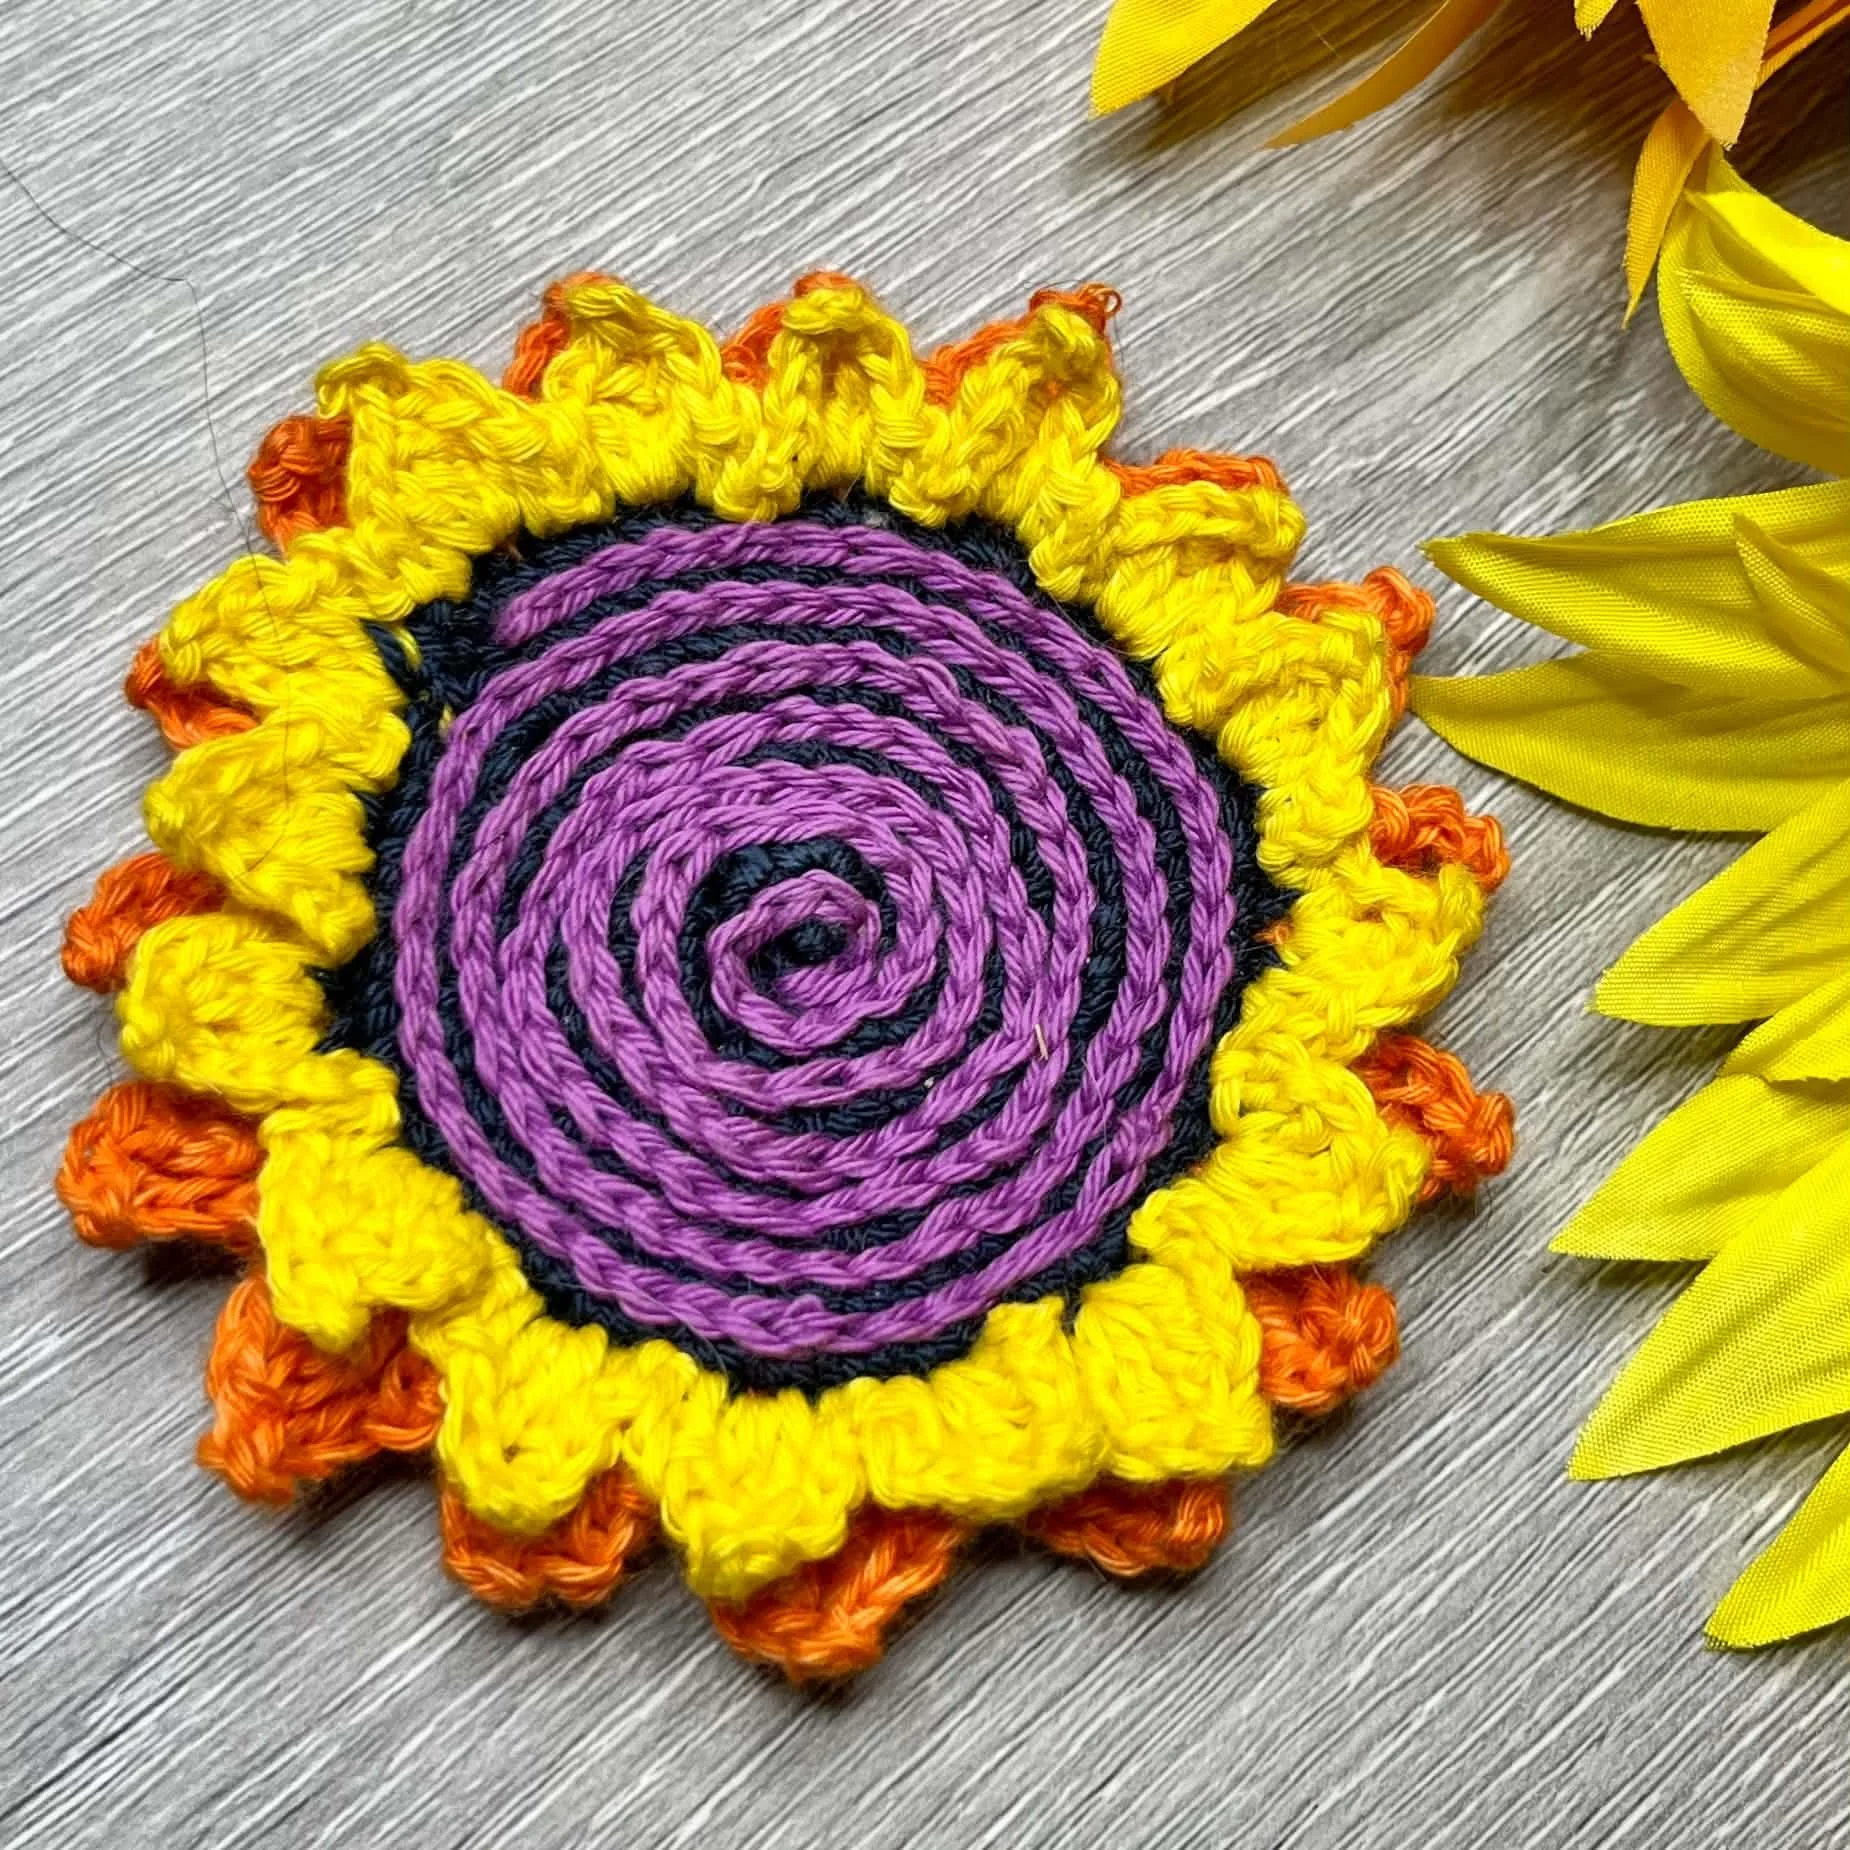
Popcorn Stitch How To:
Work 5 double crochet (dc) stitches in the same stitch.
Remove Hook
Insert hook from front to back under the top 2 loops of the firstdouble crochet of the group.
Pick up the dropped loop with your hook and pull it through thestitch.
Form a magic circle, or ch 6, sl stto form a ring.
Round 1. Ch 4 as first tr, 23 tr into ring,sl st to top of beginning ch4 to close (24 tr).
Round 2. (Ch3, to form first st of PS) PSinto same st. *Ch2, sk1 tr, PS into next st.* Ch2, slst to top of first PS. (12Ps,12, ch2 sp’s)
Round 3. Slst to the middle st (top) of nextPS, ch4 (counts as sc plus 3 chs) * Slst into space between PS in Round 1, ch3,sc to the top/middle of next PS.* Rep from * to * around. (12sc, 24 ch3’s)
Round 4. Ch1 in place of sc. *Ch4, sc intonext sc* Rep from * to * around. On the last ch4, slst to the starting sc.(12sc, 12 ch4 spaces)
Round 5. Slst into next chsp. Ch1 which counts as a sc,hdc, dc, tr2, dc, hdc, sc into ch4 sp. *Sc, hdc, dc, tr2, dc, hdc, sc into ch4 sp.*Rep from * to * around. Close with slst to starting ch1. Fasten off (12 Petals)
Round 6. Slst to between the two trebles, ch1(counts as sc). *Ch6, sc in between next two tr’s. * Rep from * to * aroundomitting last sc and close with a slst to beginning ch. (12sc, 12 ch6 sp’s)
Round 7. Slst into next chsp, ch1 (counts asa sc) sc6 into same chsp. Sc7 in eachchsp around. Slst to close. (12 groupsof 7sc).
Round 8. Slst along to 3rd sc ofthe next 7sc group. Ch1 (counts as a sc). *Sc1 Hdc2. Tr in between the two tr of rd5. Ch2, tr intosame sp between the trebles of rd5, sk2 st’s on working row, hdc2, sc2, ch7,sk5, sc into next st, ch7, sk5, sc1. * Rep from * to * around four times intotal. Slst to starting sc. Fasten off.
Round 9. Slst along to next Ch2 Sp. (Ch4, Tr3tog, ch4, tr4tog, ch4, tr4tog). *Ch4, sk next 4 st’s, sc into ch,ch4, Dc4tog into same ch sp as ch4, ch1, Sk next sc, dc4tog into next chsp,ch4, sc into same chsp as dc4tog, ch4. ^(Tr4tog, ch4, tr4tog, ch4, tr4tog)^*Rep from * to * 3 times in total. Repfrom ^ to ^ once. Close with slst to top of ch4. (4 groups of tr4 together with ch4 between, 4groups of dc4tog with ch1 in between, 8 sc with ch4 each side)
Round 10. Slst across to the top of the middletr4tog in any corner. * (Sc, ch10, sc into same sp). Ch6, sk next ch4 sp and tr4 cluster. (Sc intonext chsp, ch4, sc) into the same chsp. Ch4, sc into next chsp, ch1. (Sc, ch4, sc) in between the dc4tog clusters.Ch1, sc into next chsp. Ch4. (sc, ch4, sc) into next chsp. Ch6, ^ sk nexttr4tog cluster and ch4 sp. * Rep from *to * four times in total. Close withslst to sc in top of tr4tog cluster. Sewin any ends. Block