


What is it all about?
Having a Pattern Tested is a huge part of the Design Process. I would like to think I am perfect, but it is certainly not the case. I make mistakes! My longsuffering testers find these and point them out. We then work together to make certain that the pattern is correct, workable and any sizing issues are sorted out.
I want my patterns to be easy to follow, and mistakes free. Those who use my patterns want the same thing.
What do Pattern Testers get out of the process?
Testers get the first look at original designs. They can take their Crochet skills to the next level. They become part of a select group on Facebook there just for the testers of my patterns. On completion they get a copy of the finished pattern to keep.
My pattern test group brings together people from all over the world. I have testers from Mexico, Alaska, Morocco, USA, Australia, Denmark, Finland, Germany and possibly a few other places I forget.
What is Expected of a Tester?
- Are asked to join the Facebook group Auburncraft Crochet. Guidelines are given out and prospective testers are asked to agree to them.
- Communication between testers and myself is very important to keep me informed during the test process, and to map the progress of the test.
- Must know basic crochet stitches and have experience reading patterns.
- Must be able to complete the project by the deadline asked.
- Must add the completed project to their Ravelry account within a week of completion.
- Must provide 2 plus quality photos (photo credit will be given) to be used in places such as social media and in final pattern listings.
Having an eye for detail is an advantage in testing. When a new design is ready for testing, I will put out the call for testers. If selected you will be given the pattern and details necessary for the testing process to begin. I try to take on board all feedback, but at times I can get conflicting feedback from testers and so if your feedback is not used, it is not a slight towards you. So in saying this, having an easy going temperament is also an advantage to a tester.
If interested, go to Auburncraft Crochet on Facebook.

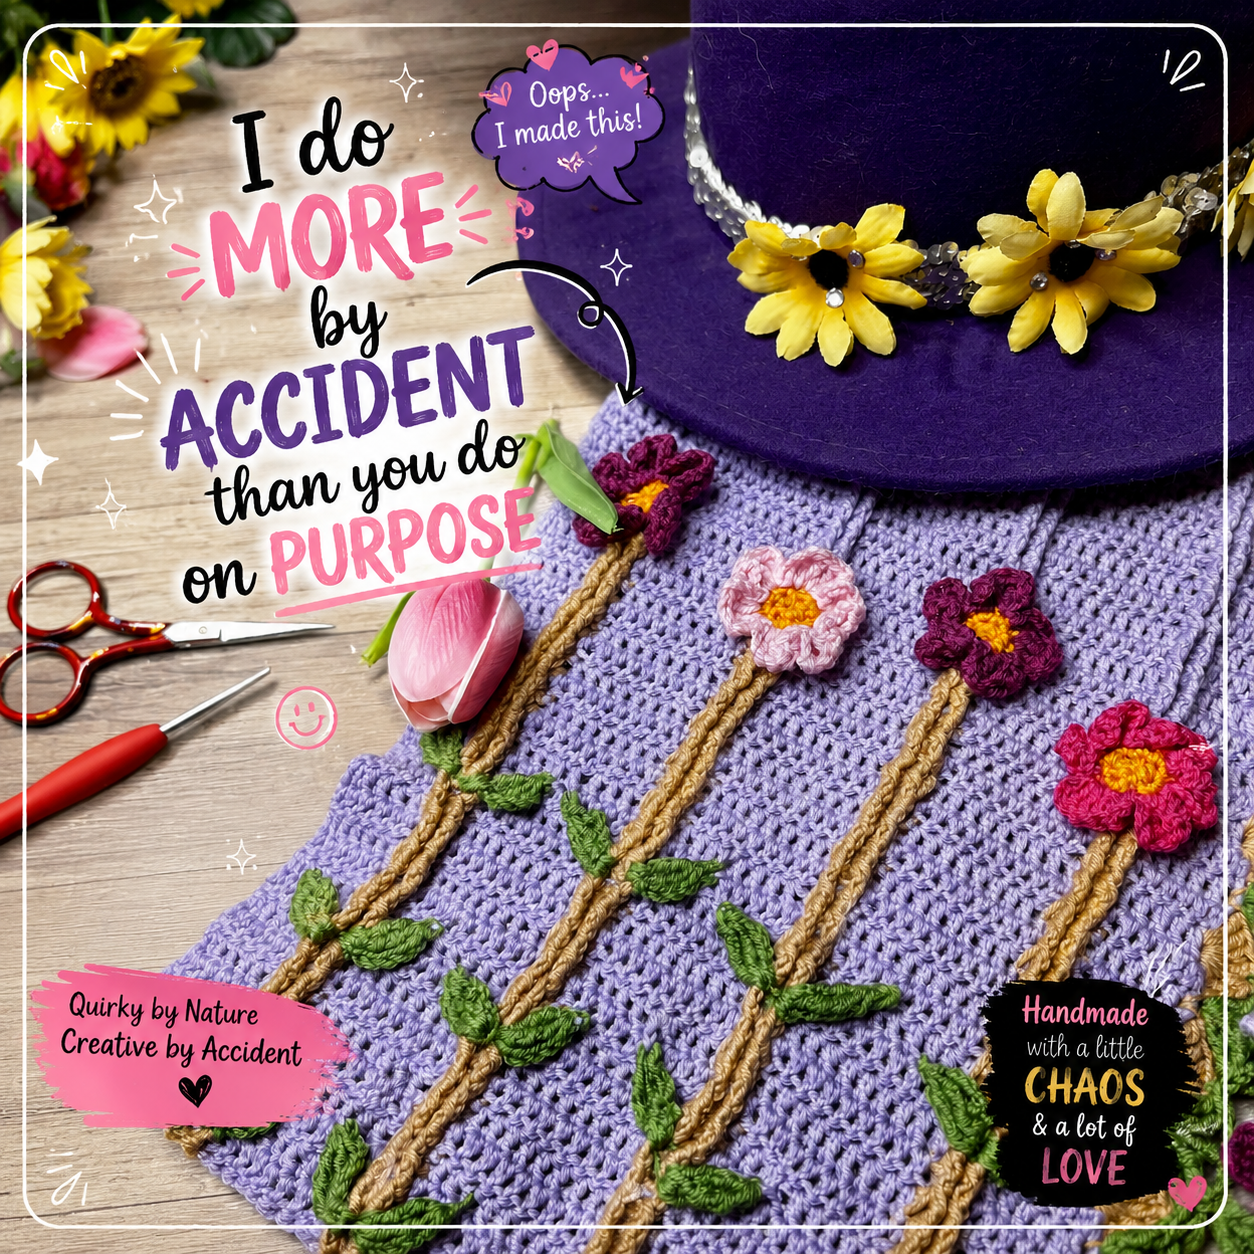
 Do you ever find yourself watching a show and getting inspired to grab your hook? I do!I have been binge watching Frankie Drake Mysteries of late and just loving the 1920's fashion. Really lovely trousers and dresses. But oh, the hats! I found myself in love with them. Next thing I knew I had my hook in my hand.I am pretty happy with the results and would like to think that Frankie would rock this hat!The hat is out with my long-suffering testers at present and will be published in the next few weeks.This uses a 5mm hook and an Aran or Chunky Yarn. Whichever makes gauge. I made this one with Lincraft Balmy. The hat is one size only. Circumference is 22 inches. Larger or smaller could be achieved using a larger or smaller hook. Or adjusting the yarn thickness.The embellishments on the hat are made using Surface Slip Stitch and the band is done with a length of Ribbon.Watch this space for an update when published.


 Some Pluses for Freeform:Uses up a heap of leftover yarn.If you made a mistake, it never happened.You don't have to count your stitches, as it really doesn't matter.If you are a beginner at crochet. You can just call your work Freeform and dare anyone to say it isn't right.You end up with a piece of work that is totally original to you.If you run out of a colour of yarn, it doesn't matter.You don't have to check gauge.

 Use stitch markers to keep track of decrease rows.Ch25.Row 1. Sc into 4th ch from hook. Sc in each ch across. Turn (23)Row 2. Sc Dec. Work 1 sc in next 19 st’s. Sc Dec. Turn (21)Row 3. And every alternate Row from here. Ch1. Sc in each st across. Turn.Row 4. Sc Dec. Work 1 sc in next 17 st’s. Sc Dec. Turn (19)Row 6. Sc Dec. Work 1 sc in next 15 st’s. Sc Dec. Turn (17)Row 8. Sc Dec. Work 1 sc in next 13 st’s. Sc Dec. Turn (15)Row 10. Sc Dec. Work 1 sc in next 11 st’s. Sc Dec. Turn (13)Row 12. Sc Dec. Work 1 sc in next 9 st’s. Sc Dec. Turn (11)Row 14. Sc Dec. Work 1 sc in next 7 st’s. Sc Dec. Turn (9)Row 16. Sc Dec. Work 1 sc in next 5 st’s. Sc Dec. Turn (7)Row 18. Sc Dec. Work 1 sc in next 3 st’s. Sc Dec. Turn (5)Row 20. Sc Dec. Work 1 sc in next 1 st’s. Sc Dec. Turn (3)Row 22. Sc3tog. Fasten off and cut yarn.Sew in ends.Block Triangles so they sit flat. This will make them easier to join.The main picture is a little teaser of what I am making from these. It is going to beFAB-U-LOUS!!!!!
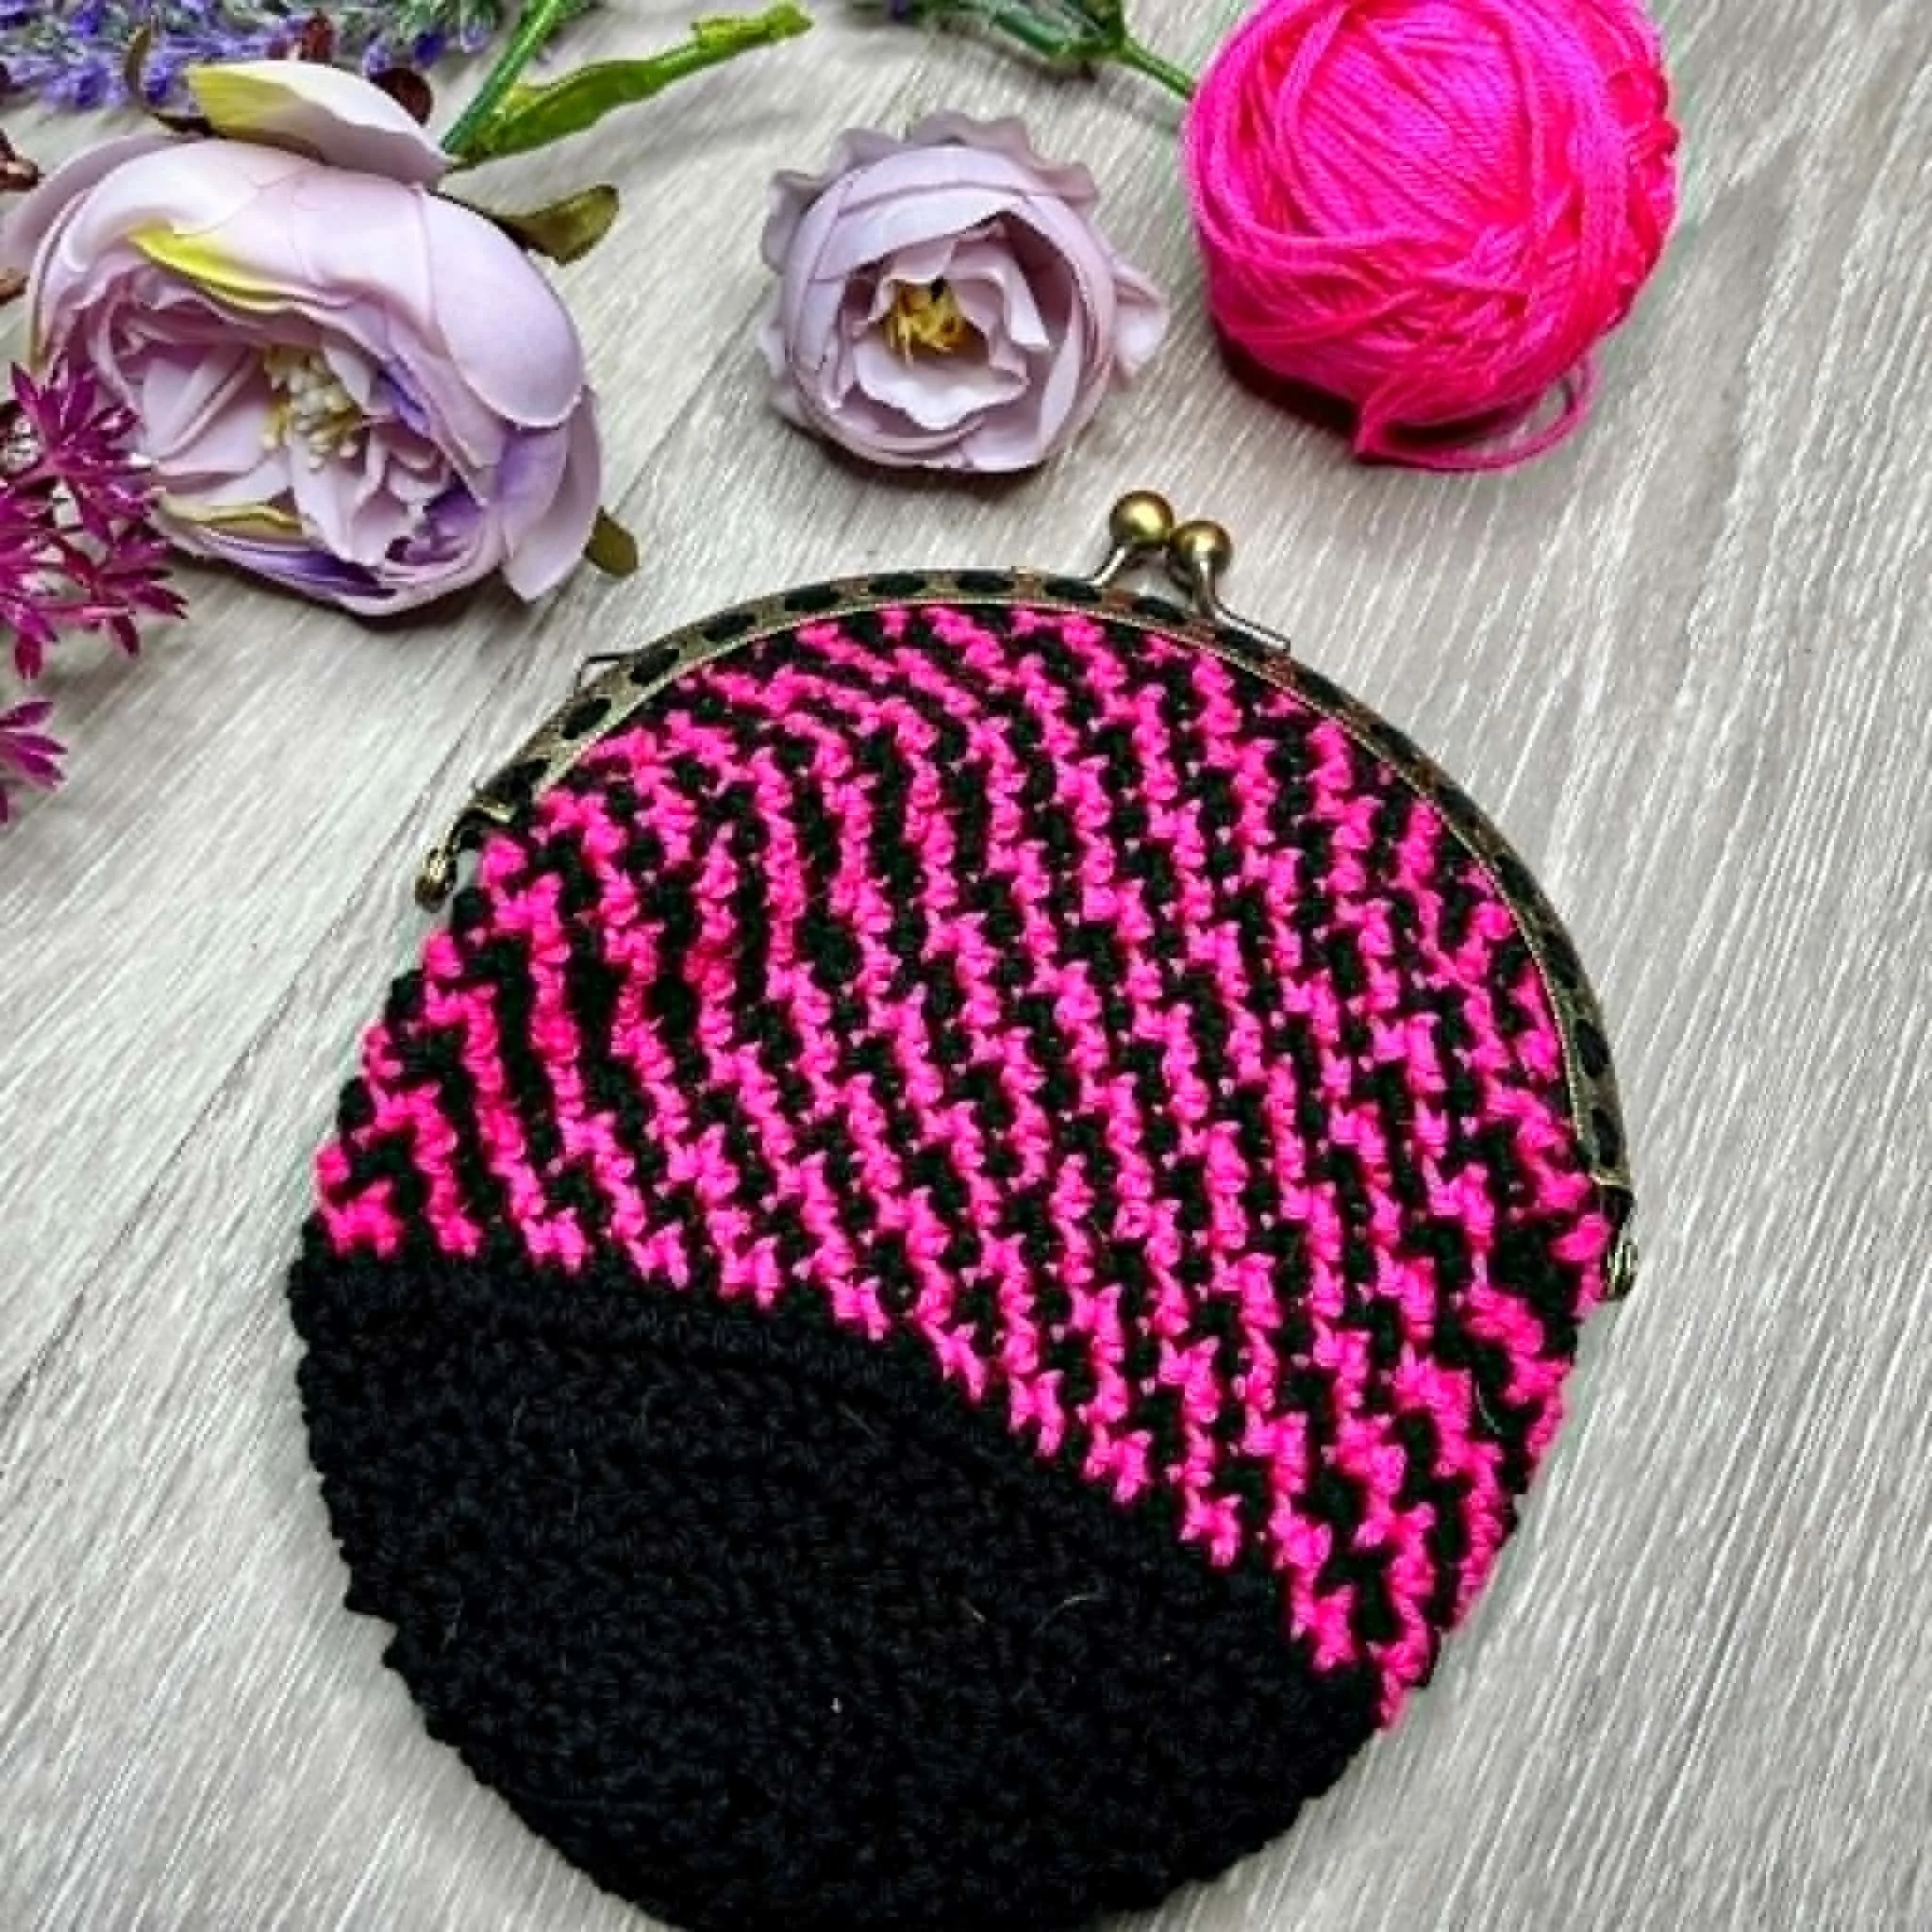
  The cynic in me thinks they do it on purpose. It's someones idea of a cruel joke. Whoever thought the colour choices up are probably a frustrated Hooker, cackling in glee that they made me frog another project.What I am currently working on, happens to be made from
  The pattern is available on:
 The pattern for the flower is available for free on my
  One day I may write the pattern for the dress up. But at this stage there is only the pattern for the flower.


 Step 1. Cut the material into approx 2 inch squares.Step 2. Using your paintbrush, cover an area on the head ready to attach the material.Step 3. Place a square of material onto the Head.Step 4. Dip your brush into the water and damp the material slightly.Step 5. Add some more Modge Podge to cover the piece of material.Continue adding pieces of material till the head is covered. Allow to dry.Give the Head a Name!