*Ravelry Discount Link in post . For two weeks only (till 26th Aug 19) buy both the Clematis Shawl and the Vintage Clematis Shawl using the code 'Clematis' and get both for $6. *
I have a few favourite things in life!
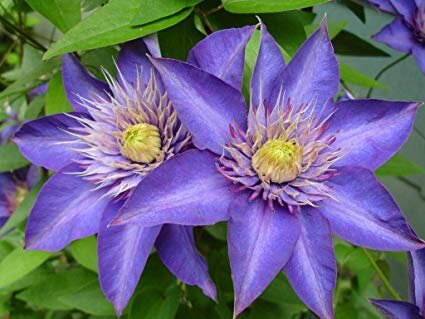
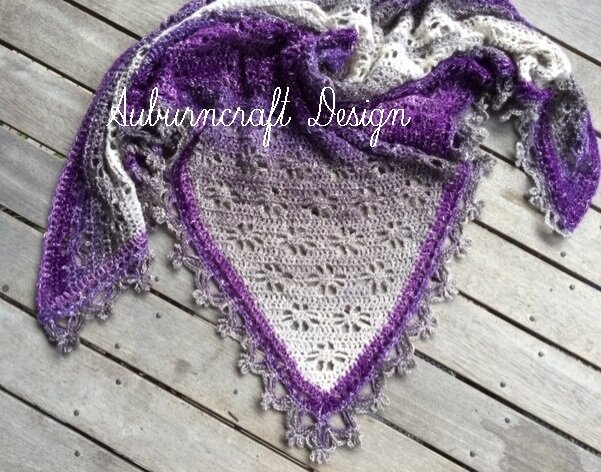
Flowers! I love flowers! Many of the things I crochet incorporate flowers in them as flowers make me happy! The Clematis flower is supposed to be part of the Buttercup family and if this is so, then it must be the cool Aunt, due to its beautiful colours (usually purples, pinks and creams).
Clematis Flower!
I love Purple! Purple makes me happy!
Chances are if I am looking at yarn, my hands will automatically be drawn to the purples. I have always had a love of purple. When I got my own bedroom as a child, my father was silly enough to ask me what colours I wanted in my room. While he didn't let me paint the walls purple, I did get purple curtains and a purple chest of drawers.
So while shopping for some unnecessary yarn (haven't we all been there?), I spotted the Lion Brand Shawl in a Cake (which also comes in a ball). They had a few different colours on offer but of course that Mindful Mauve was just calling to me.
My long suffering pattern testers were outstanding during the test process. They produced some really beautiful shawls, each with their own individual yarn choices and colours.
This post may contain affiliate links. If you click on a yarn link on my page and purchase yarn, I get a small commission. This does not affect you in any way but helps me to keep my blog going.
This is a paid pattern but will be available on ravelry free for 2 days, ending 27th June Midday Australian Time. The code to use on ravelry is at the bottom of this post. PLEASE GIVE THIS POST A LIKE AND PERHAPS CONSIDER FOLLOWING MY BLOG. This helps me to keep offering free patterns and discounts. So please do not just grab the code and run as this is a small request. The like button for this post is at the bottom of the page.
I love different things!
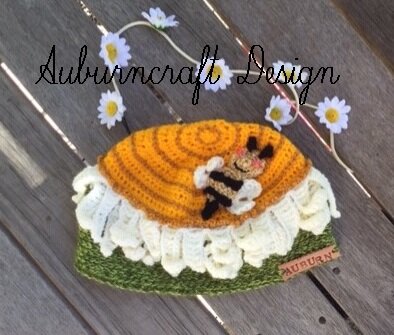
I especially love things that are colourful and unique! Yes, I would wear this hat if I had made it in Adult size, but this time I decided to stick with just the three sizes. Babies, Toddlers and Children, have all the fun!
My Very Own Daisy Hat
This is a fun hat for Babies, Toddlers and Children.
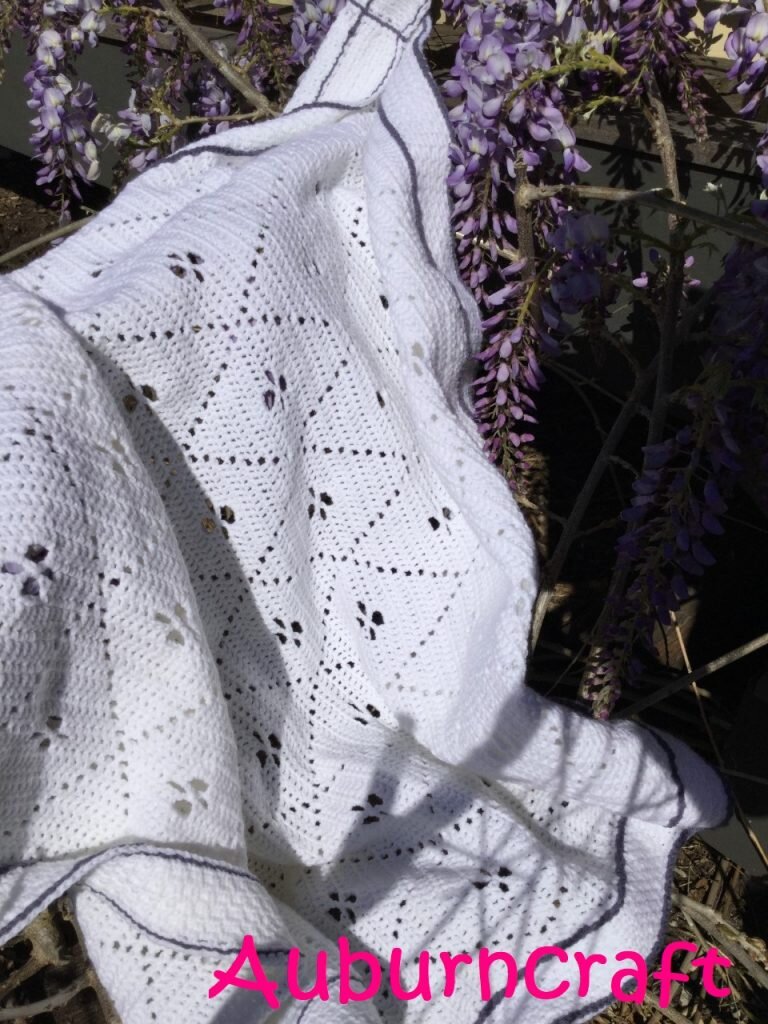
My Diamonds crochet blanket pattern is available in Butterfly Diamonds, Dragonfly Diamonds and Flower Diamonds.
Simple stitches are used making this a beginner friendly pattern. This works up quickly.
Dk yarn is used, although a larger blanket could be achieved with the use of an Aran weight yarn. I used Sirdar Snuggly(available here) which is a lovely soft nylon-acrylic yarn, very suitable for babies.
3.5mm hook 4mm hook for borders and surface slip stitch
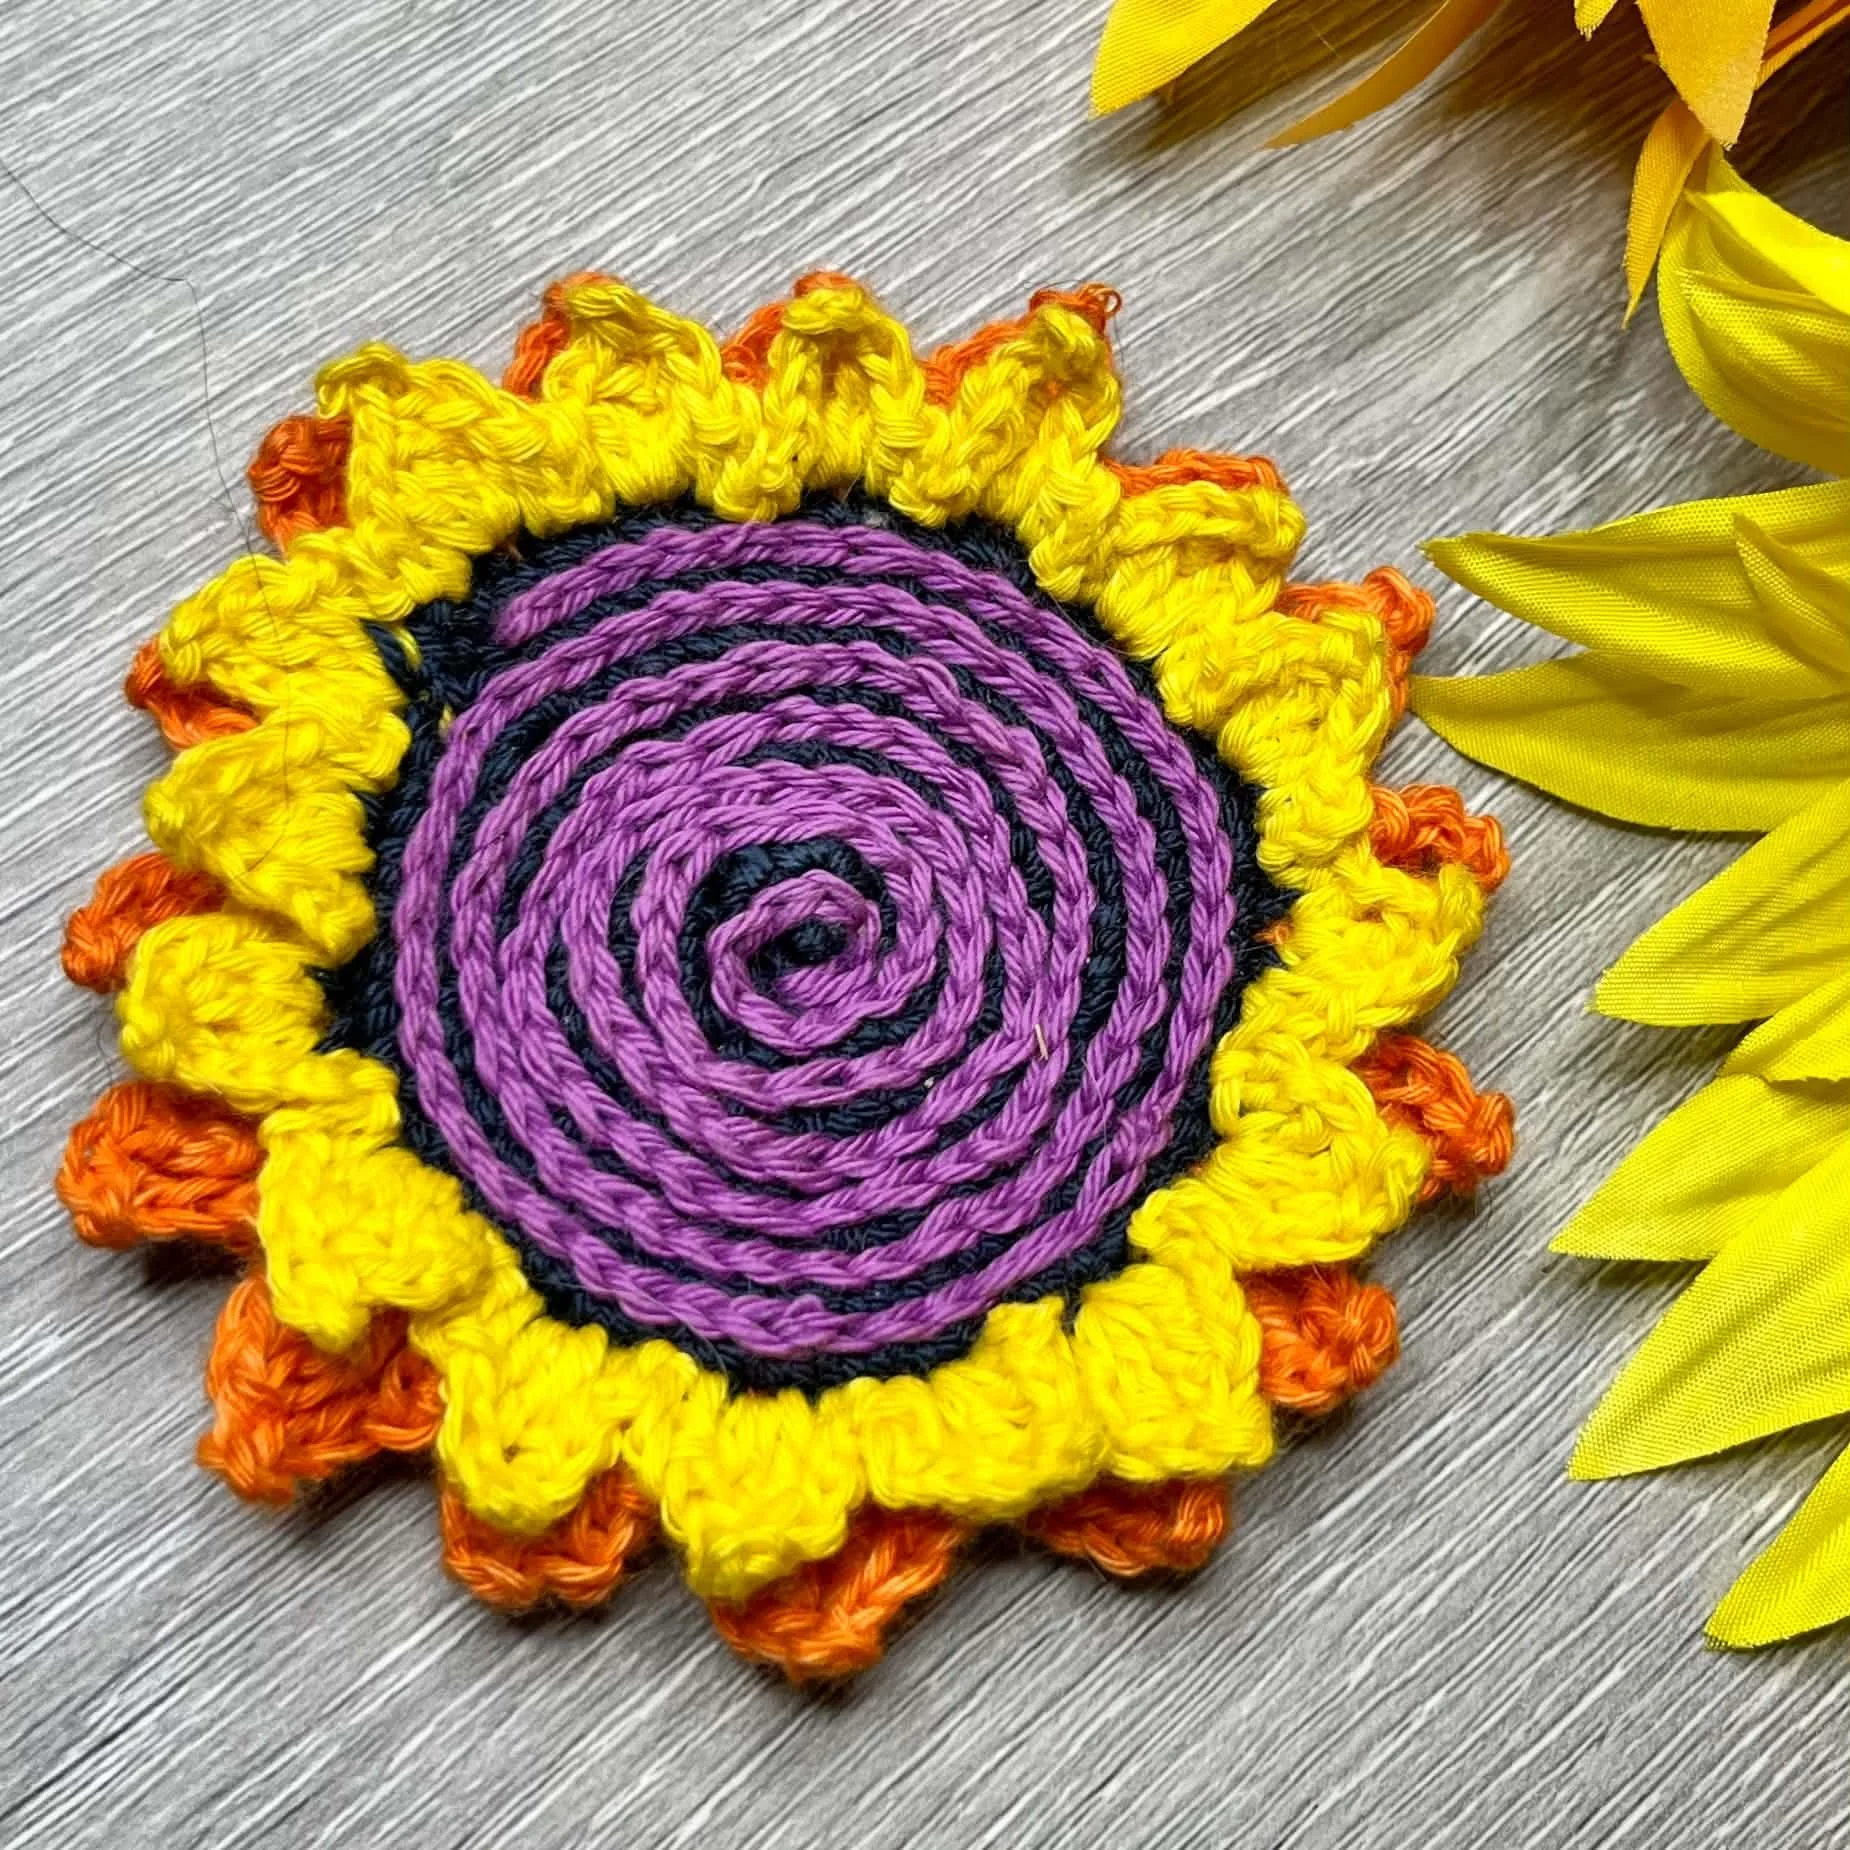
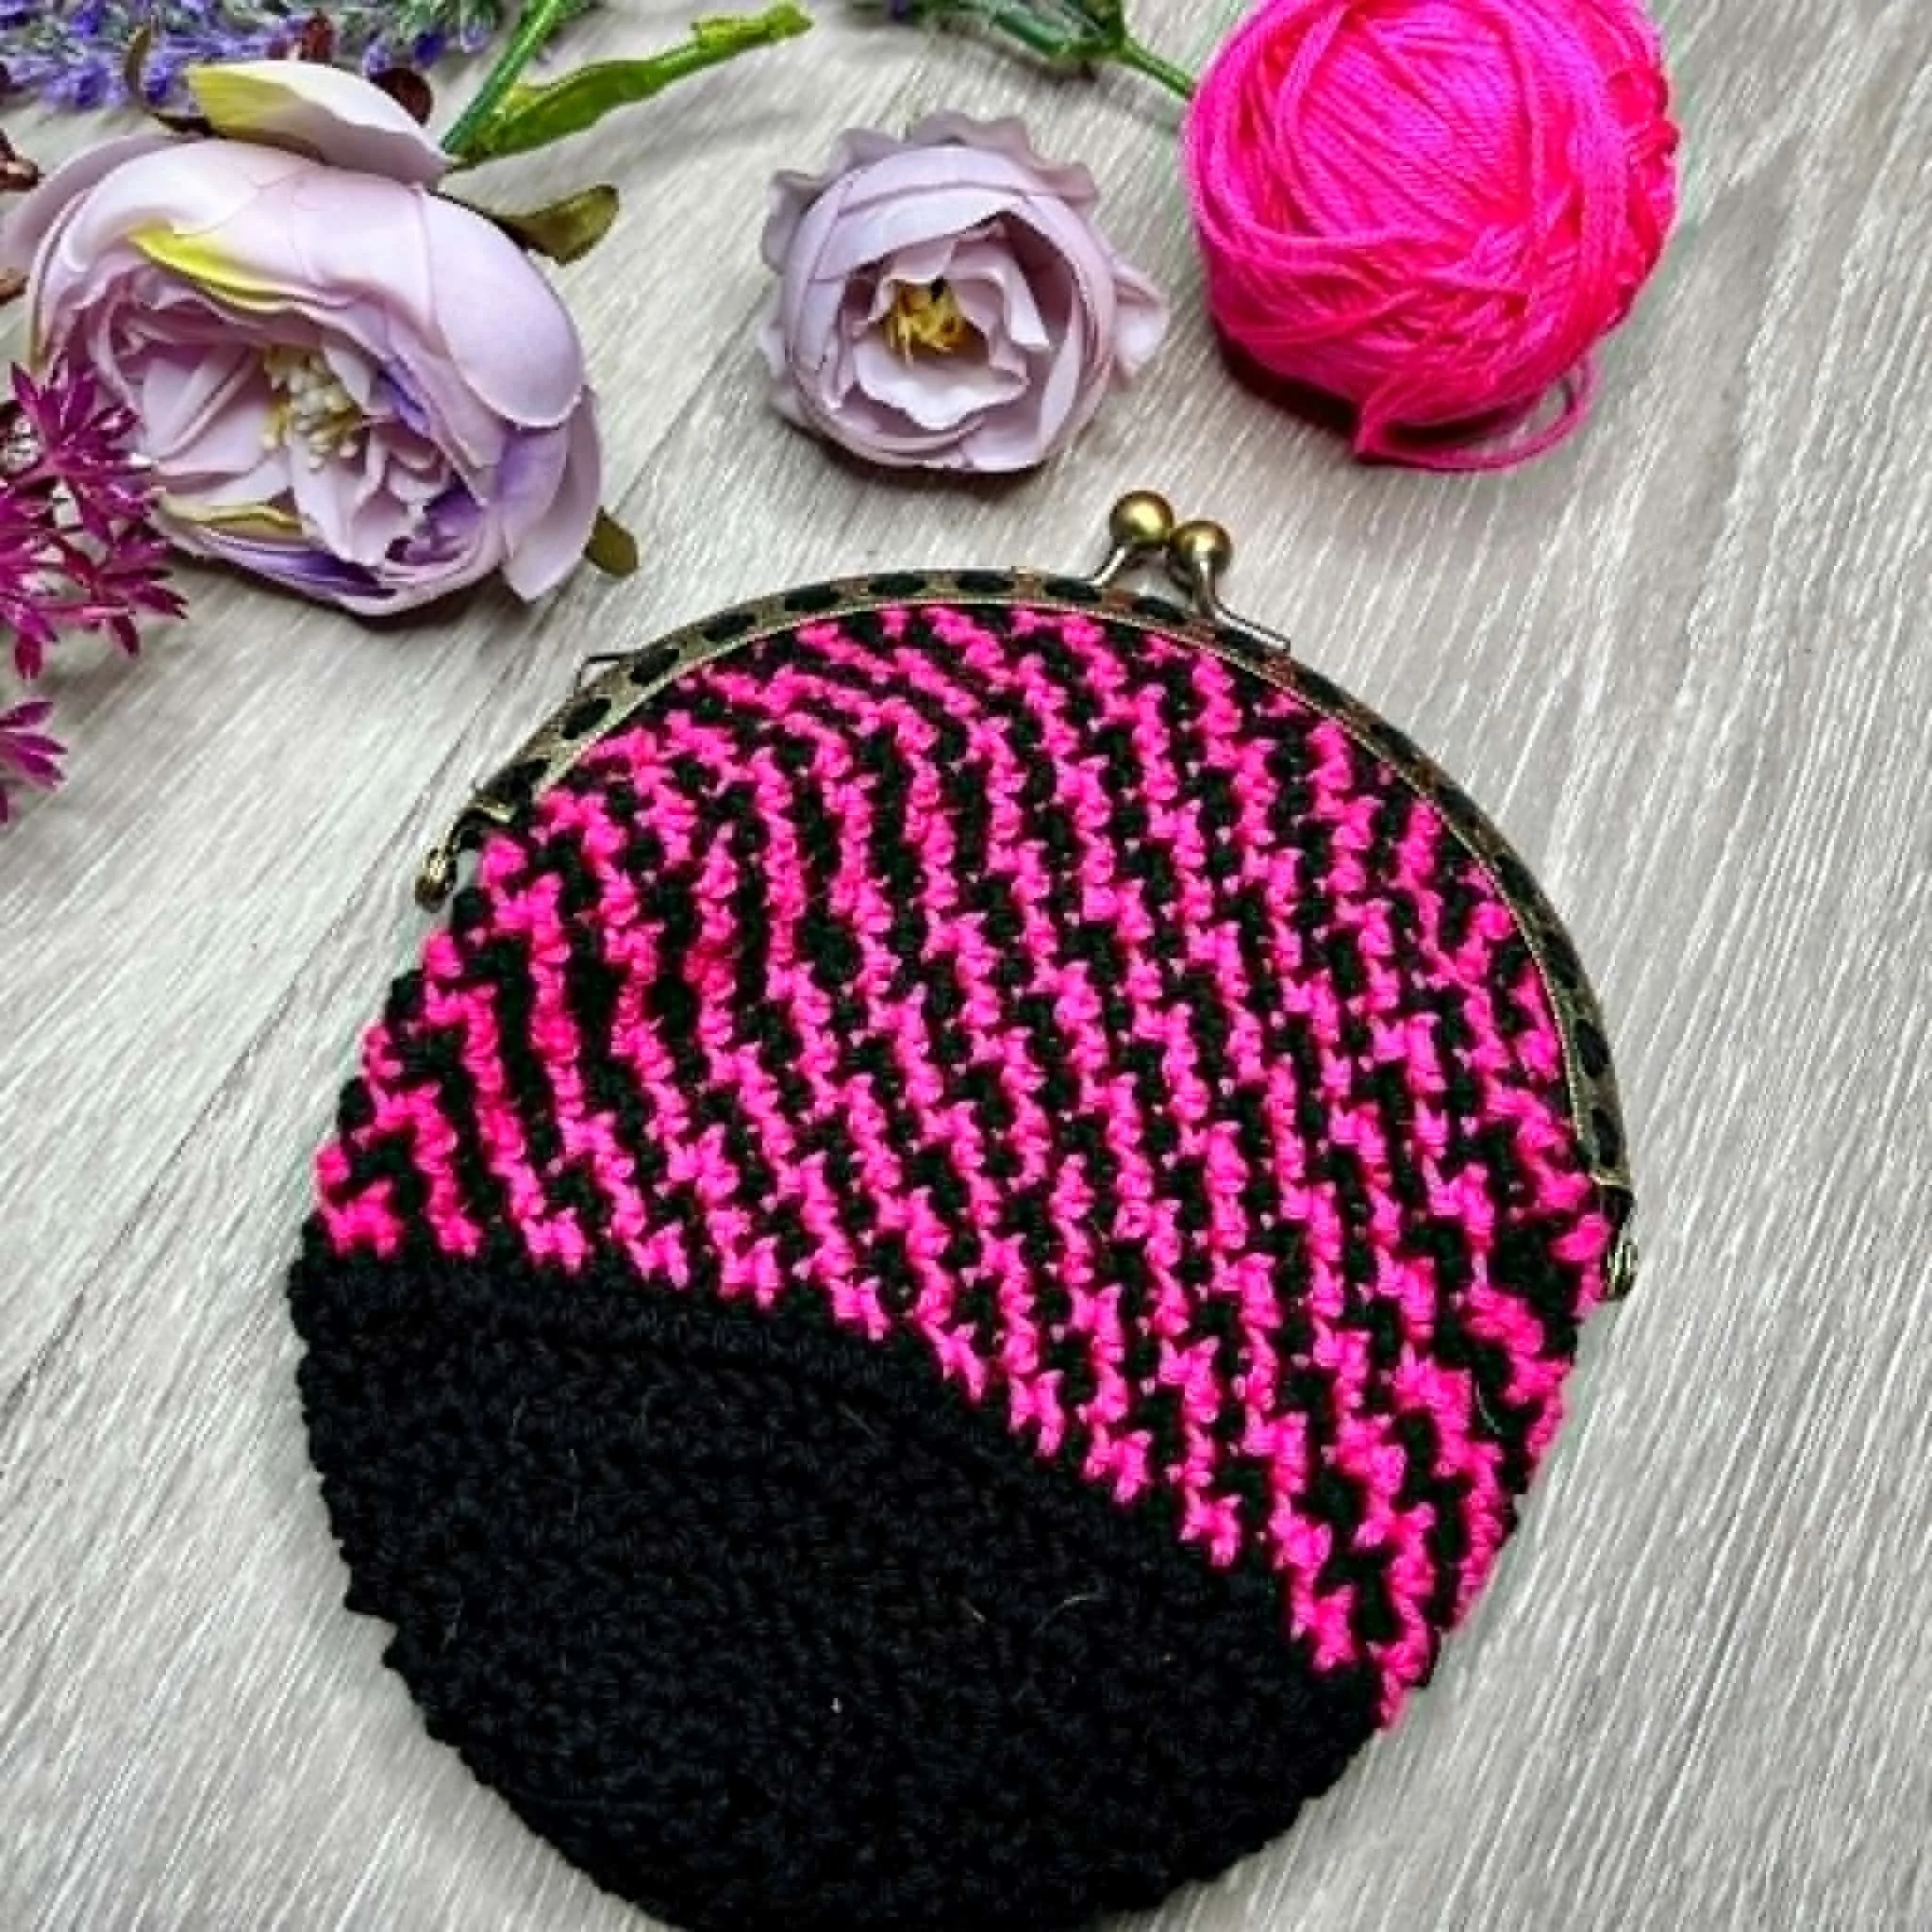
Four separate pieces come together to make this a sturdy little purse. The inner circle adds a feature of its own, with colour peeping through the outer mandala. The flowers are made as you go and not sewn on later.
Instructions are also included in the pattern to make your own polymer clay beads and button. This is quite easy. I don't use any fancy tools to make these as I am always one to improvise and use what you have on hand. Items such as a crochet hook and a lipstick lid are used to get the holes and shapes.
This purse works up quickly and I know several of my testers had family members claiming their finished purses the minute they were finished. Definately a popular item for teenagers.
My testers made this purse in a variety of yarns and colours, each one unique to them. The results were stunning!
A few of my testers bags. 1. By Christy Schuler. In navy and cream and looking fabulous with a two-tone fringe. 2. By Jane Wynne. I love this in the cream with just a hint of blue. 3. By Sharon C. Coys Elderton. I joked with Sharon as anyone who knows me, knows I really don't like green, but Sharon won me over with her beautifully neat stitches. She also made her own polymer clay beads and button (instructions for this are in the pattern ).
This is an advanced beginner to intermediate level project. Instructions include how to make your own polymer clay button and beads if you choose to. Materials: 3.5mm/E hook 5mm/H hook for I-cord 3 x balls Lincraft Dk cotton in black. 100m/109yd per ball. 3 x balls Lincraft Dk cotton in Red. 100m/109yd per ball. 7 x Beads 10mm/0.38-inch or larger. 1 x 40mm button 2 x d-rings or bead circles. 2 x Metal necklace caps/tassel ends. Tapestry Needle. Craft Glue (optional). Polymer Clay (optional if making your button and beads). Acrylic Varnish for craft (optional if making your button and beads.
I had been playing around with Daffodils for a new bag design and decided to turn one of them into a bookmark. If you are looking for a quick and easy make, or maybe you need an end of year teachers gift, these work up fast and look great!
The free version of the pattern is below. A PDF copy is available for a small purchase amount on my ravelry page.
Daffodil Bookmark
USA terms are used.
Materials:
3.5mm/E hook
This is a perfect scrap buster project as only a small amount of each ball is used.
1 ball Cotton Dk in Orange = C1
1 ball Cotton Dk in Yellow = C2
1 ball Cotton Dk in Green = C3
Tapestry needle.
To cater for different size books, adjust the stem chain length.
2large beads with wide holes. I made mine from Polymer clay. Instructions aregiven if you wish to make your own.
Jewellery cap.
Small amount of craft glue.
Abbreviations:
Sc- Single crochet
Dc- Double crochet
Tr- Treble crochet
Slst- Slip stitch
Blsc- Back loop single crochet
Fl- Front loop
Lp- Loop
Ch- Chain
Measurements: 15 ½ inches/39.37cm from top of flower to endof tassel.
Notes:
Chains count as a stitch unless otherwisestated.
Gauge is not a necessity for this project.Size will be determined by hook and yarn selection.
Keep the orange yarn and stitch marker to thefront of your flower when working round 2.
Stitch counts and hints appear in purple.
Making your own polymer beads is optional. Ifpurchasing beads, be sure to buy ones with large holes.
This bookmark is sized for a medium book.Reduce the stem chains if you wish for a shorter bookmark. Increase the stemchains for a larger bookmark.
Flower head:
Round 1: With C1 make a magic circle. Ch1 into a magiccircle (does not count as a st). Sc15 intocircle. Slst to ch1. Remove hook and insert a st marker. Do not fasten off. [15]
Round 2:With C2. Attach yarn with a slst into any back loop of round 1 .*( Ch2, dc1,tr1) into same back lp. Ch3, slst intofirst ch (picot made). (Tr1, dc1,ch2, slst) into next back loop. Slst across next 2 back loop of sc* Rep from *to * 5 times in total. Slst to first ch2 to close round. Fasten off and cut yarn. [5 petals]
Round 3:Remove st marker from C1. Ch1. Sc into each Fl of round 1. Slst to ch1 toclose. [15]
Round 4:Ch1. Sc into each st around. Slst to ch1to close. [15]
Round 5:Ch1 does not count as a st. Place next sc into same sp). * Sc. Ch2, slst backinto first ch of ch2. Sc2tog over next 2 sts.* Rep from * to * around. Closewith a slst. Fasten off and cut yarn.
Stem:
With C3. Ch50. Scinto 2nd ch from hk. Sc acrossto last ch. Work 3sc into the lastch. Turn and work sc along the otherside of the ch. Work 2sc into the last ch. Fasten off and cut yarn leaving a long tail to sew to flower head. Using a tapestry needle sew one end securelyto the back of your flower. [48sc + 3sc + 48sc + 2sc]
Stem
Leaves: (make2)
Leaf make 2.
Using C3. Ch16.Slst into 2nd ch from hook. Sc into next ch. Hdc into next 2chs. Dc across to last 3 chs. Hdc intonext ch. Sc into next ch. Slst into last ch. Fasten off and cut yarn (leave a long tail for sewing). Sew the leaves to the stem, just above thebeads. [2sc,3hdc, 10dc]
Polymer Beads (optional):
Materials Needed
Polymerclay in any colours (available at most craft outlets: I used red for thisproject).
A rollingpin
5mmcrochet hook.
Acrylicgloss varnish.
Paintbrush
Step 1: If using more than one colour ofclay, combine these by working them together. Roll balls approx 10 to 15mm indiameter.
Step 2: Push ahole through the centre of each ball with a 5mm crochet hook end. Push the hookthrough several times from each end of the hole. This ensures the hole is even.
Step 3:Place your beads on an oven tray and bake in a slow oven for approximately 10 to 15 minutes. Allow to cool. Note: It is a good idea to place foil over your beads and tray, prior to baking. This helps keep any smell from the clay contained.
Step 4: Paint with Acrylic Gloss varnishmaking sure to brush out any bubbles. Allow to dry.
Adding Beads and Jewellery cap:
Thread your beads onto the stem end, not attached to the flower. Place a small amount of craft glue inside thejewellery cap and push the stem end onto it. Allow to dry.
Tassel:
1. Wrap yarn 10times around an iPhone or a piece of cardboard approx 3 inches/7.5cm wide.
2. Thread adarning needle with 15cm/5.90inches of yarn and tie the top of the tasseltightly, leaving the tail to tie to your jewellery cap.
3. Remove the yarn from the iPhone/cardboard.
Diagram showing the making of the tassel (above) is from another project. The same technique applies. Wrap yarn around iPhone or cardboard 10 times as per the instructions.
4. Thread adarning needle with approx 20cm/7.87inches of yarn and wrap around the tassel6-8 times tightly. Knot and push the needle down through the wrapping so it canbecome part of the ends.
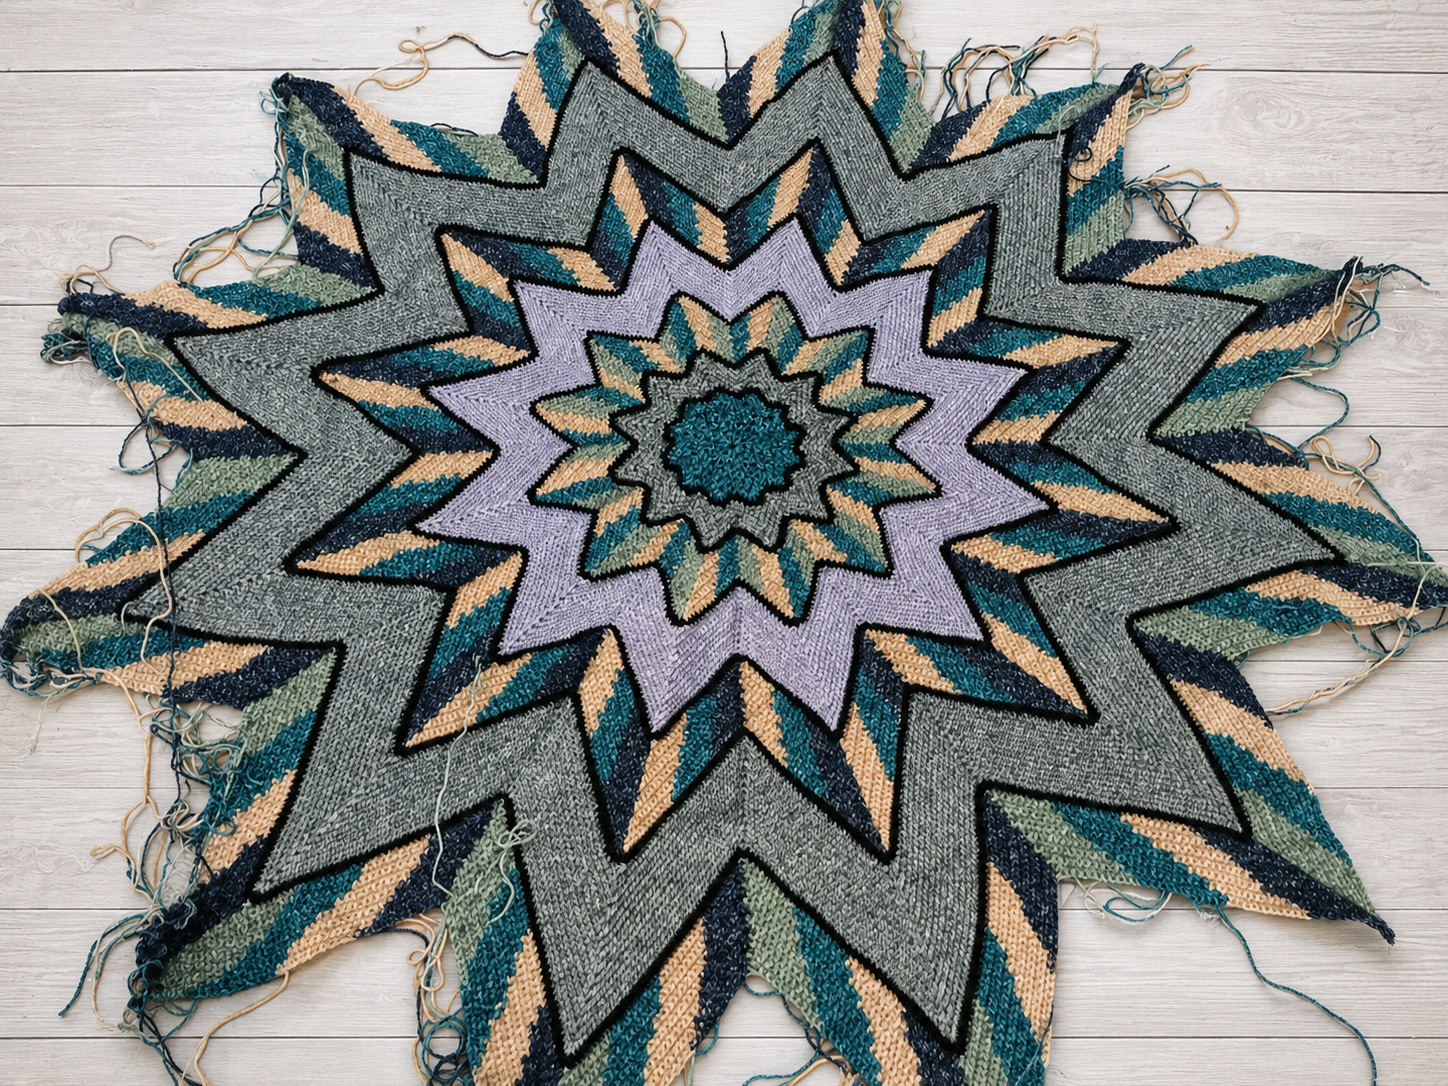
The leadlight is now in the capable hands of my testers and progressing very well!
Truth is that I have them all locked in a small room with their yarn and I refuse to let them out till they complete the testing of this design. Don't worry, I am feeding them occasionally when they work hard enough!
It is extremely exciting to see the blanket come to life in different colours. Each testers colour choices, has added a unique personal touch to their afghan, and made it their own.
The original design uses Stylecraft Batik (available here) in teals, blues, beige and just a hint of green (I grudgingly used green as I felt it needed it, but green is not often a colour I work with). With the use of Stylecraft Dk black to define the edges of each colour and give that stained glass look.
Original Leadlight Design
Kathy chose to use a very bold yellow, which gives the pattern a huge 'wow' factor. The overall effect will be quite stunning once the black comes into play in the final stages.
Bold Yellow
Carrie has chosen to use the Stylecraft Batik Dk (available here) in pinks and purples. I just love the soft effect this is bringing to the design. I am extremely fortunate to have Carrie on-board as a tester, as she also has the ability to Tech Edit a pattern and pick up any errors I may have made.
A vision in purple and pink
Corlia has selected Autumn tonings for her Afghan and I am excited to see how this is going to look, as it grows. Although purple is my favourite colour, I do have a soft spot for oranges and Autumn colours.
Gorgeous Autumn tones. Corlia's picture also highlights the challenge of this project with multiple bobbins in play.
I am very impressed with all my testers on this project. Their work is so neat, especially their organisation with bobbins. I know I did have a tangled mess at times, and their ability to work in such an ordered way tends to put me to shame.
I am aiming for a June (Maybe earlier if I can force my testers to work faster) launch date for this pattern, on ravelry and Love Crochet. So stay tuned for further progress.
Do you ever find yourself watching a show and getting inspired to grab your hook? I do!I have been binge watching Frankie Drake Mysteries of late and just loving the 1920's fashion. Really lovely trousers and dresses. But oh, the hats! I found myself in love with them. Next thing I knew I had my hook in my hand.I am pretty happy with the results and would like to think that Frankie would rock this hat!The hat is out with my long-suffering testers at present and will be published in the next few weeks.This uses a 5mm hook and an Aran or Chunky Yarn. Whichever makes gauge. I made this one with Lincraft Balmy. The hat is one size only. Circumference is 22 inches. Larger or smaller could be achieved using a larger or smaller hook. Or adjusting the yarn thickness.The embellishments on the hat are made using Surface Slip Stitch and the band is done with a length of Ribbon.Watch this space for an update when published.
A very good friend asked me to make a Cowl for her. I had been playing around with Star Stitch at the time and so felt it was a good idea to use it in this Cowl. I also named this after my friend. Sometimes in life, if you are lucky enough you have a person who is always there for you, no matter what. Deb is that person for me!At the time I did not really think this would be a popular pattern. Just goes to show you can never tell what people will love. This pattern is often downloaded more than 450 times in a month.I often tend to do things a little different and the cowl is one of these things. It is made with 2 strands of Aran weight yarn (double). Any Aran could be used Aran weight yarn used. The one pictured was made from Bendigo Woollen Mills Luxury 10 ply. It is so very soft. This is an Australian Yarn and can be purchased online via their web page. A good alternative to this yarn would be King Cole Merino Blend Aran. The same results could be achieved using a Chunky Yarn with one strand.This is a free pattern and can be found in my Ravelry Store and on Love CrochetThis post may contain affiliate links
PATTERN PERMISSIONS
This is a FREE pattern (download is available on ravelry), and by using it, you’re agreeing to the following conditions.You’re welcome to sell what you make with it; for online listings, please link back to my blog (or ravelry) using something like this:
Pattern byAuburncraftAuburncraftcrochet.com
What is not allowed:
Do not resell the pattern, altered or in its original form.
Do not copy and paste the pattern onto your own blog, in a Facebook group, or anywhere else. Link to this page instead (or my ravelry). Doing anything else is copyright theft.
Do not use any of my photos from this site (or any of my other sites) to promote yourself or your crochet business on your own blog, Facebook page, or anywhere else.
Do not post a translation of the pattern anywhere – this is copyright theft. If you would like to help make a translation available, please contact me.
Do not make a video tutorial of this pattern (or any of my patterns).


 Do you ever find yourself watching a show and getting inspired to grab your hook? I do!I have been binge watching Frankie Drake Mysteries of late and just loving the 1920's fashion. Really lovely trousers and dresses. But oh, the hats! I found myself in love with them. Next thing I knew I had my hook in my hand.I am pretty happy with the results and would like to think that Frankie would rock this hat!The hat is out with my long-suffering testers at present and will be published in the next few weeks.This uses a 5mm hook and an Aran or Chunky Yarn. Whichever makes gauge. I made this one with Lincraft Balmy. The hat is one size only. Circumference is 22 inches. Larger or smaller could be achieved using a larger or smaller hook. Or adjusting the yarn thickness.The embellishments on the hat are made using Surface Slip Stitch and the band is done with a length of Ribbon.Watch this space for an update when published.