Help! I'm addicted to W.I.P.S and Yarn!

If you were to fill a room with serious Knitters and Crocheters and ask those who do not have a HUGE stash to step forward, what do you think the outcome would be?

Sure there may be one, or two who step forward as their stash is small and controlled. But maybe they have only just stepped into the dark side of Crocheting/Knitting and are yet to succumb to the lure of those soft, squishy skeins of beauty!!!

The rest of the room would be either trying to avert their gaze, as they know they have more yarn than they can ever possibly use in one lifetime Or they would be standing tall and defiant as it's their yarn, and the world can go suck a big one if they think they are going to change their ways!

I have too much yarn. I do know this. But then how much is too much? Like really!! I have sorted through my skeins of beauty and considered downsizing. I even got rid of a few balls of really cheap acrylic that I was never going to use. It went to someone who does crochet for charity.

But as for the rest, I need them!! What happens if an idea jumps into my head, and I have to wait weeks for an order to arrive? That would just never do!

W.I.P.S, I have them everywhere. I really don't make things from other peoples patterns now. I have way too many ideas careering around in my head to even think about doing other peoples patterns.

If I am being honest I would have over 20 W.I.P.S at least. I do a bit, move on to another one and repeat. Sooner or later I finish most of them, but not always. There is that Ruana that I started well over a year ago, and I am just not feeling it any more.

I am very proud of myself at the moment though! I had an idea leap into my head yesterday and I was itching to place an order for some really lovely yarn I saw. It looks so NICE! It wanted me to buy it!!! I was so close to pressing that order BUTTON. It was begging me to press it!

Go on, you know you want to.

I looked at my stash and pondered it for a bit. Then I remember all that Stylecraft Batik Dk (here), that I had left over from my own Leadlight Afghan (here) and also from many years back where I made Sue Pinners beautiful Carousel Blanket. I had some lovely purples (my favourite) left from that one. This would work! It would look wonderful with what I had in mind. I dragged my hand away from that nasy order button. It was of course still begging me to press it. The order button did not get pressed, and I am using up my stash. Someone please give me a medal or two!!
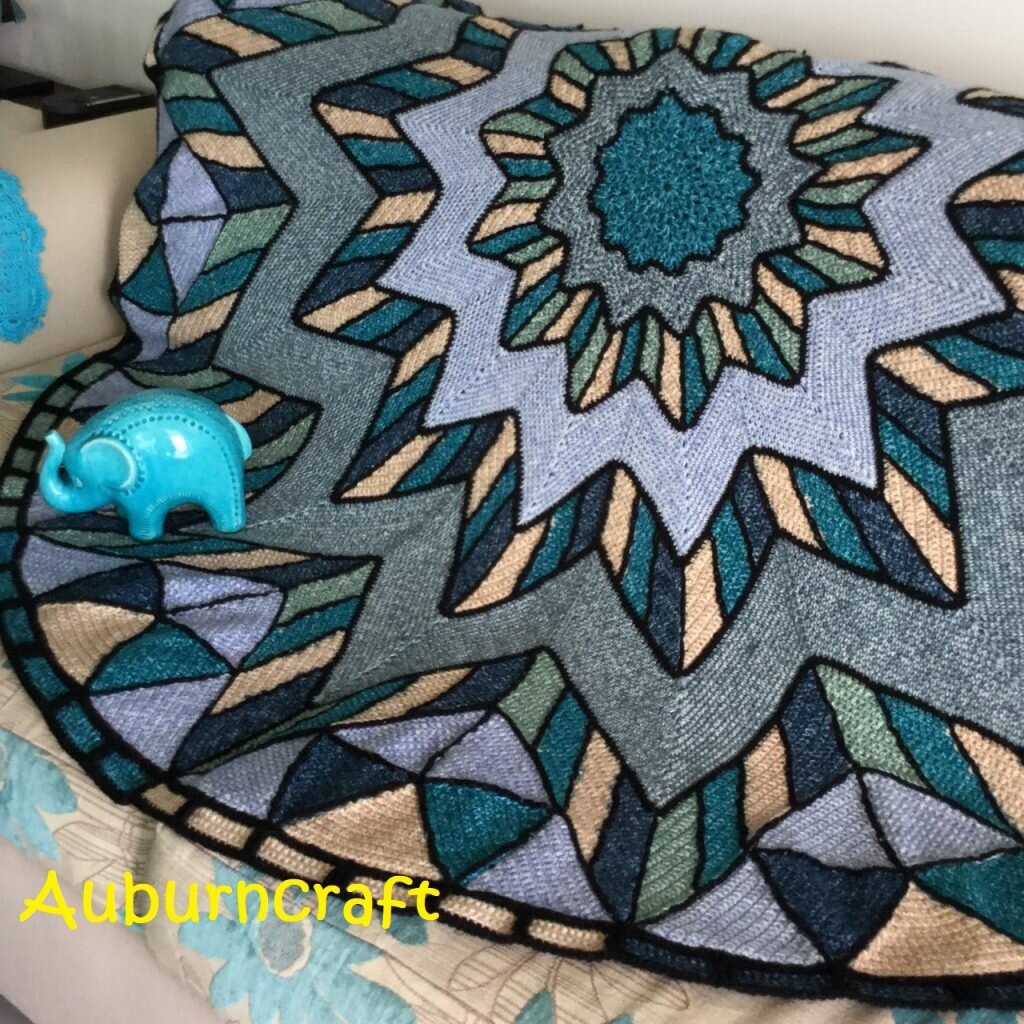
Leadlight Afghan Made from Stylecraft Batik Dk.

What a superior feeling! I dug through my stash and found all those bits and pieces of Stylecraft Batik (which turned out to be quite a bit). I am just loving the colours and this is going to be really lovely. The stitches will be easy and very beginner friendly. It is the colours that will make this special. Excitement Plus!!!
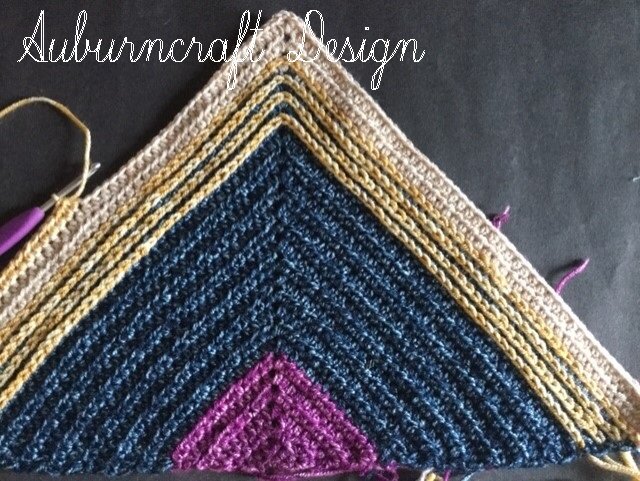
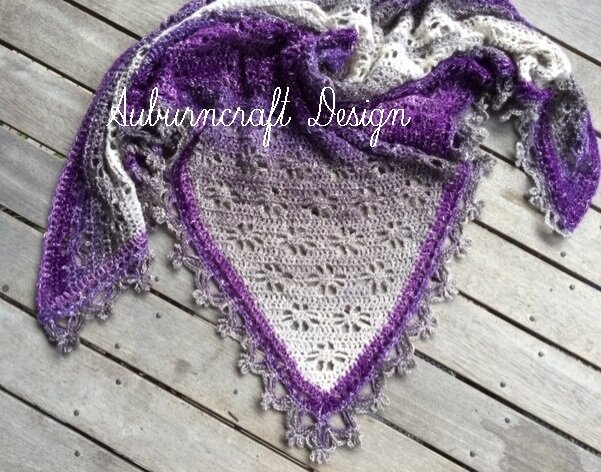
Sneaky Peek of 'Just a Little Bit Batik Shawl'.

So stay tuned for my 'Just a Little Bit Batik Shawl'. Pattern coming soon!!! (That is if I don't decided to start another W.I.P. or even finish something I started ages ago, I really should do that). I can also feel a vest or jacket in this same style is going to be in order.

I may even gift this shawl to a very special relative of mine who loves to follow my crochet with EXTREME interest. I am sure they will love it!!!

This post may contain affiliate links. If you click on a yarn link on my page and purchase yarn, I get a small commission. This does not affect you in any way but helps me to keep my blog going.

Clematis Crochet Shawl Pattern

*Ravelry Discount Link in post . For two weeks only (till 26th Aug 19) buy both the Clematis Shawl and the Vintage Clematis Shawl using the code 'Clematis' and get both for $6. *

I have a few favourite things in life!

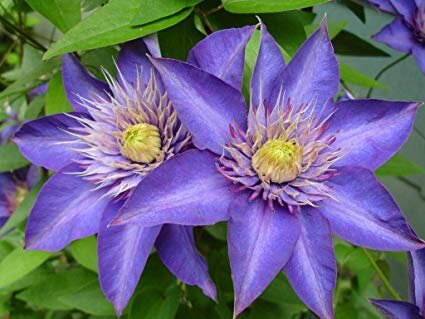
Flowers! I love flowers! Many of the things I crochet incorporate flowers in them as flowers make me happy! The Clematis flower is supposed to be part of the Buttercup family and if this is so, then it must be the cool Aunt, due to its beautiful colours (usually purples, pinks and creams).

Clematis Flower!

I love Purple! Purple makes me happy!

Chances are if I am looking at yarn, my hands will automatically be drawn to the purples. I have always had a love of purple. When I got my own bedroom as a child, my father was silly enough to ask me what colours I wanted in my room. While he didn't let me paint the walls purple, I did get purple curtains and a purple chest of drawers.

So while shopping for some unnecessary yarn (haven't we all been there?), I spotted the Lion Brand Shawl in a Cake (which also comes in a ball). They had a few different colours on offer but of course that Mindful Mauve was just calling to me.

The result is the Clematis Shawl. Pattern available on Ravelry, Love Crochet and Etsy.

Made from Lion Brand Shawl in a Cake. Mindful Mauve.

My long suffering pattern testers were outstanding during the test process. They produced some really beautiful shawls, each with their own individual yarn choices and colours.

Top left: Shawl by Nikki Barker made from Cascade Sateen.
Top Centre: Shawl by Simone Howes made from Stenli Candy.
Top Right: Shawl by Amy Elizabeth Peterson made from Lion Brand Shawl in a Ball, Community Coral.
Bottom Left: Shawl by Opal Pickard made from Lion Brand Mandala in Gnome.
Bottom Right: Shawl by Shaunna Hallon made from Lion Brand Shawl in a Cake.


This post may contain affiliate links. If you click on a yarn link on my page and purchase yarn, I get a small commission. This does not affect you in any way but helps me to keep my blog going.

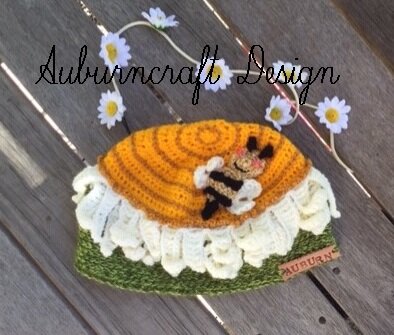
My Very Own Daisy Hat.

This is a paid pattern but will be available on ravelry free for 2 days, ending 27th June Midday Australian Time. The code to use on ravelry is at the bottom of this post. PLEASE GIVE THIS POST A LIKE AND PERHAPS CONSIDER FOLLOWING MY BLOG. This helps me to keep offering free patterns and discounts. So please do not just grab the code and run as this is a small request. The like button for this post is at the bottom of the page.

I love different things!

I especially love things that are colourful and unique! Yes, I would wear this hat if I had made it in Adult size, but this time I decided to stick with just the three sizes. Babies, Toddlers and Children, have all the fun!

My Very Own Daisy Hat

This is a fun hat for Babies, Toddlers and Children.

The pattern is available in Uk and USA Terms.

Sizing available:

  • Baby – 17-inch circumference
  • Toddler -18-inch circumference
  •  Child -19.5-inch circumference

Materials:

4mm hook (Mytension is firm)

1 Ball Stylecraft Special Dk Greengage = C1.

1 Stylecraft Special Dk Cream = C2.

1 Stylecraft Special Dk Sunshine = C3.

1 Stylecraft Special Dk in Gold or a small amount of black yarn in Dk = C4.

1 (very small amount) Stylecraft Batik Gold = C5.

1 (very small amount) Stylecraft Black = C6.

2 x 6mm beads. (Hand sewn eyes).

Cottonthread to sew beads on.

Tapestry Needle.

Sewing Needle.

Code for use on Ravelry 'blogdiscount3'

Please give this post a like and follow my blog for future promotions.

This post may contain affiliate links.

Filigree Flowers Crochet Shawl

If you are looking for a delicate, lightweight shawl then look no further!

The pattern is available on Ravelry, Etsy and Love Crochet (HERE).

Filigree Flowers in Alize Angora gold Simli

Filigree Flowers is a delicate shawl comprised of simple shells for the border and for the main body of the shawl, Solomons/Lovers Knots.

Nestled in between the knots are 4 petal flowers. These are constructed of chains all grouped together. Photo tutorials show how to create these delicate flowers.

If you are looking at this shawl and thinking 'Oh, I can't do that stitch, it looks too difficult,' then you would be wrong!

Lovers/Solomons knot may look a difficult stitch, but it is in fact a simple stitch and works up quickly. Combined together with a shell border and simple flowers the result is quite satisfying.

This is a written pattern in Uk and USA terms, with pictures and graphs to help along the way.

The pattern is a four row repeat and best results are achieved with a light fingering weight yarn. I used Alize Angora Gold Simli for mine.

Success has been achieved with this pattern in several other yarns including Lion Brand Shawl in a ball (available here), Lion Brand Summer Nights and Lion Brand Shawl in a cake (available here).

I love both yarns and while the shawl looks great in the Alize, this is often a little harder to source than the Lion Brand yarn.

I am extremely fortunate to have some fabulous testers and they produced some really lovely shawls.

As for the naming of this shawl....Yes! most of us know what the word Filigree means, but for me it is a little more. I had a gorgeous pure bred Appaloosa Horse with the name Filigree. Her full name was TTT Bar Filigree. I lost her at the age of 23 due to Cushings disease.

She was a character, and was known to push our shed roller door up with her nose, to get at the feed barrels inside.

My husband often had his lunch stolen by her. If he left his esky in the back of his ute and she happened to be in the yard, she would get the lid off with her nose and take his sandwiches.

The birdseed in the bird feeder was a favourite snack of hers, when she was not eating the heads off my dahlia flowers. My kids loved her, and would stop to pat her when they walked down our drive after school! She had a delicate white pattern over her rump and so I named this delicate shawl after her.

Some of my testers shawls. 1. Kim Carlos. 2. Natishia M Curry. 3. Kathy Mant. They all came out beautiful.

This post may contain affliliate links. Clicking on these links does not cost you anything but can help me to keep my blog open. Thank you.

Diamonds Everywhere!

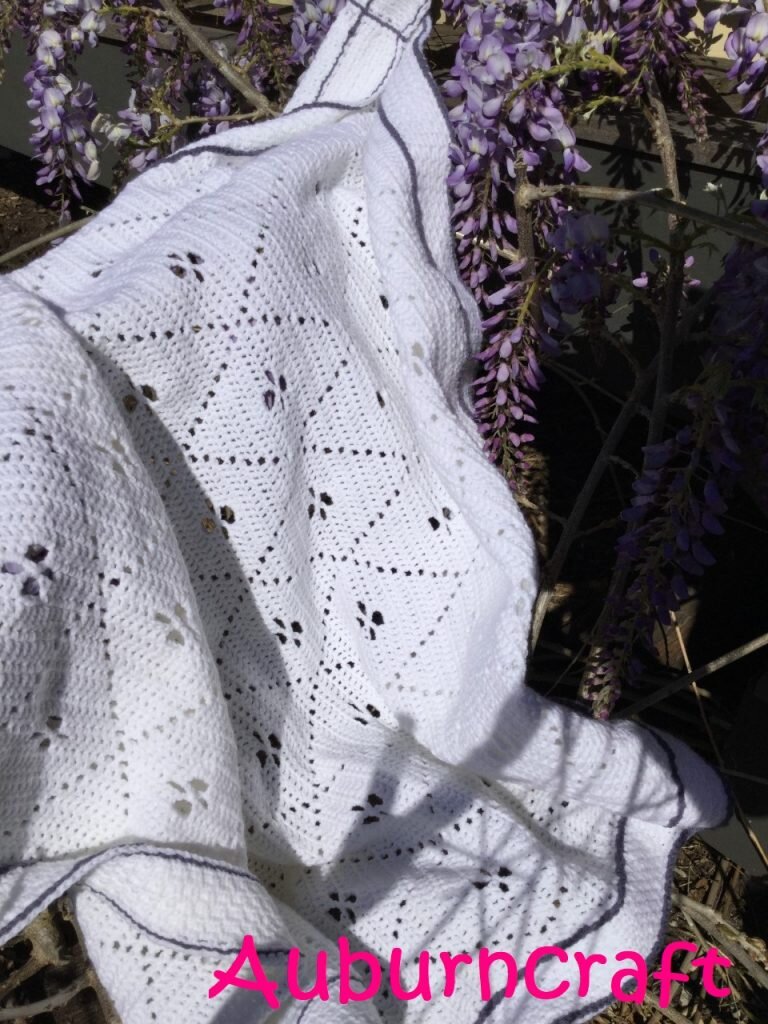
My Diamonds crochet blanket pattern is available in Butterfly Diamonds, Dragonfly Diamonds and Flower Diamonds.

Simple stitches are used making this a beginner friendly pattern. This works up quickly.

Dk yarn is used, although a larger blanket could be achieved with the use of an Aran weight yarn. I used Sirdar Snuggly (available here) which is a lovely soft nylon-acrylic yarn, very suitable for babies.

3.5mm hook 
4mm hook for borders and surface slip stitch 

Flower Diamonds, Butterfly Diamonds and Dragonfly Diamonds crochet patterns are available on Love Crochet (click on blanket names for link).

Flower Diamonds

Butterfly Diamonds

This post may contain affiliate links.

Poppy Meadow Crochet Bag

This is a fun hippy/boho purse with an inner pocket. Self lined with an inner dc/tr circle.

I used Dk cotton for this beauty available here.

Four separate pieces come together to make this a sturdy little purse. The inner circle adds a feature of its own, with colour peeping through the outer mandala. The flowers are made as you go and not sewn on later.

Instructions are also included in the pattern to make your own polymer clay beads and button. This is quite easy. I don't use any fancy tools to make these as I am always one to improvise and use what you have on hand. Items such as a crochet hook and a lipstick lid are used to get the holes and shapes.

This purse works up quickly and I know several of my testers had family members claiming their finished purses the minute they were finished. Definately a popular item for teenagers.

My testers made this purse in a variety of yarns and colours, each one unique to them. The results were stunning!

A few of my testers bags. 1. By Christy Schuler. In navy and cream and looking fabulous with a two-tone fringe. 2. By Jane Wynne. I love this in the cream with just a hint of blue. 3. By Sharon C. Coys Elderton. I joked with Sharon as anyone who knows me, knows I really don't like green, but Sharon won me over with her beautifully neat stitches. She also made her own polymer clay beads and button (instructions for this are in the pattern ).

This is an advanced beginner to intermediate level project. Instructions include how to make your own polymer clay button and beads if you choose to. 
Materials: 
3.5mm/E hook 
5mm/H hook for I-cord 
3 x balls Lincraft Dk cotton in black. 100m/109yd per ball. 
3 x balls Lincraft Dk cotton in Red. 100m/109yd per ball. 
7 x Beads 10mm/0.38-inch or larger.
1 x 40mm button 
2 x d-rings or bead circles. 
2 x Metal necklace caps/tassel ends. 
Tapestry Needle. 
Craft Glue (optional). 
Polymer Clay (optional if making your button and beads). 
Acrylic Varnish for craft (optional if making your button and beads.

Find the pattern on Ravelry. Etsy and Love Crochet (click on place name)

This post may contain affiliate links! By using them it costs you nothing but can help me to keep my blog going. Thank you.

When you forget to pack your crochet and life happens!

Most people have probably seen the ads for the American Express card in which the motto is, 'Don't leave home without it'.

Yes, a few of you are nodding as you know the ads I mean!

Well for us die-hard crochet maniacs, while a credit card is a very important thing to have on hand, say for if you need to duck into a yarn store or two. Michaels could be having a flash sale and then that card will be your best friend............but I think for most of us, the top of the list of what to take on leaving home, would be an emergency crochet WIP.

You know how it is! You are going about your day and the unexpected happens and you get stuck somewhere. I had one of those days this morning.

I was leaving the gym after a rather strenuous pump class and got to my car, my car must have been in a rather selfish mood as it had a flat tyre. Surely it knew I was actually a bit tired and would rather not have this delay. I did plead with it to not have a flat tyre, but it was refusing to listen. As I stated, SELFISH!

I looked at the tyre and thought about it for a bit. My dad ensured that I knew how to change a tyre and I am pretty darn good at it. Mind you I have told my long-suffering husband that we really need a better jack than what is in the car. It takes longer to get the car up on the jack, than it does to change the tyre. So with this in mind I considered just how much air was left in this tyre, how tired I was, and I made the sensible decision to drive the 200 metres to the tyre shop down the road.

Now they were great and got stuck into changing that tyre right away. But as I sat there, waiting I was also kicking myself. This was prime crochet time. Sitting there, hands idle, nothing to do. I had left all approximately 30 WIPS at home.

I thought about the Girl Guides we have in Australia (for anyone in the USA this is sort of like a Scout) and their Motto "Be Prepared". Well I was not! I guess I can excuse my lack of preparedness due to the fact that I was never a Girl Guide, although I was a Brownie, which is sort of an understudy to Girl Guides. Once initiated into this group you get put into a sub group, some of which were Pixies, Elfs, Leprechauns and I forget what else. As an added incentive to becoming a Brownie you get to wear a hideous poo brown pinafore. I wanted to be a Pixie, but of all the sections to be put in, I got Leprechaun. No wonder I hate green!

Well being a Brownie was obviously a waste of time. Don't think I paid a lot of attention to the Brownie code at all as none of it helped me today. I was not prepared!!

So lesson learnt. I won't make that mistake again! What a boring 15 MINUTES that was! Imagine how many rows I could have done in that time!

Time to pack the car with an emergency WIP!

SO, DON'T FORGET TO TAKE YOUR CROCHET WHEN YOU LEAVE HOME!!!

Crochet! Go big, or go home!

Sounds great in theory! And I always have grand ideas that seem to take forever from idea to completion.

Last huge idea I had took over two years to complete, and I think I am sizing myself up for a similar experience.

I bought yarn for a large size Afghan approximately a year ago. For this one I am using Stylecraft Aran with wool. (available here). These are fabulous for a larger project as they come in these huge 400g balls.

Then I spent many hours designing a graph for it. In my head the Afghan has two picture panels. These panels have cats on them.

Sounds easy doesn't it? I got as far as putting the cats on the crochet panel via cross stitch and found I was a stitch out somewhere.

Cross-stitch on crochet is not hard. At least it isn't till you make a boo, boo and have to frog back several hours work. These cats were staring at me with their yellow eyes in a mocking manner. Something wasn't right! The cats refused to tell me what the issue was, selfish things!!!

So this has been one of those projects that gets taken out of the naughty corner for a bit, stared at, glared at, and I even begged it to show me what I was doing wrong.

For ages this horrid thing refused to answer and lay despondent in the naughty corner, cats, half done and sulking.

I worked my way through several million WIPS that had been piling up and decided it was time to take another look. It was as if a light bulb went off and all of a sudden it was clear. Why didn't I see that ages ago? After all it is pretty darn obvious!!!

I am now happily working on my Cat Afghan again and while this is going to take a bit of time to complete, it is going to be A-MAZ-ING!!!

Cross-stitch cats.

Daffodil Crochet Bookmark.

I had been playing around with Daffodils for a new bag design and decided to turn one of them into a bookmark. If you are looking for a quick and easy make, or maybe you need an end of year teachers gift, these work up fast and look great!

The free version of the pattern is below. A PDF copy is available for a small purchase amount on my ravelry page.

Daffodil Bookmark

USA terms are used.

Materials:

3.5mm/E hook

This is a perfect scrap buster project as only a small amount of each ball is used.

1 ball Cotton Dk in Orange = C1

1 ball Cotton Dk in Yellow = C2

1 ball Cotton Dk in Green = C3

Tapestry needle.

To cater for different size books, adjust the stem chain length.

2large beads with wide holes. I made mine from Polymer clay. Instructions aregiven if you wish to make your own.

Jewellery cap.

Small amount of craft glue.

Abbreviations:

Sc- Single crochet

Dc- Double crochet

Tr- Treble crochet

Slst- Slip stitch

Blsc- Back loop single crochet

Fl- Front loop

Lp- Loop

Ch- Chain

Measurements: 15 ½ inches/39.37cm from top of flower to endof tassel.

Notes:

  • Chains count as a stitch unless otherwisestated.
  • Gauge is not a necessity for this project.Size will be determined by hook and yarn selection.
  • Keep the orange yarn and stitch marker to thefront of your flower when working round 2.
  • Stitch counts and hints appear in purple.
  • Making your own polymer beads is optional. Ifpurchasing beads, be sure to buy ones with large holes.
  • This bookmark is sized for a medium book.Reduce the stem chains if you wish for a shorter bookmark. Increase the stemchains for a larger bookmark.

Flower head:

Round 1:  With C1 make a magic circle. Ch1 into a magiccircle (does not count as a st). Sc15 intocircle. Slst to ch1. Remove hook and insert a st marker. Do not fasten off.  [15]

Round 2:With C2. Attach yarn with a slst into any back loop of round 1 .*( Ch2, dc1,tr1) into same back lp.  Ch3, slst intofirst ch (picot made).  (Tr1, dc1,ch2, slst) into next back loop. Slst across next 2 back loop of sc* Rep from *to * 5 times in total. Slst to first ch2 to close round.  Fasten off and cut yarn. [5 petals]

Round 3:Remove st marker from C1. Ch1. Sc into each Fl of round 1. Slst to ch1 toclose. [15]

Round 4:Ch1.  Sc into each st around. Slst to ch1to close. [15]

Round 5:Ch1 does not count as a st. Place next sc into same sp). * Sc. Ch2, slst backinto first ch of ch2. Sc2tog over next 2 sts.*  Rep from * to * around.  Closewith a slst. Fasten off and cut yarn.

Stem:

With C3. Ch50. Scinto 2nd ch from hk.  Sc acrossto last ch.  Work 3sc into the lastch.  Turn and work sc along the otherside of the ch. Work 2sc into the last ch. Fasten off and cut yarn leaving a long tail to sew to flower head.  Using a tapestry needle sew one end securelyto the back of your flower. [48sc + 3sc + 48sc + 2sc]

Stem

Leaves: (make2)

Leaf make 2.

Using C3. Ch16.Slst into 2nd ch from hook. Sc into next ch. Hdc into next 2chs.  Dc across to last 3 chs. Hdc intonext ch. Sc into next ch. Slst into last ch. Fasten off and cut yarn (leave a long tail for sewing).  Sew the leaves to the stem, just above thebeads. [2sc,3hdc, 10dc]

Polymer Beads (optional):

Materials Needed

  • Polymerclay in any colours (available at most craft outlets: I used red for thisproject).
  • A rollingpin
  • 5mmcrochet hook.
  • Acrylicgloss varnish.
  • Paintbrush

Step 1: If using more than one colour ofclay, combine these by working them together. Roll balls approx 10 to 15mm indiameter.


Step 2: Push ahole through the centre of each ball with a 5mm crochet hook end. Push the hookthrough several times from each end of the hole.  This ensures the hole is even.

Step 3:  Place your beads on an oven tray and bake in a slow oven for approximately 10 to 15 minutes. Allow to cool. Note: It is a good idea to place foil over your beads and tray, prior to baking. This helps keep any smell from the clay contained.

Step 4: Paint with Acrylic Gloss varnishmaking sure to brush out any bubbles. Allow to dry.

Adding Beads and Jewellery cap:

Thread your beads onto the stem end, not attached to the flower.  Place a small amount of craft glue inside thejewellery cap and push the stem end onto it. Allow to dry.

Tassel: 

1. Wrap yarn 10times around an iPhone or a piece of cardboard approx 3 inches/7.5cm wide.

2. Thread adarning needle with 15cm/5.90inches of yarn and tie the top of the tasseltightly, leaving the tail to tie to your jewellery cap.

3. Remove the yarn from the iPhone/cardboard.

Diagram showing the making of the tassel (above) is from another project. The same technique applies. Wrap yarn around iPhone or cardboard 10 times as per the instructions.

4. Thread adarning needle with approx 20cm/7.87inches of yarn and wrap around the tassel6-8 times tightly. Knot and push the needle down through the wrapping so it canbecome part of the ends.

5. Tie the Tassel to the Stringing Jewellerycap.

6. Cut the ends of the Tassel and trim evenly.

 
Thank you to my wonderful testers:

 Agnès Arcarons, Kathy Dodge, Bethany Colhoff, Amy Belanger Dreffs, Heather Greene, Patsy Breaux Cantor

One of my fabulous tester's bookmarks. Agnès Arcarons.

Kathy Dodge's test bookmark.

This page may contain affiliate links.

Leadlight Crochet Afghan/Blanket

You know that moment, that very special moment when you have worked really hard at something so it is unique, one of a kind? You press the publish button on the pattern and fingers crossed, people will like it and want to make it.

Today has been a button pressing and publishing day for me! My Leadlight Afghan decided to become an idea in my head in 2016. And today it has finally found its way to being published.

The pattern can be found on Ravelry, Etsy and Love Crochet. (click on place name)

It took my testers around four months to work their way through the 96 pages of pattern. They did a fantastic job. So Thank you to Carrie Skach, Kathy Mant, Bethany Colhoff and Corlia Van Zyl. This was a LOT of work to test!

The Leadlight is made from Stylecraft Batik Dk (available here)in the following quantities:

Materials 

5mm hook 

5 Stylecraft Batik Teal 138m/151yrd= C1 

3 Stylecraft Special dk Black = C2 

5 Stylecraft Batik Storm 138m/151yrd = C3 

5 Stylecraft Batik Biscuit 138m/151yrd = C4 

3 Stylecraft Batik Sage 138m/151yrd = C5 

4 Stylecraft Batik Indigo 138m/151yrd = C6 

5 Stylecraft Batik Lupin 138m/151yrd = C7 

This post may contain affiliate links. By clicking on these links it costs you nothing but will be helping me to keep my blog going.
Crochet Bags, bags and more bags!

Lately, I have been making bags!

I made the 'Billy Thunder' Tote and was pleased with that (and I got to play with beads, which is always a good thing.)!

Billy Thunder Tote

Next was my Re-mojonation purse/bag and I was super happy with that one.

Re-mojonation bag

Then I moved on to 'Field of Flowers' (which is a mess of flowers on a bag and a fantastic stash buster). I do love flowers! I also got to play with polymer clay with this one. Clay is fun to play with, as long as you remember to keep the oven to a slow temperature. Not a lot of fun if you forget. Toxic fumes are not fun!

Field of Flowers is at present in the hands of my long-suffering testers and will hopefully be listed early next month. I am forcing them to work day and night to get it done, so it should be good!

Field of Flowers Tote

I showed Field of Flowers to one of my non-crocheting friends (Yes, I do have one!). This friend is mad, crazy, obsessed with the colour 'RED'. Red is not a colour that I am totally drawn to. I prefer purples and oranges. Anything on the spectrum of those colours and I'm drawn like a moth to a flame.

If I was asked to get rid of a couple of colours in the world, never to be seen again. I would probably get rid of GREEN first, as I hate green. I told my red obsessed friend the other day that green should only ever be seen on a plant or grass. She did agree!

There I would be acting as colour designer to the world and banishing Red and Green. I can imagine them both sulking and refusing to leave! Begging me to let them stay. But I would be firm in my decision as they headed for the exit door offering excuses as to why they should stay! Although I guess Red Roses would be missed! Maybe I could be generous and make a dispensation for Valentines day!

I could make a proclamation: Here yee, here yee. I hereby declare that there may be Red (and I guess Green too) on Valentines Day! But only on Valentines Day!

The world could do without green for sure. Imagine a world full of Purple and orange trees and plants! Throw in a bit of pink and this is a world I could dance in! That would rock!

We could do without red! Couldn't we? My red obsessed friend would vehemently disagree with me and I do have to admit it would seem rather odd not seeing this person dressed in red and driving her red car.

And I guess it could be an issue, due to the fact that I am a redhead.


Yes, yes, this sounds like a contradiction as I love my hair colour, but red hair is totally different to the actual primary colour red, so don't start there! I guess if I ended up with purple hair it would not be the end of the world. Look at how many nannas rock the purple dyed look!

My father would have hated a world without red in it. Red was his favourite colour and he loved his red truck. But this is my imaginary world and RED has to go!!!

I wonder where my dislike of Green and Red comes from. Red is just such an, in your face colour and doesn't go with that many other colours all that well. And always having people suggest I should wear green, probably didn't help the colour green. 'It will go with your hair' they say. Yeah sure, if you want me to look like a potplant! Yes, I love flowers, but I don't want to look like a potplant! Every time I put on something green I just hated it.


But bags, back to the subject of bags! After showing off my Field of Flowers Tote, I decided (after talking to the red obsessed friend) that I did need to produce one with red flowers in purse size. I added a red lining inside so the red peeps through from the back, adding an extra touch to the design. This little beauty is in the capable hands of my testers!

Poppy Meadow Bag

I have two other bags in the works. One is part done, and the other is just stewing around as an idea in my head (and no, in my head it is not red or green in colour, but a lovely shade of lilacs and blues).

I have a ton of ideas for different crochet bags! And I have the stash to do them all (insert evil laugh here)!!! I will take over the world one crochet bag at a time!

Keep an eye out for my latest two coming soon to a ravelry/etsy/love crochet pattern store near you (well at least a computer click away).

Technicolour Yawn Freeform Vest!

I love colour! I love flowers! I love crochet! What a great mix of things!

They just had to be combined together. So I started this Freeform Vest around an aeon ago!

Freeform can be challenging and I thought this one had got the better of me. It got thrown into the naughty corner as I was not happy with it. I refused to even look at it for quite a while. I had darts in the back and they were just not working.

I dragged it out from the depths of the cupboard two weeks ago. I took to it with the scissors in a mad frenzy and removed the darts. Of course this left gaping holes where they were. So I slowly started to repair the damage. I would do a bit, undo a bit more, repeat, repeat, repeat!

The armholes were a pain! They were too small! The wrong shape! The wrong colour! Just not right and blatantly mocking me! So out came the scissors again!

I love purple!

Once I had the vest together and was happy with it, I then had to face the ends and sewing them in.

The ends! Oh the ends! So many ends! I did despair that I would never get them all sewn in. But last night I sewed the very last one in. This was followed by happy dancing! No humans were around, so I shared my excitment with my best friend and constant companion, Stella (cocker spaniel). Needless to say she was impressed. Not only with the vest, but with my dancing too!

This is made from pure wool, so is rather heavy. The buttons I made from polymer clay and there is a 'how to' on my blog about making them.

I intended to do sleeves on this, but decided I may actually get to wear it here in QLD if I made it sleeveless. Who knows I may even add sleeves at a later date. Although I did run out of purple yarn in the final stages, and had to join several pieces to finish the armholes.

Funky Buttons! Make Your Own to Add Flair to Crochet!

Below I outline how to make the spiral buttons and the flower button.

Spiral Button:

I am on the home stretch of a freeform crochet masterpiece (in my own mind) that I have been working on for ever! It is a hodge, podge mess of flowers and anything else I think of at the time. Made from pure wool and quite heavy to work on.

I started this possibly 18 months or 2 years ago. It has been in and out of the naughty corner quite a bit. I have frogged (unpulled), redone, frogged again, changed my mind multiple times, and I even took to it with the scissors recently. The heading picture is of my coat in progress.

Despite all this frustration, it is now starting to look like a coat, or vest. I am yet to decide if I can tolerate doing sleeves on it.

My mind is now turning to buttons. I need unique buttons for this unique jacket. They must be a statement of epic proportions! Something that reflexs the hours of frustration this coat has brought me. I have looked high and low for these gems but with no success. Nothing has yelled 'these are the ones' at me. I had to find something that I feel is unique enough to do justice to this piece of freeform.

Last night I had a light bulb moment and today I created my own buttons using polymer clay. I want to share this easy way of making your own unique buttons with you:

Materials:

  • Polymer clay in two colours (available at most craft outlets).

  • A rolling pin

  • A wooden kebab skewer (or a darning needle will do)

  • Acrylic gloss varnish

  • Paint brush

  • Knife

Step 1:

Roll your clay out into two thin sausages, no more than 5mm thick.

button-poly-5.jpg

Step 2:

Put the two pieces together with one length slightly longer to begin the curving. Slowly roll your pieces together. When you are at the size of button you require, cut the clay on an angle.

button-poly-6.jpg

Step 3:

Gently rub at the ends you cut to work them into the rounded shape you need. Squash the button flat and gently rub to make certain the pieces grab together. I wanted an oval shape so I squashed my circle a little.

button-poly-4.jpg

Step 4:

Using your wooden kebab skewer or darning needle, push holes into the top of the button. If making more than one button, place the first button with holes on top of any following buttons to find exact placement.

button-poly-3.jpg

Step 5:

Place your buttons on an oven tray and cover with foil. Bake in a slow oven for approximately 15 minutes. Allow to cool.

Step 6:

Paint with Acrylic Gloss varnish making sure to brush out an bubbles. Allow to dry.

button-poly.jpg

My buttons are roughly 40mm in size. Enjoy your unique handmade buttons!

buttons-poly-fin-1.jpg

Flower Button

This little button is for a new Tote bag I am working on 'Field of Flower', which will hopefully be in the testing stage soon.

Like many of my other projects it is a unique bag and the name says it all. I wanted a button that would reflex that. I decided to make a flower this time!

I have mentioned before that I don't have a huge array of tools for specific things. I tend to use what I have at hand. You will see what I mean below with my use of an old lipstick lid.

Materials:

  • Polymer clay in two colours (available at most craft outlets).

  • A rolling pin

  • A wooden kebab skewer (or a darning needle will do)

  • Small round object to make petal shapes (I used an old lipstick lid).

  • Acrylic gloss varnish

  • Paint brush

  • Knife

Step 1: With colour 1 of your polymer clay, roll a piece into the a ball about the size of a walnut.

Step 2: Flatten the ball with your rolling pin.

Step 3: Using your lipstick lid, mark the petals by pressing this into the clay.

Step 4: With a sharp knife, gently cut away between the petals.

Step 5: Smooth the edges with your finger.

Step 6: With colour 2 of your polymer clay, roll a piece smaller than your first colour into a ball.

Step 7: Flatten the ball with your rolling pin. Using your lipstick lid, cut a neat circle. Smooth the edges up with your finger.

Step 8: Place the colour 2 circle on top of your flower.

Step 9: Using your wooden kebab skewer or darning needle, push holes into the top of the button. If making more than one button, place the first button with holes on top of any following buttons to find exact placement.

Step 10: Place your buttons on an oven tray and cover with foil. Bake in a slow oven for approximately 15 minutes. Allow to cool.

Step 11: Paint with Acrylic Gloss varnish making sure to brush out an bubbles. Allow to dry.

My Flower button measures approx 50mm

Mended Fences Crochet Shawl

Put your hand up if you think Solomons/Lovers knot looks scary!

Yeah, I bet you considered putting your hand up. Most people do look at the stitch and think that it must be really difficult. It isn't!

I thoroughly enjoyed designing this little shawl. It is comprised of a simple two row repeat. Testers with all levels of ability have made this, with success.

I used Alize Angora Gold for mine, but my testers used various yarns. Light fingering works best and Lion Brand Shawl in a ball works up beautifully.

Amanda Corniello's Mended Fences made using Lion Brand Shawl in a ball

The shawl is worked on a 5mm/H hook and is a simple rectangle shape. It works up quickly, and would be beautiful addition to wear for any special occasion, lightly draped across your shoulders.

The pattern is available in my Auburncraft store on Ravelry.

Please give the pattern some love on Ravelry and pop it in your favourites.

Also please remember that my patterns are copyrighted.

SueStapleton/Auburncraft—Please do not copy/sell pattern as your own work ordistribute without my permission.  Pleaseshare a link to my blog or ravelry, NOT MY PDF.   You may sell finished items but pleasecredit me as the designer.  Read more aboutAustralian copyright laws here: http://copyright.org.au/ACC_Prod/ACC/ 

Filet Crochet. Adding Flowers. So you want to know HOW!

I enjoy a bit of Filet crochet and have done my fair share over the past few years. while Filet crochet is fabulous on its own, it can be so much more than just blocks and spaces.

I have to say I love flowers! Flowers make me happy!

I have a couple of patterns in the design stage that incorporate 3D flowers into the filet or hole spaces of the work. This may look harder than it actually is. In reality it is a simple technique and can be done in two different ways. It does not remain exclusive to just filet crochet, but can be done on any crochet by adding in a filet hole where you want the flower.

The two methods are:

As you go, using the same colour yarn or, after completion of your filet piece and using a different colour.

Here I outline these methods:

Method one: Worked in different colour yarn:

Adding that 3D look to filet work. It's easy!

USA TERMS:

  • Step 1: Attach yarn with a slip stitch into the top chain space of your Filet hole. Into this space work (sc, dc, tr, tr, dc, sc) one petal made.

  • Step 2: Rotate your work to the right. Around the side of your dc filet stitch work

  • (sc, dc, tr, tr, dc, sc).

  • Step 3: Rotate your work to the right. Around the chain space of the previous row work (sc, dc, tr, tr, dc, sc).

  • Step 4: Rotate your work to the right. Around the side of your dc filet stitch work

  • (sc, dc, tr, tr, dc, sc). Slip stitch to top of first petal sc to close. Fasten off and cut yarn. Sew in any ends.

field-of-flower-one-side-2.jpg-wm.jpg

My latest design 'Field of Flowers'

Method two: Worked as you go, using the same yarn.

  • Step 1: Working on a wrong side row, complete your Filet hole. Turn your work so you now have right side facing.

  • Step 2: Work (sc, dc, tr, tr, dc, sc) into the chain space just created. One petal made.

  • Step 3: Rotate your work to the right. Around the side of your dc filet stitch, work (sc, dc, tr, tr, dc, sc).

  • Step 4: Rotate your work to the right. Around the chain space of the previous row work (sc, dc, tr, tr, dc, sc).

  • Step 5: Rotate your work to the right. Around the side of your dc filet stitch (last stitch created) work (sc, dc, tr, tr, dc, sc). Slip stitch to top of first petal sc to close. Turn your work and continue on with your project.

3D Flowers. As you go method!

So go on! Now you know how to add a bit of flare or colour to your filet work. Colour the world with Flowers!

A flower doesn't love or hate you, it just exists. Mike White.

Crochet Pattern Free! But What Does it MEAN?

This week has had good and bad. I released a pattern (Billy Thunder Tote) and it made it to number one on ravelry, which is pretty darn awesome. I was dancing around like I had just won the yarn lottery and got free yarn for a year.

Unfortunately, this had a damper put on it due to a copyright issue.

You may be thinking, 'What has this to do with free patterns.' A lot!

I decided to list this pattern for one month free. I did this to try and get interest in the pattern, and it certainly has worked. Did I mention it made number one on ravelry? (Yes I am blatantly bragging.)

To have a pattern get to number one is super fantastic as you never know what designs are going to gel with people. Ones you think will go well, may not and visa versa. So it is a real buzz when it happens.

Number one in whats hot now.

Then we get to the unfortunate side of things!

I discovered simply by accident that one of the Facebook Crochet Groups here in Australia had put my pattern up as a PDF in their group. It was made worse by the fact that an administrators of this group was the person who had put it up.

You may think, 'what does it matter? Its free isn't it'. And yes it was free at the time, but with a clear deadline for the end of this. The group in question has almost 7,000 members. So by putting up my pattern as a PDF in a file on their group, they were basically removing any future sales I may get from it. I was getting absolutely no advertising or credit from this as it was just my PDF, no write up, nothing, not even my name beside the PDF.

Most Designers offer free patterns to:

  • Draw attention to their other patterns.
  • Attract people to their blogs and web pages etc. Some have affiliate links which reimburse them slightly for the free pattern, by clicks.
  • So people can try a pattern and see that it is well written. This leads to sales.

Many people seem to be of the opinion that designers make a fortune out of patterns. They visualise them sitting in a room surrounded by money, throwing it in the air and chuckling over their sales. I wish!

Yeah sure I have some affiliate links on my blog, but you can count in cents the amounts I get out of it, so what I wanted for this pattern was future sales once that month was up. I was not going to get these from the 7,000 people who now had access to this pattern. This is pretty much stealing!!!

Another Designer I have been conversing with put it like this:

A free pattern does not mean that the designer has waved all rights to it, and you can do what you want with it. You must have express permission from the designer to share the pattern as anything other than a link to their own page. Free patterns are still copyright.


This Tote was a lot of work.

From design idea, to completion, is a major process. Getting it to the stage that others can remake it with a legible working pattern is huge. Then it has to find its way through testing.
I have another design in testing at present that has been 3 years from idea to now. I found the receipt for the yarn I purchased for it in 2016. So I will have to think carefully just how I will launch this. I doubt I will put it up for free after this experience!

So, if you see any of my patterns offered as PDF or any other form not linked to my ravelry, etsy, love crochet or blog. Please let me know. And I am sure other designers would appreciate the same. Copyright still applies to patterns, even if they are free! PDF downloads are for PERSONAL USE!

Rant over. You may now go back to your crochet and enjoy and I will go back to my money room, and throw my millions around. (I use the stuff as wallpaper you know). Chuckling all the while of course. NOT!

Footnote:

I am adding a footnote to this post due to things that have transpired in the last few days. The group in question that put my pattern up as a PDF has now blocked many designers who questioned them for having their patterns up as PDFs without their permission. My pattern was not the only one, but there was hundreds of designers patterns, many had clearly on them that they were not to be distributed via PDF (including mine).

They have now also posted a long response to their members (who have no idea of what has gone on.) This explanation of theirs is something out of a fairytale and does not stick to the truth at all. The designers are being painted as a problem and the admin as victims. This is sad in the extreme. The admins are being thanked by the members for keeping them safe, from the evil ones who dare to complain that they are misusing their property. They have also stated publicaly that they may start up offering free patterns again in the future. My only hope is that they see sense and post links only, and not PDF's. Admins of a group this large should know about copyright laws!

An apology to the designers with a promise to respect their intellectual property in future would have gone a long way. I am saddened by the inability for the admins of this group to take responsibility for their mistakes and own them. I guess saying sorry and telling their members what actually happened is too hard.

Billy Thunder Crochet Tote Pattern.

It is always a fabulous feeling when you get to publish a pattern. Months and sometimes more, can go into the making and testing of a design. It becomes a collaboration with the testers making sure it works for everyone (well hopefully, fingers crossed).

I won't go into the story behind the name as you can view that in another of my blog posts (crochet ramblings section).

Now down to business:

This is a functional fun bag. It features beads on both sides.

Beading on both sides. Don't stress it's easy!

The links to the pattern are at the bottom of the page.

It is made from two mandala type pieces worked in the round. The beading is added as you go. If you have never done beading then that is ok. It may look hard but not the way I do it. Pictures are there to help.

The Tote has stiffening in the base and outer edges to help hold the shape.

It is not a lined bag as I have left it more of a market bag style look.

This bag has been tested by a fabulous group of people and some of their bags are shown below. I do feel I need to name them as they were great, five star quality!
Debbie Schell Kirkland
Michelle Rose
Christelle Norrbohm
Jane Wynne
Dulcy Harris

Tension is important with this bag and measurements have been listed with stitch height to ensure success.

There is a wide variety of stitches used: Us terms right/Uk left

Chain 
Slip Stitch 
Treble/Dtr- Double Treble 
Treble 2 together/Double Treble 2 together 
Treble 3 together/Double Treble 3 together 
Treble 4 together/Double Treble 4 together 
Treble 5 together/Double Treble 5 together 
Back Loop Treble/ Back Loop Double Treble 
Linked Double Crochet/ Linked treble crochet 
Back Loop single crochet/ Back loop double crochet 
Reverse double crochet (also known as Crab Stitch).

Now for the bits I just have to add (although boring).

You are purchasing/downloading a pattern only- Instant download of PDF pattern. You will require a PDF viewer to open pattern.

The pattern is available in Uk terms and USA terms

Many hours of work has gone into the designing and producing of this pattern, You are purchasing/downloading this pattern for personal use only. Please do not copy, rewrite, or redistribute this pattern as your own or otherwise. Please do not resell my patterns.

You are welcome to sell items made from this pattern, but please credit me as the designer and add a link to purchase my pattern in your sale.

Please note my patterns and my images are copyright protected, please do not use my images to sell your items.

This pattern has been tested by a large group with varying abilities in crochet.

Please do show me your finished bags and if you can add them to ravelry as projects. I love to see your finished work.

Pattern available on Love Crochet

and Ravelry

Crochet/Knitting Rivalry! A tongue in cheek look!

I have moved over to the dark side and started knitting. Nah! Just kidding! Why would I want to do that? I am just helping my mother out.

My mother wants to knit baby hats to donate to a local hospital, and she has been having trouble getting started. She used to knit a lot when younger but hasn't for a very long time. So I cast on and did the first row to get her started. Mind you I had to think for a minute. It had been a while!

knitting.jpg

James C Brett Aran

I used to knit a lot an aeon ago, and I would have to say I was okay at it. Fair isle, cables, blackberry stitch, you name it. But then I picked up a crochet hook and found it was my thing.

Don't get me wrong I love knitted items and some of the pieces produced are incredible. I just find crochet makes me happy. Don't know if I can say the same about knitting.

It got me thinking about Knitting vs Crochet and the rivalry that seems to be surrounding it. For those in Australia it is a bit like the rivalry between Melbourne and Sydney. Neither considers the other as good. Get the two groups together, and you have a lot of banter going on!

If you listen to the whispers in forums and social media, many of those who crochet are of the opinion that knitters think they are better. The word 'Snob' has been mentioned a lot. Now don't shoot the messenger as I don't personally think this but who knows!

Then there are the stories that you hear online of the lady who went to buy yarn for her next crochet project and had the salesperson attempt to convert her to knitting. In the salespersons eyes knitting was superior. The avid crocheter has vowed never to go back to that yarn store again. Can't say I blame her!

Or the comments 'Oh, you crochet'. Delivered with the look. Yes, that one, that speaks volumes!

Crocheters are mostly a pretty easy going lot but some things do get their hackles up.

batman.jpg

Below are a few things that Crocheters really hate and are sure to get them riled up:

  • Yarn with a centre pull that refuses to pull.

  • Knots in the middle of a skein.

  • Patterns that are wrong.

  • Frogging hours of work.

  • Being called an old person or granny cos you

  • crochet.

But at the very top of that list in very BOLD letters, is:

  • Having someone, anyone, refer to their crochet as knitting. ARrrgh!

So if you are interested in having a crochet hook embedded somewhere on your body, call their crochet, knitting.

If you ask a knitter if they think crochet is less, of course, they won't say so to your face (unless they foolishly want that embedded hook). But we all know that underlying tension is there.

Many of the shows for entering your handcrafts have larger sections for knitting (at least in my Country). The prizes are better for winning the knitting, and it just goes on!

I have visions whirling around in my head of the rivalry between the two. Imagine a yarn conference set in a huge hall. The knitters are all huddled on the right and the crocheters to the left. Both sides are scowling at the other. And there in the middle are those who choose to do both. They are not sure where they want or should sit. Should they admit to crocheting as well as knitting and if they do, will they be stoned by both sides. There is a name for them if you listen to the whispers:

'Bistitchual'. Which is defined in the Urban Dictionary as:

The ability to create stitches in two crafts, e.g. knitting and crocheting.

I guess I am Bistitchual as I can do both. I am also Bicraftual as I paint, do resin art and pretty much any other craft that takes my fancy.

But really what does it matter, as long as we are creating and enjoying craft in some form or other. And when that Zombie Apocalypse (yes I am back on that again) eventually happens, both Knitters and Crocheters will be raised above many others. We have the skills necessary!

And if you want to go and buy that squishy ball of pretty yarn just to look at it, then all good. That is a hobby in itself. Just collecting the yarn.

Remember tongue in cheek! Some of my good friends are knitters.

I won't sit with them at yarn conferences but hey they won't sit with me either! Maybe we will pretend we don't know each other!

<!--/* Font Definitions */@font-face{font-family:Wingdings;panose-1:5 0 0 0 0 0 0 0 0 0;mso-font-charset:2;mso-generic-font-family:auto;mso-font-pitch:variable;mso-font-signature:0 268435456 0 0 -2147483648 0;}@font-face{font-family:"Cambria Math";panose-1:2 4 5 3 5 4 6 3 2 4;mso-font-charset:0;mso-generic-font-family:roman;mso-font-pitch:variable;mso-font-signature:-536870145 1107305727 0 0 415 0;}@font-face{font-family:Calibri;panose-1:2 15 5 2 2 2 4 3 2 4;mso-font-charset:0;mso-generic-font-family:swiss;mso-font-pitch:variable;mso-font-signature:-536859905 1073786111 1 0 511 0;}/* Style Definitions */p.MsoNormal, li.MsoNormal, div.MsoNormal{mso-style-unhide:no;mso-style-qformat:yes;mso-style-parent:"";margin-top:0cm;margin-right:0cm;margin-bottom:8.0pt;margin-left:0cm;line-height:107%;mso-pagination:widow-orphan;font-size:11.0pt;font-family:"Calibri",sans-serif;mso-ascii-font-family:Calibri;mso-ascii-theme-font:minor-latin;mso-fareast-font-family:Calibri;mso-fareast-theme-font:minor-latin;mso-hansi-font-family:Calibri;mso-hansi-theme-font:minor-latin;mso-bidi-font-family:"Times New Roman";mso-bidi-theme-font:minor-bidi;mso-fareast-language:EN-US;}p{mso-style-noshow:yes;mso-style-priority:99;mso-margin-top-alt:auto;margin-right:0cm;mso-margin-bottom-alt:auto;margin-left:0cm;mso-pagination:widow-orphan;font-size:12.0pt;font-family:"Times New Roman",serif;mso-fareast-font-family:"Times New Roman";}.MsoChpDefault{mso-style-type:export-only;mso-default-props:yes;font-family:"Calibri",sans-serif;mso-ascii-font-family:Calibri;mso-ascii-theme-font:minor-latin;mso-fareast-font-family:Calibri;mso-fareast-theme-font:minor-latin;mso-hansi-font-family:Calibri;mso-hansi-theme-font:minor-latin;mso-bidi-font-family:"Times New Roman";mso-bidi-theme-font:minor-bidi;mso-fareast-language:EN-US;}.MsoPapDefault@page WordSection1{size:612.0pt 792.0pt;margin:72.0pt 72.0pt 72.0pt 72.0pt;mso-header-margin:36.0pt;mso-footer-margin:36.0pt;mso-paper-source:0;}div.WordSection1/* List Definitions */@list l0{mso-list-id:1838691669;mso-list-type:hybrid;mso-list-template-ids:643472584 201916417 201916419 201916421 201916417 201916419 201916421 201916417 201916419 201916421;}@list l0:level1@list l0:level2{mso-level-number-format:bullet;mso-level-text:o;mso-level-tab-stop:none;mso-level-number-position:left;text-indent:-18.0pt;font-family:"Courier New";}@list l0:level3@list l0:level4@list l0:level5{mso-level-number-format:bullet;mso-level-text:o;mso-level-tab-stop:none;mso-level-number-position:left;text-indent:-18.0pt;font-family:"Courier New";}@list l0:level6@list l0:level7@list l0:level8{mso-level-number-format:bullet;mso-level-text:o;mso-level-tab-stop:none;mso-level-number-position:left;text-indent:-18.0pt;font-family:"Courier New";}@list l0:level9--><br />

Sunburst Crochet Square

This is a little square I designed a while ago. I have had visions of doing something more with it and a modified version of it is in the works (don't hold your breath though as I have a million WIPS on the go).

You can get a printable version here on Ravelry and Love Crochet.

Sunburst Square

AuburncraftDesign

USA Terms

Materials

3mm hook

Bendigo Mill4 Ply Cotton in Latte 887

Finished Size:

6 ¼ “/15.5cm

Abbreviations:

Ch-Chainstitch

Hdc- Halfdouble crochet

Tr – TrebleCrochet

Slst- SlipStitch

Dc-Doublecrochet

Sp- Space

Sc- Singlecrochet

Dc4togcluster- Double Crochet 4 together to form Cluster

Tr4togcluster – Treble Crochet 4 together to form Cluster.

Tog-Together

RS- Rightside

PS- popcornstitch

Notes:

Chains countas a stitch unless otherwise stated.

Popcorn Stitch How To:

  1. Work 5 double crochet (dc) stitches in the same stitch.
  2.  Remove Hook
  3. Insert hook from front to back under the top 2 loops of the firstdouble crochet of the group.
  4. Pick up the dropped loop with your hook and pull it through thestitch.

Form a magic circle, or ch 6, sl stto form a ring.

Round 1. Ch 4 as first tr, 23 tr into ring,sl st to top of beginning ch4 to close (24 tr).

Round 2. (Ch3, to form first st of PS) PSinto same st. *Ch2, sk1 tr, PS into next st.* Ch2, slst to top of first PS. (12Ps,12, ch2 sp’s)

Round 3. Slst to the middle st (top) of nextPS, ch4 (counts as sc plus 3 chs) * Slst into space between PS in Round 1, ch3,sc to the top/middle of next PS.* Rep from * to * around. (12sc, 24 ch3’s)

Round 4. Ch1 in place of sc. *Ch4, sc intonext sc* Rep from * to * around. On the last ch4, slst to the starting sc.(12sc, 12 ch4 spaces)

Round 5. Slst into next chsp.  Ch1 which counts as a sc,hdc, dc, tr2, dc, hdc, sc into ch4 sp.  *Sc, hdc, dc, tr2, dc, hdc, sc into ch4 sp.*Rep from * to * around. Close with slst to starting ch1. Fasten off (12 Petals)

Round 6. Slst to between the two trebles, ch1(counts as sc). *Ch6, sc in between next two tr’s. * Rep from * to * aroundomitting last sc and close with a slst to beginning ch. (12sc, 12 ch6 sp’s)

Round 7. Slst into next chsp, ch1 (counts asa sc) sc6 into same chsp.  Sc7 in eachchsp around. Slst to close.  (12 groupsof 7sc).

Round 8. Slst along to 3rd sc ofthe next 7sc group. Ch1 (counts as a sc). *Sc1 Hdc2.  Tr in between the two tr of rd5. Ch2, tr intosame sp between the trebles of rd5, sk2 st’s on working row, hdc2, sc2, ch7,sk5, sc into next st, ch7, sk5, sc1. * Rep from * to * around four times intotal. Slst to starting sc. Fasten off.

Round 9. Slst along to next Ch2 Sp.  (Ch4, Tr3tog, ch4, tr4tog, ch4, tr4tog).  *Ch4, sk next 4 st’s, sc into ch,ch4, Dc4tog into same ch sp as ch4, ch1, Sk next sc, dc4tog into next chsp,ch4, sc into same chsp as dc4tog, ch4. ^(Tr4tog, ch4, tr4tog, ch4, tr4tog)^*Rep from * to * 3 times in total.  Repfrom ^ to ^ once. Close with slst to top of ch4.  (4 groups of tr4 together with ch4 between, 4groups of dc4tog with ch1 in between, 8 sc with ch4 each side)

Round 10. Slst across to the top of the middletr4tog in any corner. * (Sc, ch10, sc into same sp).  Ch6, sk next ch4 sp and tr4 cluster. (Sc intonext chsp, ch4, sc) into the same chsp. Ch4, sc into next chsp, ch1. (Sc, ch4, sc) in between the dc4tog clusters.Ch1, sc into next chsp. Ch4. (sc, ch4, sc) into next chsp. Ch6, ^ sk nexttr4tog cluster and ch4 sp.  * Rep from *to * four times in total.   Close withslst to sc in top of tr4tog cluster.   Sewin any ends.  Block

Why didn't I use my yarn winder!

I am working on something for myself at the moment. I wasn't going to write the pattern up, but I just could not help myself.

At this stage I am nineteen pages into the pattern and almost finished the design. I am pretty chuffed with how it is turning out, and I have found these super cute buttons to add to it. I can't wait to finish it.

You may be thinking, what is this design? Well at this stage you will just have to wait and see as I am only showing a portion of it. It should be ready to test in the next few weeks.

But back to the issue at hand! You know how it is with a project, when you can see the finish line up ahead and are in a mad rush to finish it. You attempt to work faster, but every little thing seems to stop you.

I am using Ice Magic Light yarn in this design and from past experience I know very well that half way into a ball of yarn, it becomes a tangled mess of yarn barf.

Yarn Barf. If you see an end in there message me!

Sitting over in the corner of the room is my yarn winder. It is glaring at me and chanting 'I told you so. Serves you right'. It probably has a point, although I do wish it would be quiet! I did know it would happen, but I just wanted to keep going. The finish line is just there!

The thing that is really, really annoying, is the ten minutes I have just spent attempting to find the end of the yarn. I know, and you know, that there are two ends in there. But where are they? Have I somehow ended up with an endless part ball of yarn, with no start and finish? Is the yarn taunting me and trying to mess with my mind by hiding its ends?

So here I am with my tangled mess. I could still be here in a months time attempting to find the ends. I will probably be found sitting on the floor, completely tangled in my yarn and muttering 'there are no ends' over and over.

Maybe I should just hire a Detective to find these camouflaged ends and save myself the torment . And can someone please tell the yarn winder in the corner to Shut Up!